A big part of the power of Procreate lies in its simplicity and minimalistic interface. Gestures and shortcuts are the key to moving around the app with speed and ease.
Something tucked away that isn’t very obvious is ‘QuickMenu’. QuickMenu is a very useful tool that allows you to set shortcuts to your most used actions. This means you can quickly access your favourite brush or create a new layer with the tap of a button, not wasting time opening different panels looking for the action you want!
Today I’m going to show you how to access QuickMenu, how to set your own shortcuts as well as my favourite use for this handy tool.


Learn Calligraphy
on the iPad
from Scratch!
Create stunning calligraphy in Procreate with no experience or special tech skills (even if you have messy handwriting and don’t think you’re creative enough)
WATCH THE FREE WORKSHOPHow to access QuickMenu & change the actions
To activate QuickMenu, tap the square button and tap the screen with your Pencil at the same time.
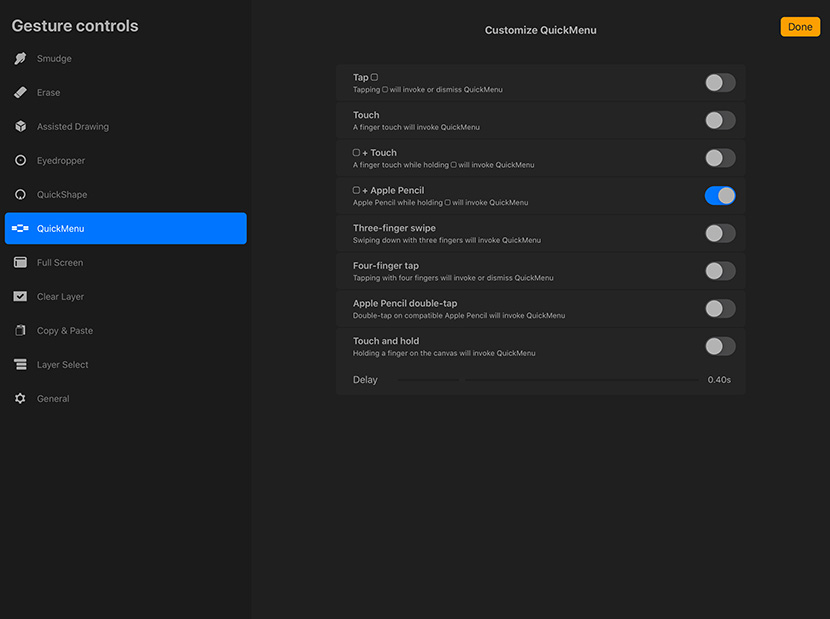
If the menu didn’t appear (your gesture might be set as something else), or you want to change the gesture, tap Actions (spanner icon), then go to the ‘Prefs’ tab and choose ‘Gesture controls’. Find ‘Quickmenu’ in the left menu and turn on the toggle of the action you want to assign.
As you can see below, mine is set at the square icon and Apple Pencil tap.

It’s just as easy to assign new shortcuts to the QuickMenu buttons!
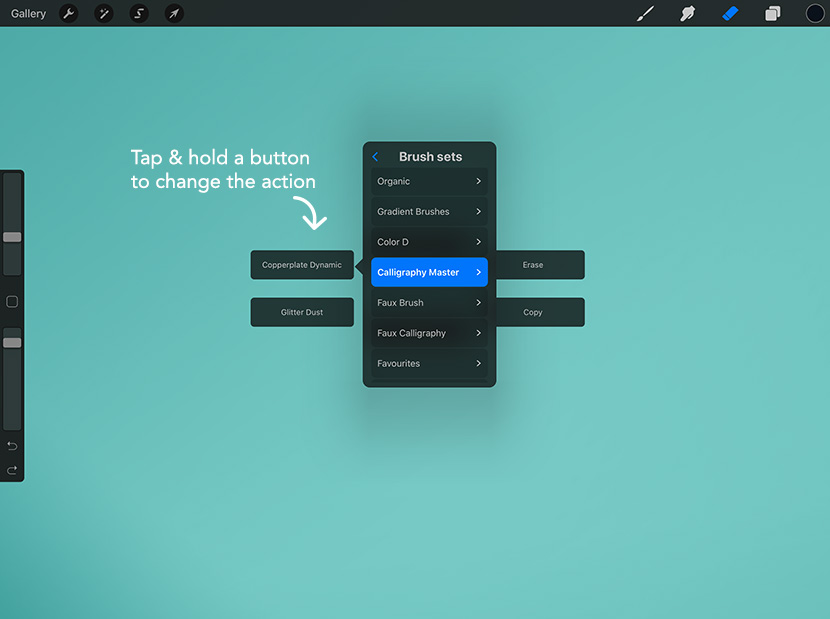
The default QuickMenu is set as – New Layer, Flip Horizontally, Copy, Merge Down, Clear Layer, and Flip Vertically. To change these actions, simply tap & hold one of the buttons and you’ll see a dropdown panel appear giving you all the actions to choose from.
You could even set a shortcut to your favourite brushes and switch between them!

My favourite way to use QuickMenu
Anyone that’s been to this blog before would know I teach calligraphy on the iPad in Procreate. My method for doing this using repetition through practice guides to build muscle memory for the strokes and letterforms.
When writing Copperplate, there is a finishing step that I teach my students, and that is to straighten the bevelled endings on the downstrokes, making the style more in line with traditional Copperplate script.
This means switching between the Copperplate brush and eraser tool often, which is where QuickMenu comes in!
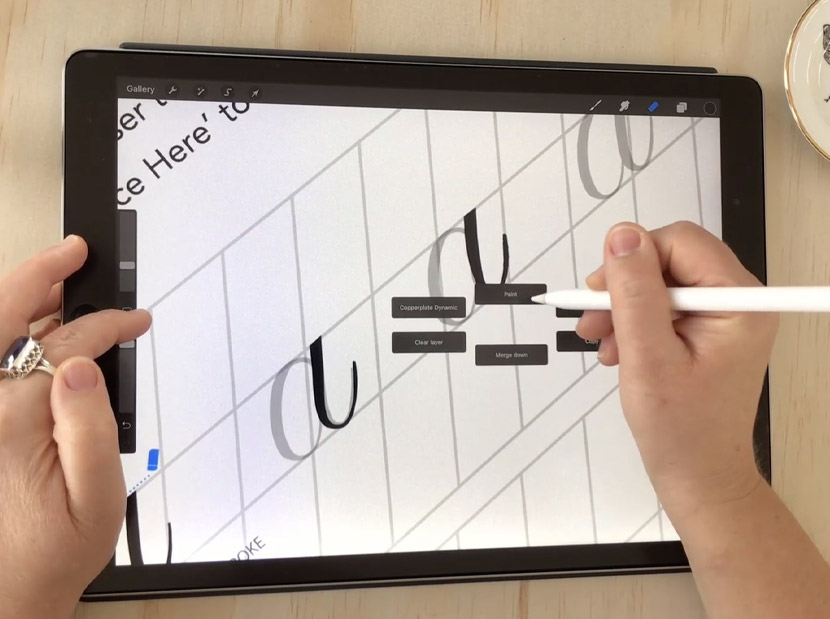
So I make sure these are set in quick menu buttons – the Copperplate brush on the top, and the left button is the eraser tool.

So now I just need to tap on the screen while holding the square icon on the left, and I can easily access my brush. Then bringing up the QuickMenu again to change to the eraser.
Even though the eraser tool isn’t buried within a sub panel dropdown, it is still a timesaver. It’s an action I do super frequently and being able to keep my hand in the one area is saving me that time and energy.
Especially in a longer session, it’ll mean you have more stamina to practice – even just those micro seconds you save and your arm not moving as much can make a big difference!
So that was a quick tip on how I use the QuickMenu feature! You might like to use it for this purpose, or choose the most frequently used tools for your own workflow. You can even change it based on the project you’re working on.
I hope you enjoyed this tutorial. Let me know in the comments if you already use QuickMenu or what you will set as your action shortcuts.

Thomas Devenney
Excellent! This shortcut should prove very beneficial in the future.
Thanks. ????✒
Nicole Mauloni
So glad it helps Thomas, thanks for the comment 🙂
Camille
Very useful, thank you (I din’t know it)
Nicole Mauloni
Glad it was useful Camille!