It might look like the lettering you see online is the result of these amazing flawless artists who get it right every time. That’s not the case digital Calligraphy is super organic and forgiving. The results you see is often the culmination of a lot of tweaks and iterations behind the scenes.
Today I share my best method for tweaking your lettering in Procreate! These 3 easy simple allow you to correct mistakes easily, giving you more confidence and encouraging growth and experimentation in your work! This is literally why digital calligraphy is SO great!
Write your First Attempt
In Procreate I have my guidelines layer andI have written a first version of the word “Thank you” in calligraphy.
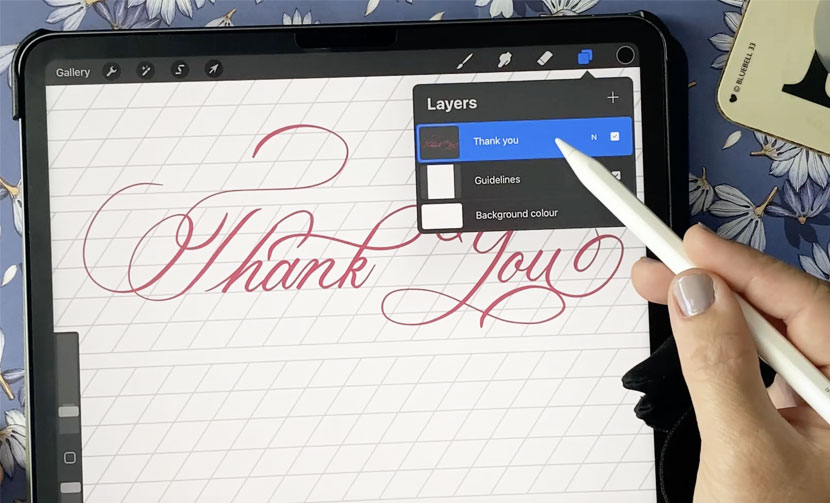
I can see there are some areas that need improvement.
1) There’s too much space between the ’T’ and the ‘h’
2) There’s too much space between the ’n’ and the ‘k’.
3) And another thing I’ve noticed is the two flourishes in the word ‘You’ are clashing and creating a hotspot.
I’m going to fix the three spacing issues on the layer. First I’ll reduce the opacity of that layer to use it as a guide and rewrite the calligraphy and on a new layer on top!
Tweak the Guide Layer
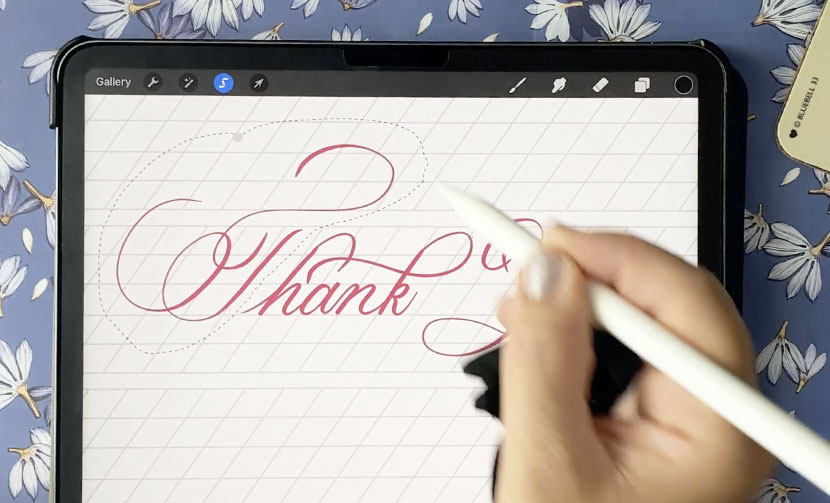
Choose the icon in the top menu that looks like an S. This is your selection tool. Draw around the ’T’ to enclose it in the little lines you’ll see as you draw (these are called marching ants.
Choose the arrow tool now, and you’ll see that you can move it independently from the rest of that layer.
Move it closer to close up the spacing between it and the ‘h’.
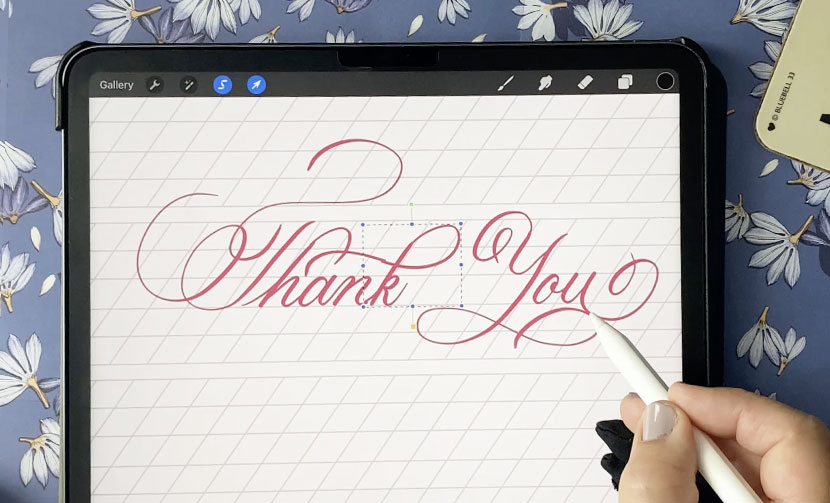
Next do the same but with the ‘k’. Activate the selection tool and draw around the ‘k’. Now change to the arrow tool and move it to a more balanced position. And don’t worry that you’re breaking the stroke by doing this. Remember we are going to use this layer as a guide, so we’ll be writing a new layer soon.

Learn Calligraphy
on the iPad
from Scratch!
Create stunning calligraphy in Procreate with no experience or special tech skills (even if you have messy handwriting and don’t think you’re creative enough)
WATCH THE FREE WORKSHOP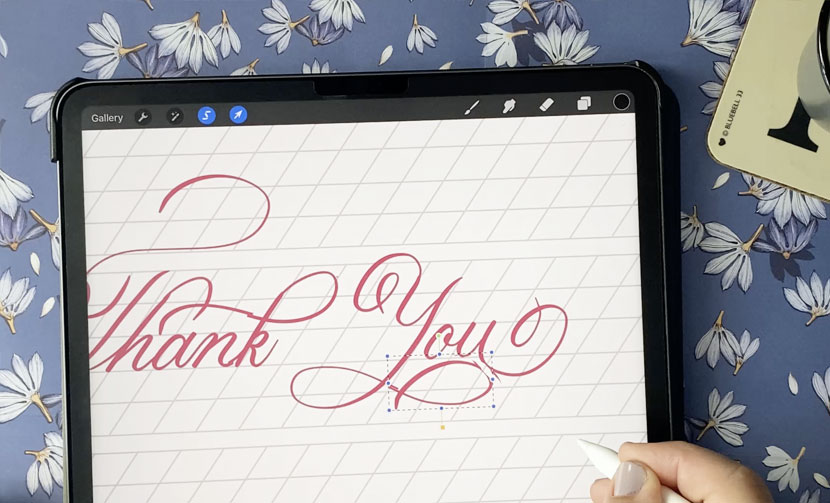
Now repeat to fix the flourishes clashing at the bottom of the letter ‘u’.
So I’m happy with this now, it’s much more balanced.
Next, turn the Opacity down on the tweaked layer. To do that, just tap the little ’N’ and turn down the opacity slider. I’m going to create a new layer over the top now (‘+’ icon in the top of the layers panel).
Then just trace over your guide layer to create the improved version!
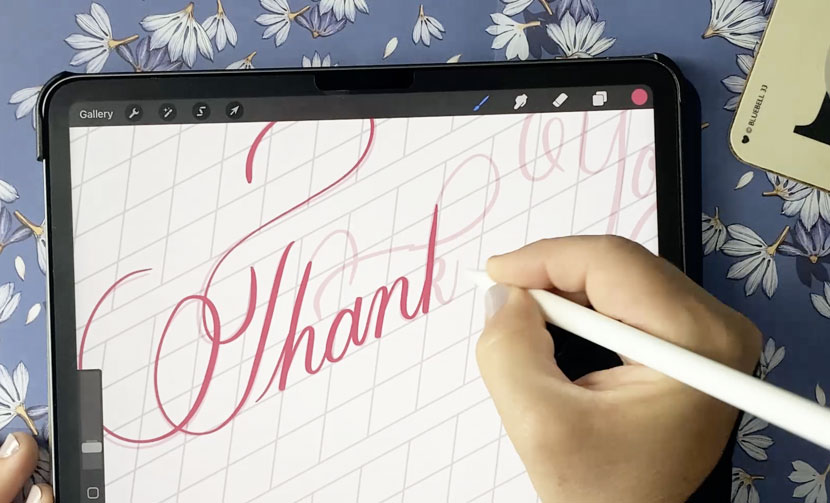
Now we have the finished version with those spacing improvements and changes.
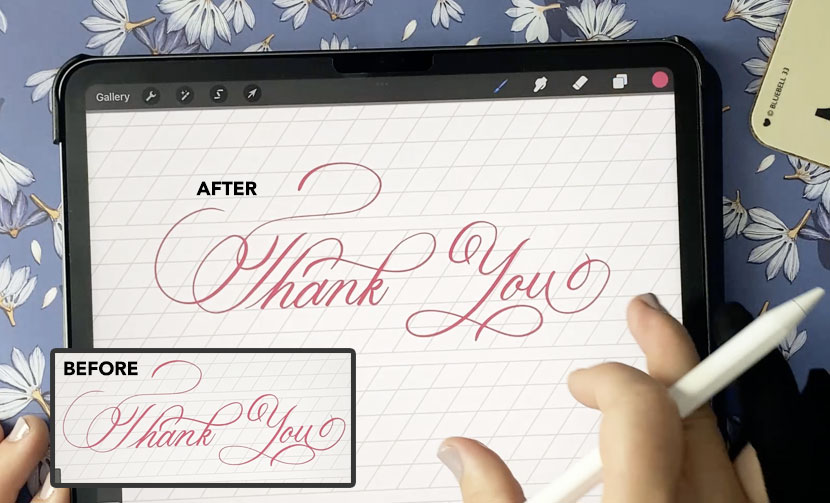
I hope today’s tutorial illustrates that you don’t have to get your lettering and calligraphy projects perfect the first time. This technique allows you to tweak and iterate along the way so you can have confidence trying things out because you know you can always change it later.
If you want to dive deeper and know my exact process to learn iPad calligraphy from scratch just head to my new masterclass by registering below!

Darbi
Hi! I was wondering if you could help with a problem I myself keep having in procreate. I can’t figure out the terminology for the space that I’m talking about, but if I write the lowercase d, for example or any letter with enclosed white space )… at the the inside space (i think it’s the counter)… it’s angular and instead of round. I have tried several diff brushes (close to maybe 75 lol), so it has to be something I’m doing/not doing… but when I handletter with pen and paper, that issue isn’t there. I’m finding myself having to go into procreate after I’m done and using a monoline brush to fill in that “crotch” (might be off with the term) and then it never looks right either. If you need an example, this quote sheet of mine on etsy…. look at the “g” in the word grief. https://www.etsy.com/listing/1388297900/printable-everybody-hurts-quote-digital?click_key=4fabaccd4ffc501139ff90567d38fae884600b68%3A1388297900&click_sum=b11d041d&ref=shop_home_active_5&crt=1&sts=1. The upper counter is not rounded smoothly, but the lower one is… any advice for getting those to look similarly smooth? THANK YOU SO MUCH for all your helpful articles.
Nicole Mauloni
Hi Darbi, thanks for your question! Here’s my response! https://youtu.be/JFZtlwcflHI