If you want smoother strokes in procreate, there are two key settings you need to know about.
The simple tweaks I’m about to show you today are incredibly useful for lettering and calligraphy, illustrators and tattoo artists. It will give you improved line stability and precision, so you can completely remove wobbly or shaky strokes.
The video demo shows how to edit your Procreate preference, there’s also written instructions below.
Please Note : It’s important to know though, you’ll only be able to see the effects of these changes if you have a pressure sensitive stylus (like the Apple Pencil). Also your brush has to have pressure sensitivity settings already applied as well. If you’re having trouble following along and you’re not seeing the results of your changes, it’s likely one of those is missing ie. it’s not going to work if you use your finger – you have to use your stylus.
The first setting we’re going to look at are the brush stabilization settings.
Any tweaks made here are specific to the individual brush. The second is the Pressure Curve. Changes to this property applied globally and will adjust how the Apple Pencil interprets pressure and force while it’s across all brushes. Note, you can easily reset it back to the default so don’t worry about breaking anything or permanently changing it. I’ll show you how a bit later.
There are also stabilization settings within this area too, which is particularly helpful for anybody that suffers from a really shaky hand as it will impact every brush globally.
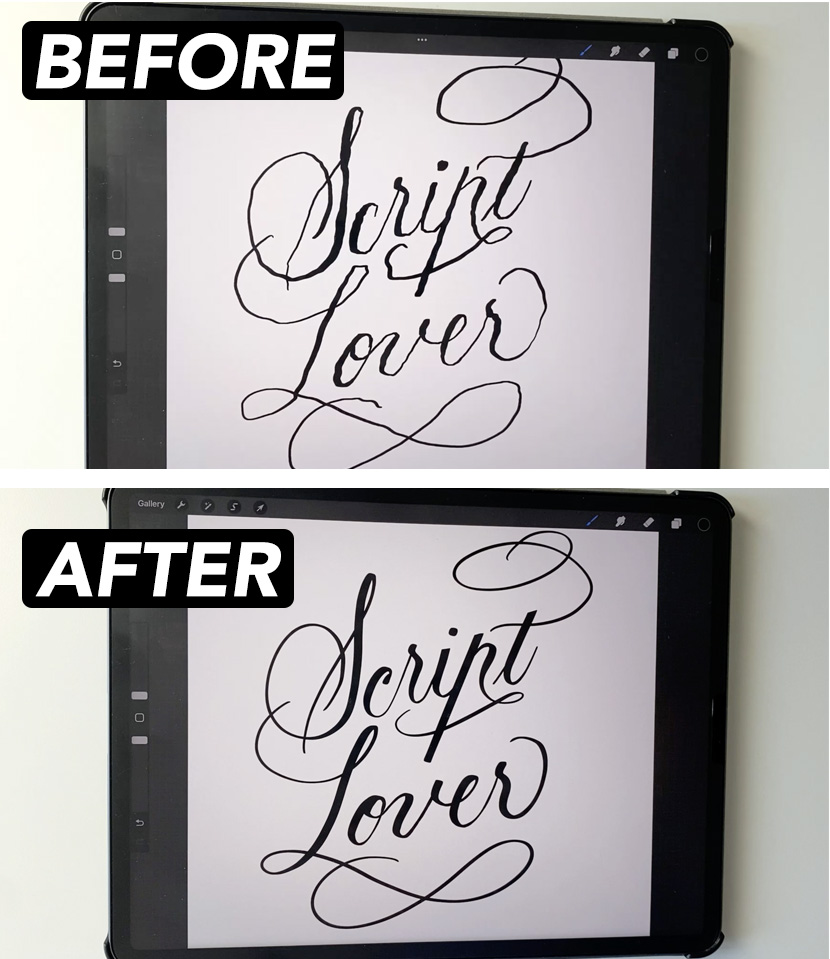
1 Brush Stabilization Settings (affects individual brush)
First we’ll go into the Procreate default ‘Calligraphy’ set and find the brush called ‘Script’.
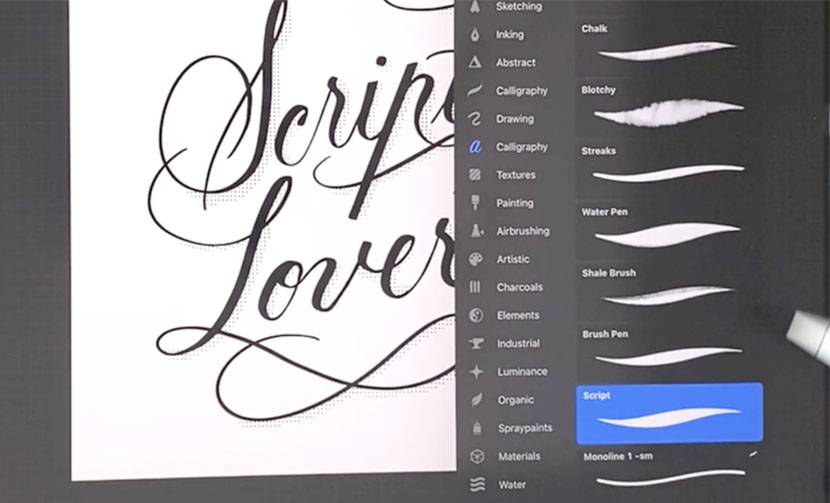
Now I’m going to make a backup of this so we don’t override anything – just swipe to the left and choose ‘Duplicate’. Now tap on the brush duplicate we just made and it’ll open in Brush Studio.
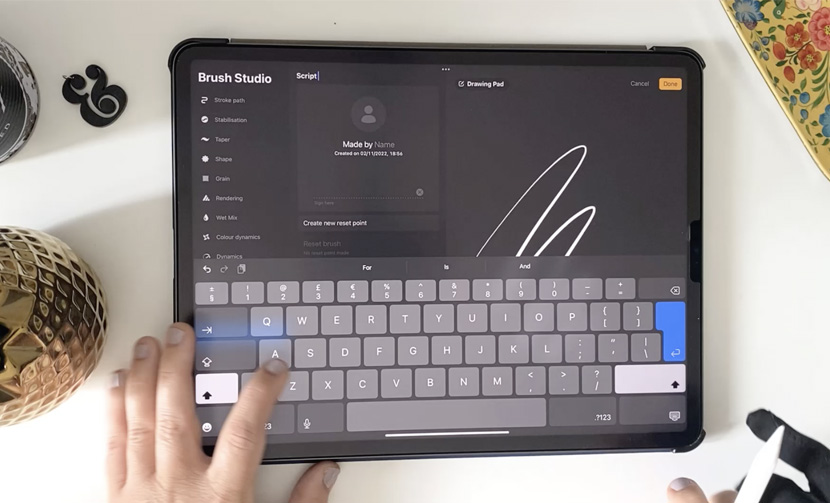
Let’s rename the brush so we know we’re working with the right version. Go to the ‘About this Brush’ properties tab, and at the top where the name is and call it ‘Script Smooth’.

Learn Calligraphy
on the iPad
from Scratch!
Create stunning calligraphy in Procreate with no experience or special tech skills (even if you have messy handwriting and don’t think you have enough time)
WATCH THE FREE WORKSHOPNext we’re going into the top menu called ‘Stabilization’. If you don’t see that and you’re on a smaller iPad, just make sure you’ve scrolled to the very top of the left menu.
The ‘Streamline’ setting is the one that’s going to make the most impact here. So we can see the changes we’re making, just clear the Drawing pad on the right. To do this, tap the top link that says ‘Drawing pad’ and choose ‘Clear Drawing Pad’ from the drop down.
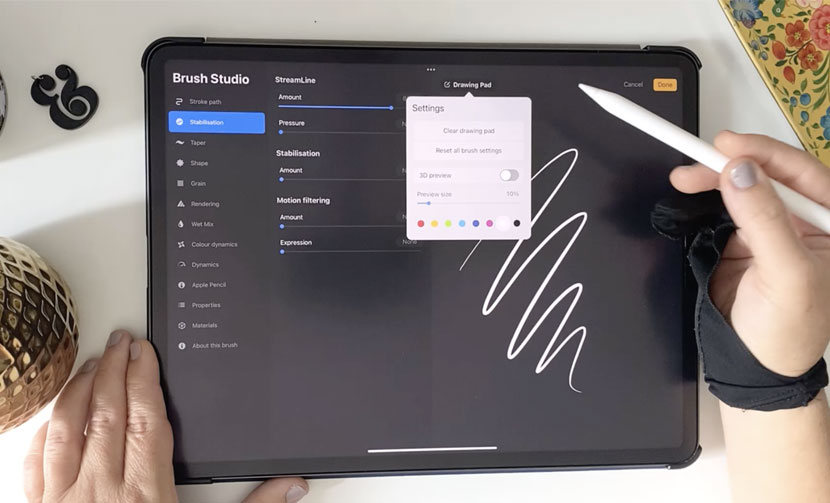
Now make a scribble stroke on the drawing pad. When we alter the sliders on the left, you’ll now be able to see the effect it’s having to the stroke in real time on the right.
The streamline settings smooth out the strokes as you’re drawing them and they minimize any shaking movements giving you much smoother strokes and straighter lines. You can use a combination of all the sliders on this panel, but the one you’re most probably interested in is the Streamline ‘Amount’ slider. But also try ‘Stabilization’ as well. ‘Motion Filtering’ was specifically designed to help with hand tremors. That’s a good one to play with if you’ve got a particularly shaky hand.
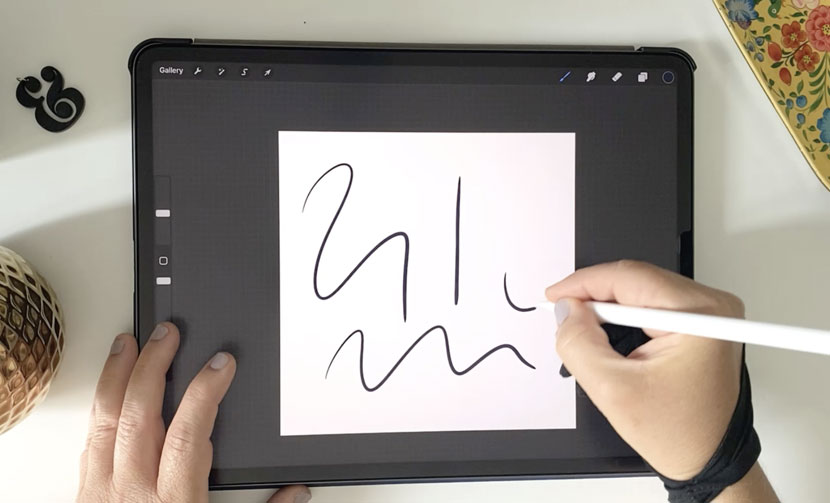
It’s best to try actually drawing or writing so you get a good feel for the changes you’ve made. So tap ‘Done’ to exit brush studio and draw a few lines and shapes.
I’d suggest drawing a curve, a wavy line and a straight straight stroke as well to just experience the effects.
2 Pressure Curve Settings (Global)
Next we’re going to move on to the second setting – the Pressure Curve. To access that, just go to your ‘Actions’ panel (that’s the wrench icon in the top menu). Under the ‘Prefs’ tab, you’ll see ‘Pressure and Smoothing’ link at the bottom. Tap on that.
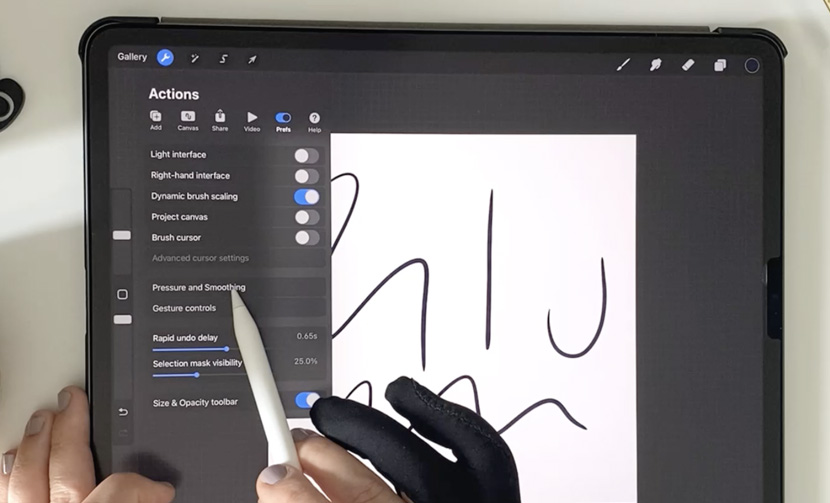
Remember changes to this setting are global and will alter the sensitivity across all brushes. It mainly adjusts the pressure preferences but we also have the ability here to alter the Stabilization settings globally too.
The graph might look a little bit intimidating but don’t worry, once you know what those axis are, it’ll make more sense!
The vertical axis represents ‘Pressure’ and goes from minimum at the bottom and maximum at the top. The horizontal axis represents ‘Force applied’. That’s minimum force on the left and maximum force on the right.
In its default it’s set to minimum pressure with the lightest touch and maximum pressure with maximum force.
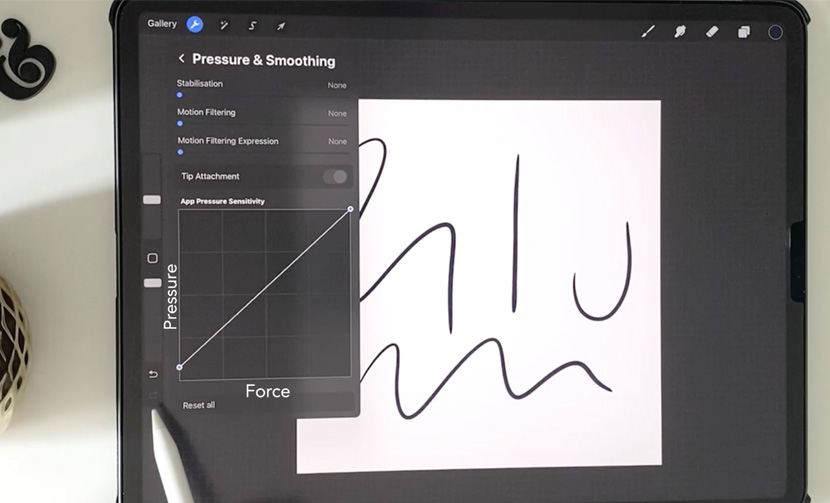
Tapping on the line will add a little node that you can adjust to pull the curve. If you ever want to return to the default just tap the ‘reset al’l button at the bottom.
This is great if you have a particularly light touch you can make sure that the pressure that you apply is converted to your own preferences.
In calligraphy we want thick and thin strokes to be consistent. So sometimes reducing sensitivity can have a better outcome. It is going to be down to your personal preference though so it’s best to explore and find what works for you.
Remember it is global and it’ll apply to every brush. So if you’re working on a different project with a different set of brushes that might not work so well with this. You might want to reset those settings. So I recommend taking a screen grab of the graph once you find your personal preference. That way you can always reset it when needed for another particular project and come back to it later!
If you have any questions, leave a comment below and I’ll get back to you.

Laura
Thank you for this comprehensive guide on achieving smooth strokes in Procreate! The explanation of the brush stabilization and pressure curve settings along with the visuals makes this guide easy to follow. I also appreciate the tips for customizing these settings to suit individual needs, which will be incredibly useful for improving my lettering and illustration work. Thanks again and I look forward to exploring more articles on your site.
Nicole Mauloni
Thanks so much for reading Laura, glad it helped!