We’re diving into another big feature this week – Brush Studio! Often creating something hands-on is the best way to learn. So today we’re doing a little project to make our very own Procreate Brush that changes color when you apply pressure! Along the way, we’ll get an in-depth overview of the Brush Studio and look at the new ‘Color Dynamics’ settings.
You can also download the finished brush for free under the tutorial.
Brush Studio is well designed making it clear and easy to use. It’s possible to set a revert point and even autograph your brushes!
Here’s an overview of what we’ll be looking at today :
- A tour of Brush Studio
- How to edit brush attributes & properties
- Overview of Color Dynamics (this makes your brush change colors!)
- How to set a ‘revert point’ (meaning you can always go back to that if you edit further)
- How to add your name and sign to a brush you’ve created
And there’s an extra bonus video at the end for instructions on how to import Adobe Brushes into Procreate 5.
So let’s get going!

Learn Calligraphy
on the iPad
from Scratch!
Create stunning calligraphy in Procreate with no experience or special tech skills (even if you have messy handwriting and don’t think you’re creative enough)
WATCH THE FREE WORKSHOPYou can watch the video demo below, and there’s written instructions underneath as well.
Overview Brush Studio
“There are two ways to approach Brush Studio. You can dive in knowing what you want to create, and tweak settings until you reach your goal. Or you can play, using experimentation, serendipity and exploration to build something that feels good.” From the Procreate Handbook
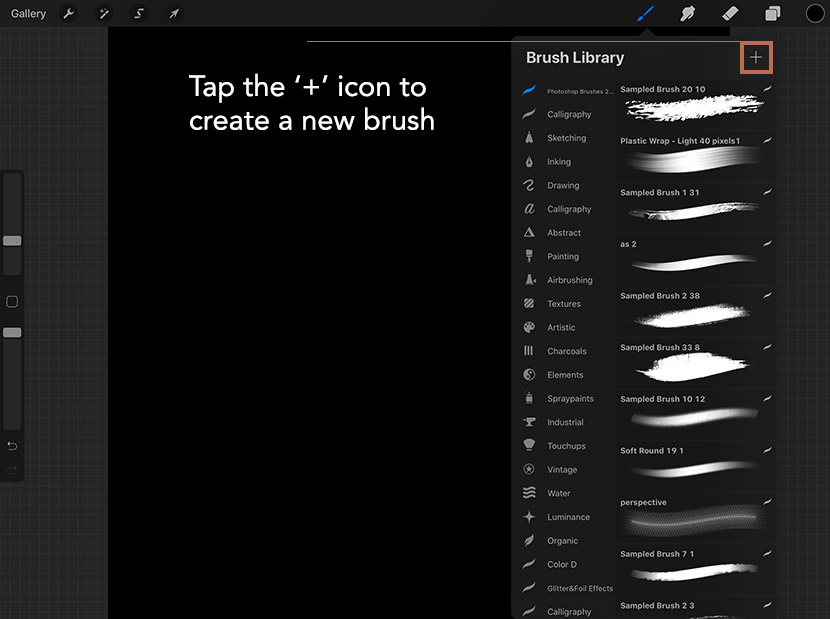
To access the brush studio, you can either tap on an existing brush in your brush library, or tap the ‘+’ icon at the top right of the brush panel to create a new brush.
Even with the new ‘revert’ feature, if you want to edit an existing brush, it’s a good idea to make a backup by duplicating it before making any changes. This way, you’ll have a copy of the original to return to should you need it. Do this by sliding the brush thumb to the right and choose ‘duplicate’.
We won’t go into every property and setting here today. You can find out extensive details here if you are interested. But in the next section, I’ll highlight a few important settings to create our color changing brush!
Create a New Brush
Tap the ‘+’ button to create a new brush. Procreate will automatically set the ‘shape’ and ‘grain’ attributes to default settings. This gives a solid round circle for the ‘Shape’ source and a clear white square for the ‘Grain’. This is necessary, otherwise there would be nothing to make the brush paint!
A good place to start is to adjust these two attributes.
A brief summary of how these work …
“Grain is the texture that sits inside your brush shape. While the shape acts as a container for the grain, the grain acts like a paint roller. When you paint a stroke, the grain is ‘rolled’ inside the shape and onto the canvas.”
Set the Shape Source
Select the ‘Shape’ attribute on the left menu to access the properties. You’ll see the ‘Shape Source’ at the top of the properties panel. Right next to the heading ‘Shape Source’, you’ll see a little ‘Edit’ button. Tap on this to change the source image. On tapping ‘Import’ on the next screen, you’ll see you have the option to either ‘Import’ your own shape from a photo, a file, paste from the clipboard, or choose one form use the Procreate Source Library.
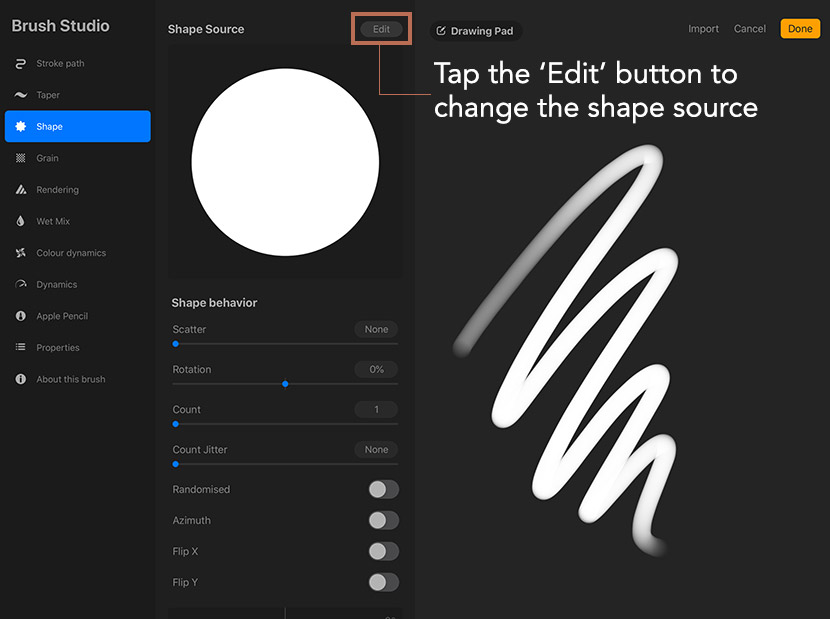
To keep things simple, I’m going to choose from the source library and select the ‘Blotch’ shape (2nd row). Tap ‘Done’ when you’re finished. If you now draw on the ‘Drawing Pad’ to the right, you’ll see how your brush looks. You can change a few of the sliders to experiment and see how they change things. It will alter the strokes you previously made on your Drawing Pad in real time! Preetttyy cool!
I have the ‘Scatter’ set at 35%, and the Rotation at 20%.
Don’t forget, for detailed information on all the settings, click here to read the Brush Settings section of the Procreate Handbook.
Set the Grain Source
Next, we’re going to edit the grain. Select the ‘Grain’ Attribute on the left to access the ‘Grain Source’. Like before, you’ll see the ‘Edit’ button just above the texture image. Select ‘Source Library’ and choose the ‘Grunge’ texture on the first row.
Make sure ‘Grain behavior’ to moving. I have the ‘scale’ set at 25%
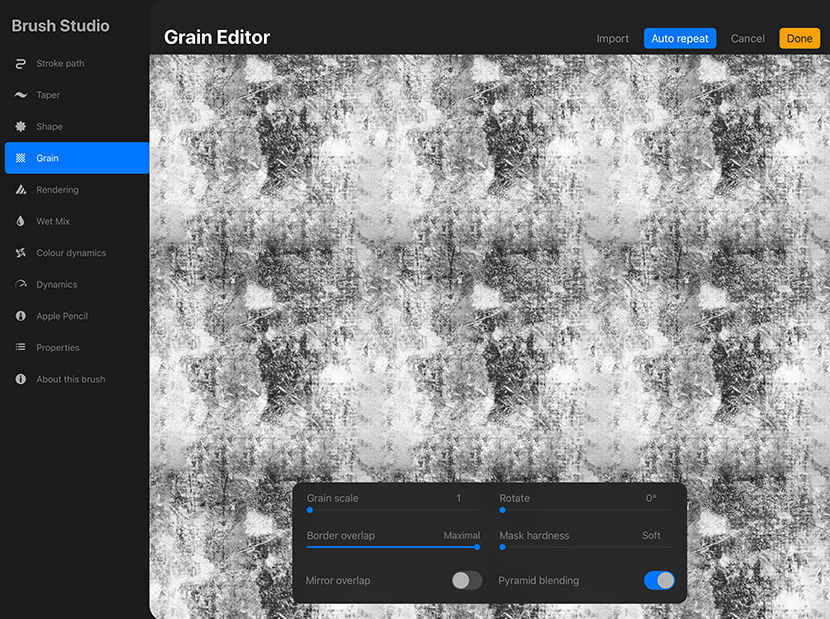
Seamless patterns are important, particularly with brushes designed to reveal the texture. The texture will repeat as you paint, and if there is a mismatching pattern, you’ll see an obvious seam the where the repeat line sits.
Previously, we needed to use another app, such as Photoshop to create a repeatable pattern. But we now have the helpful assistance of the new ‘Grain Editor’ tool inside Procreate.
You can access this in the same window we imported the grain source image. Just tap the ‘Auto repeat’ button at the top, and the ‘Grain Editor’ will fill the screen.
From here you can adjust the settings, scale and rotate the texture sample to change the pattern. It really is super easy to use and VERY clever!
Next, we’ll skip ahead to the next attribute we want to experiment with and that’s ‘Color Dynamics’!
Color Dynamics
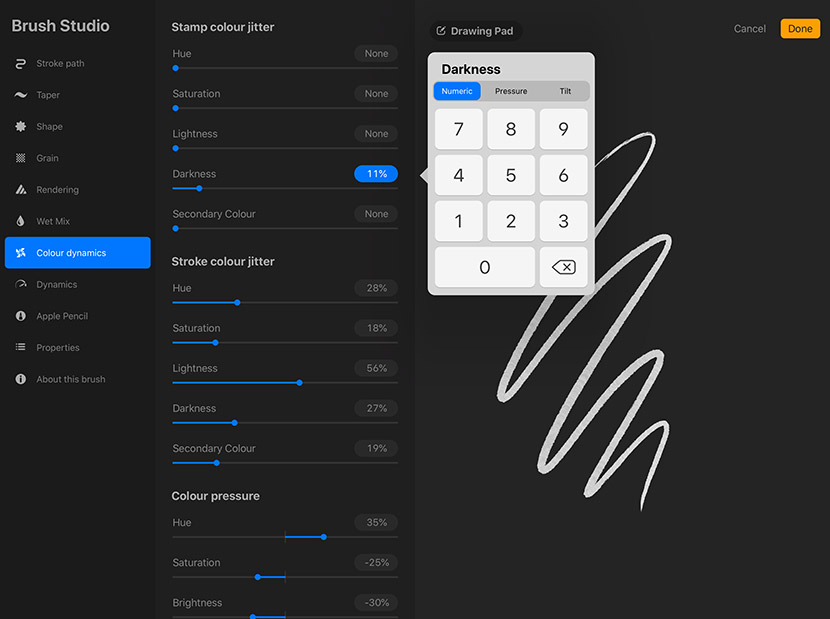
The Color Dynamics properties give the ability to change the color, saturation and brightness according to pressure or tilt.
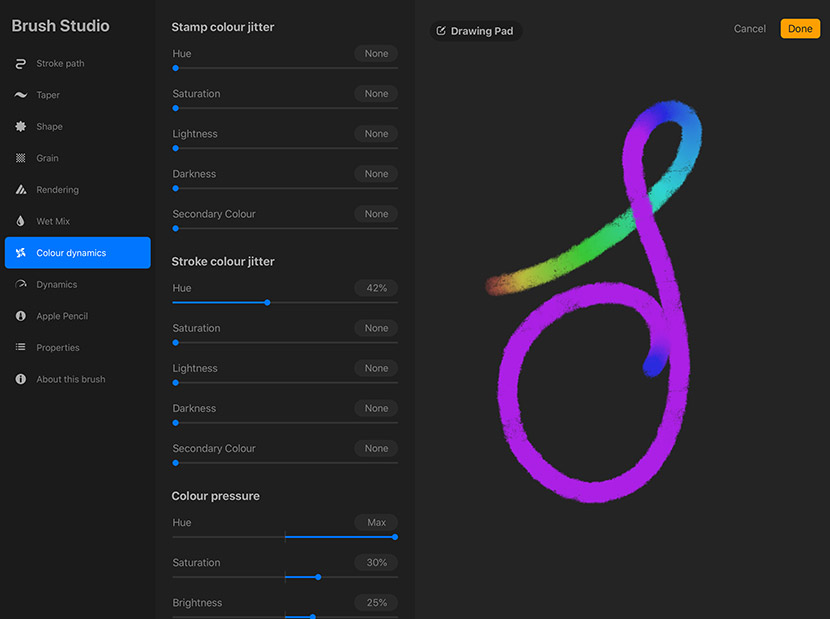
The properties are broken into Stamp Color Jitter, Stroke Color Jitter, Color Pressure and Color Tilt.
The first 2 settings (stamp and stroke color jitter) affects what part of the stroke changes color. In the case of ‘Stamp’, this means each individual stamp shape is affected by the changes within that section. For example, if you dramatically increase the ‘Hue’ slider, each stamp will be a different color. If you choose a lower setting, it will make a more gradual change.
My color change brush has the following settings in Color Dynamics preferences:
Stroke color jitter
Hue : 42%
Color pressure
Hue : Max
Saturation : 30%
Brightness : 25%
Color tilt
Hue : 31%
Name your Brush and Autograph it
Choose the ‘About this brush’ preferences to name and sign your brushes. If you tap of the little avatar image, you can add an image. Tap next to the ‘Made by’ text to type your name, and you can at your signature underneath.
You can also ‘Create a new reset point’. What this means is the brush will be finalised at that point. If you were to make changes to other settings in the future and wanted to revert, you can do this via the Drawing Pad drop down to reset it.
And finally, a big change in Procreate 5 was the option to import Photoshop brushes (.abr) into Procreate. This opens up a lot more options for brush collectors.
It’s a very simple process… transfer your .abr file on iCloud or Dropbox or download to your iPad. Open the Files app, locate your .abr file. Tap on it and then tap the share icon in the top right.
You’ll see a list of apps. If you don’t see Procreate, scroll horizontally and you’ll see a ‘More’ optional . Tap on that and choose ‘Open in Procreate’ from the ‘Suggested’ apps list.
Go into a Procreate document and you’ll see the brushes is at the top of your brush library.
You can find the brushes I used in the video example above here.

Michel Narbel
Many thanks !
Mel Whittaker
Will the abr have the same settings attached as it did in Photoshop? Like the scatter settings, ect? I need a freckles brush and have one in abr that I like so I’m curious. I love your brushes and tutorials! When I first installed Procreate and went haywire because I’m used to Photoshop, I came to your tuts and now I’m more comfortable with Procreate!
Nichole
Hello, thank you for this very informative tutorial and lovely brush. I was playing with the setting and for some reason I can’t get the brush to change colors. I’ve watched the video twice and I’m not sure what I’ve done wrong. The colors only change when I pick up the pen.
Thank you,
Nichole