As you have most likely heard by now, Procreate 4.3 hit the app store last week! The update included one of the most requested features of all time – the Text Tool. We looked at Text in detail last week on the blog, so today we’re going to walk through the other features included in this release. They may not have had as much hype as type, but there are some interesting and useful additions!
Note: a new patch was just released with a couple of minor fixes : Korean text issue, opacity slider issue and tap to edit text.
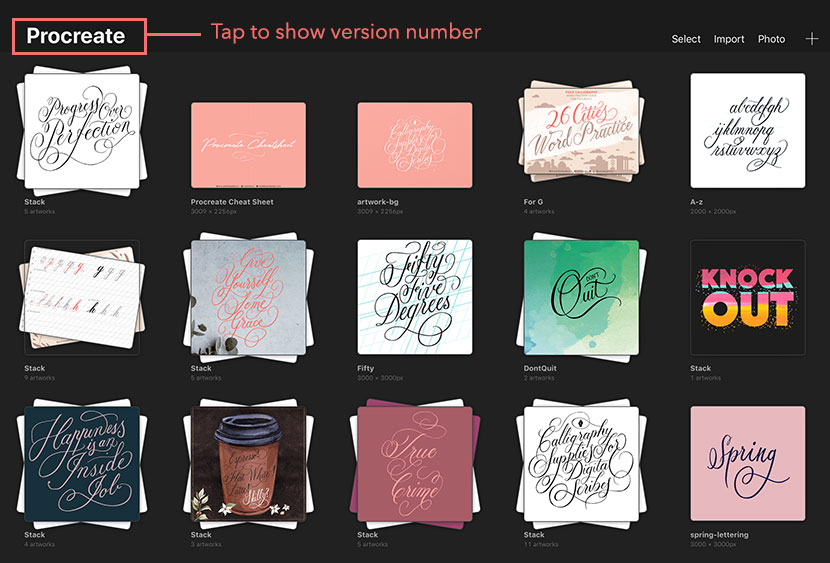
How to check you have the latest version of Procreate
In order to see any of these new features, you need the most up-to-date version of Procreate. You can check the version you have installed tapping the ‘Procreate’ logo at the top left of the gallery screen. (It should be 4.3 or higher).
If you need to update, open the App Store on your iPad and search for Procreate and tap ‘install’ (it will say ‘Open’ if you have this version already installed).
The update is free to existing users. If you’re new to Procreate, there is a one off cost of $9.99 for new customers.
Note : If you are not seeing version 4.3, it’s likely a compatibility issue with your iPad iOS. It is necessary to be running at least iOS 11.


Learn Calligraphy
on the iPad
from Scratch!
Create stunning calligraphy in Procreate with no experience or special tech skills (even if you have messy handwriting and don’t think you’re creative enough)
WATCH THE FREE WORKSHOPWhat was included in Procreate 4.3
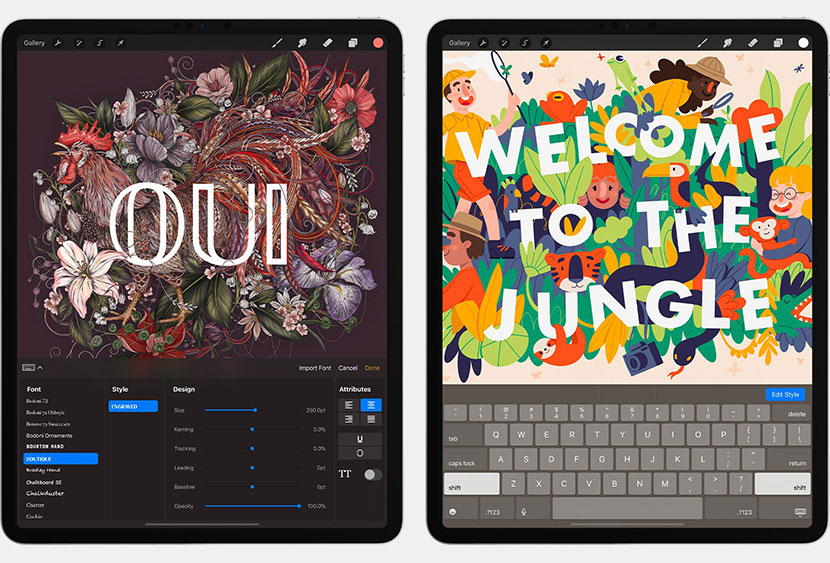
1. Text
As mentioned, the biggest addition to version 4.3 was of course Text. The Text Tool is as user friendly and integrated as their approach to all other tools within the app. It was interesting to learn from the press release: ‘Text remains in vector format when warping and transforming, and only rasterises once changes are committed, leading to sharper results without the rough pixelation common in other programs.’ This ensures a really crisp render if you warp or change the angle of your text.
You can find out more detail on Text including how to import fonts here.
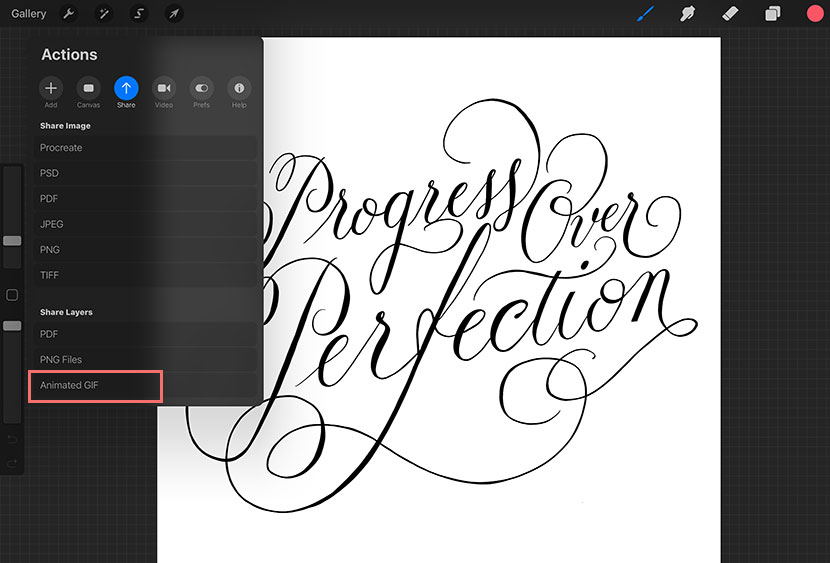
2. Share Layers (+ create animated GIFs!)
The new exporting option for ‘Share Layers’ offers three file formats to choose from. PDF, PNG and GIF format. By choosing GIF you can create a simple animation which cycles through your artwork layers.
In order to prepare your file, set up the frames of your animation using different layers. The layers need to include the whole scene, for example if you are using a background, the background should be merged with the object you want to animate – 1 layer = 1 frame of the animation.
Quick tip: I would suggest creating the file using Layer Groups in initial in the design stage. This allows you to tweak and refine the design as you go. Once you’re happy, you can flatten the layer groups into individual layers.
The GIF animation will cycle through the layers in the order of bottom to top (ie. the base layer being the first frame and the top being the last). Another important note is the visibility should be on for all layers that you wish to export. Any hidden layers will not be included in the animation.
Once you’re happy with your animation frames, choose the wrench icon at the top left to reveal your ‘Actions’ panel, and tap ‘Share’. You’ll see the option for ‘Animated GIF’ at the bottom of the menu. Tap this and you’ll see a screen to adjust the frame rate (ie. slow the animation down or speed it up). Choose between ‘Web Ready’ or ‘Full Resolution’ for the quality settings. There’s also the option to switch the toggle on for ‘Transparent background’ which will preserve the transparency of your layers.
Create GIFs from your Gallery Files
Don’t want to merge your layers in order to create a gif? No problem! As part of this feature you also have the ability to create animated GIFs using the artwork from your gallery! In this instance, the GIF uses the whole artwork as a single frame and you compose your animation by choosing several different artwork files.
Quick Tip : If you were animating a scene. You could keep things tidy by creating a ‘stack’ to store the files. A good alternative to try if you want to avoid merging your artwork.
To export your animation, from the gallery screen tap ‘Select’ in the top right, and select the different artworks in the order you want them to appear. Tap ‘Share’ from the top right menu, and choose ‘GIF’ from the dropdown. Repeat the export setting steps mentioned above.
The Layer Export options also allow you to :
– export each layer from a document as individual PNG images
– create a multi-page PDF with the layers as your pages
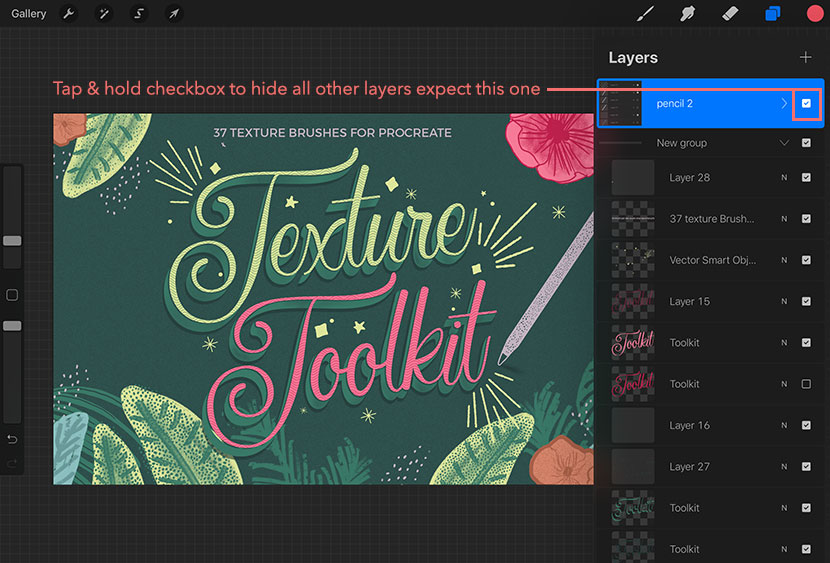
View Single Layer (hide all others with one tap!)
A simple but excellent shortcut gesture addition for toggling layer visibility! To view one individual layer and hide all others in one tap, simply long press on the visibility checkbox on the layer thumbnail. Long tap again to revert back. Particularly useful for artists working with a lot of layers!
P.S. It works for layer groups too!
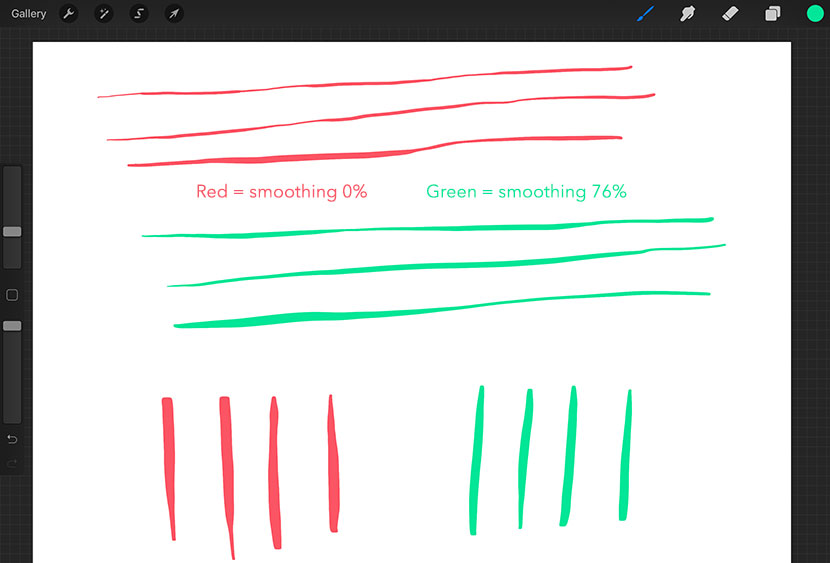
Pressure Smoothing for Brushes
This one went under the radar with all the hype about type, but it is a really special improvement, particularly for calligraphy artists! The new pressure smoothing settings help you to create flawless strokes by graduating the taper as you change pressure. When you lighten pressure to create a thin part of the stoke, the brush eases into it and creates a much smoother taper and curve.
To experiment with this setting, choose a pressure sensitive brush and make a duplicate so you have a backup (swipe left and choose duplicate). Try out a few strokes with the brush as it is before you change anything so you can get a feel for what it is like. To see the best benefits, you want to make a few lines that have varying pressure, going from thick to thin and back again.
You’ll find the new ‘Smoothing’ slider under the Apple Pencil Pressure controls (within the ‘Pencil’ tab of your brush settings). Move the slider up to about 65-80%.
Now make those same test lines as before. You should notice an improvement in the brush behaviour when the stroke changes thickness.
New Layer Blend Modes
Layer blend modes are not new to Procreate, but the 4.3 update saw another 7 modes added to the mix :
Darker color : shows only colors that are darker than the layer below
Lighter color : shows only colors that are lighter than the layer below
Vivid light : increases the color contrast making lighter colors lighter and darker colors darker
Linear light : uses a combination of the linear dodge blending on lighter colors and burn on darker colors
Pin light : performs darken and lighten blend mode simultaneously
Hard mix : applies the blend by adding the value to the RGB channel. Colors can only be black, white or any of the primary colors.
Divide : Darker colors produce a brighter result
So that’s the summary of the new features in Procreate 4.3! I would love to hear how you are finding the update and what your favourite feature is! Comment below and let me know.
mike
how do you warp text?