*** Please Note: While this post is still relevant, there is a more recent post with these instructions showing a more efficient method. Click here for Installing on your iPad (without a computer), and here for installing with a computer + iPad. ***
Since the release of Procreate 4, the brush palette has had a serious makeover, so things work slightly differently when importing custom brushes. One big advantage since the update is it’s MUCH easier to bulk import brushes using iOS’s new Files app. Hurrah! More on that later.
There are different methods depending on if you’re downloading to your computer first, or straight to your iPad. We’ll go through both, but I would recommend downloading to your computer first if you have that option. It means you can keep all your files neat and tidy and you won’t lose any brushes should something happen to your Procreate on your iPad. It’s also pretty easy to accidentally delete custom brushes in the brush panel (as I have done a few times before)!
First off, let’s look at the step when using your computer to transfer the files. I’ll be using the ‘Essentials for Calligraphy’ pack as an example, but most brush packs will be packaged in a similar way, so you should be able to follow along.
Downloading Brush Files Using your Computer
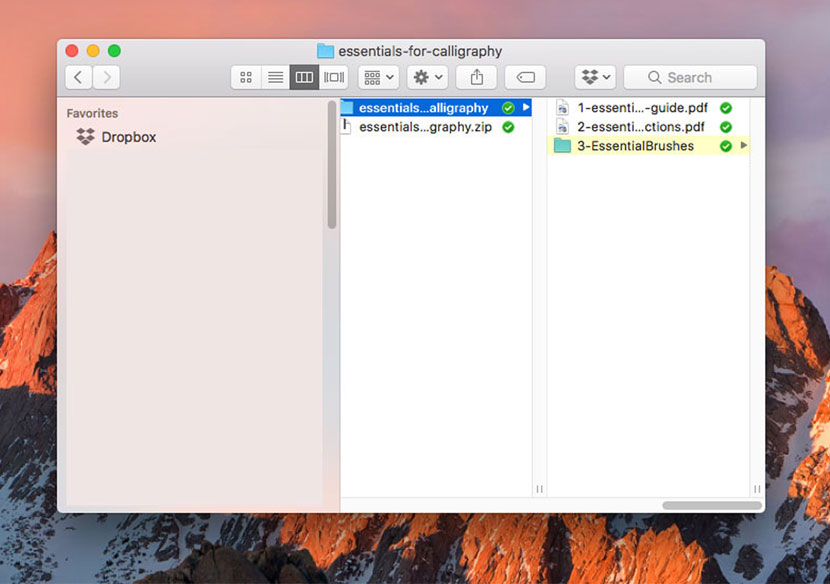
Step 1 – After you have downloaded the zip to your computer and unzipped the contents, you will see a sub-folder containing your .brush files called ‘3-EssentialBrushes’. Put this folder in a location you can access from your iPad (such as Dropbox or iCloud).
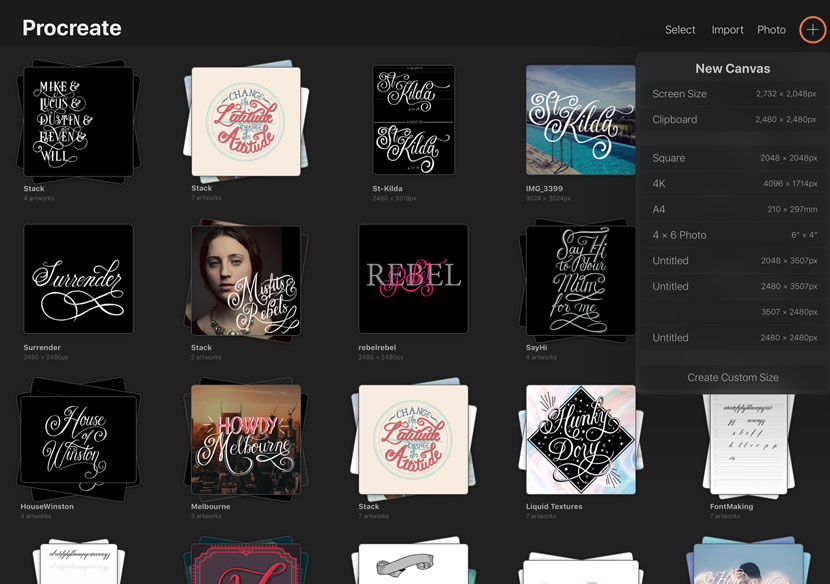
Step 2 – Open Procreate on your iPad and create a ‘New Canvas’ by tapping the + symbol at the top right of your screen. Choose any canvas size you want, we just need to get into the app to access the brushes panel.
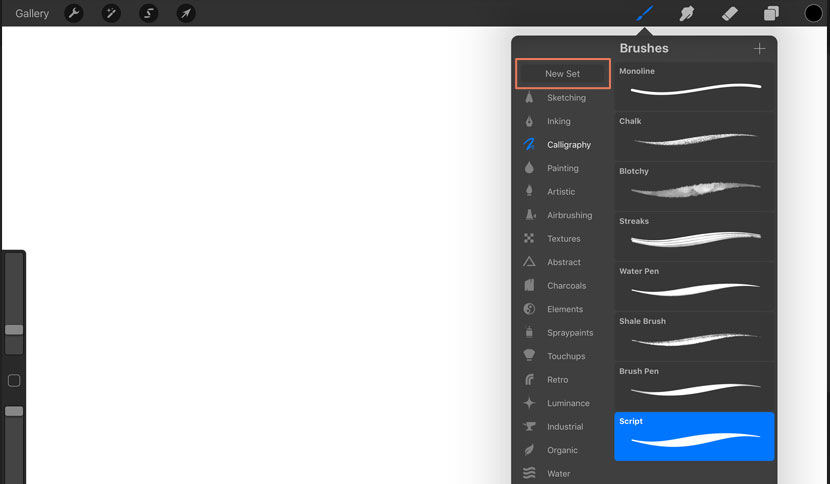
Step 3 – Tap on the Brush icon in the top menu to reveal your brush panel. You’ll see your brush sets listed on the left hand side. Pull down on the list to reveal the button ‘New Set’ and type to label the set something relevant ie. ‘Essential Brushes’.
Step 4 – With your new Set active, tap the + at the top right of the brush panel and choose ‘Import’.
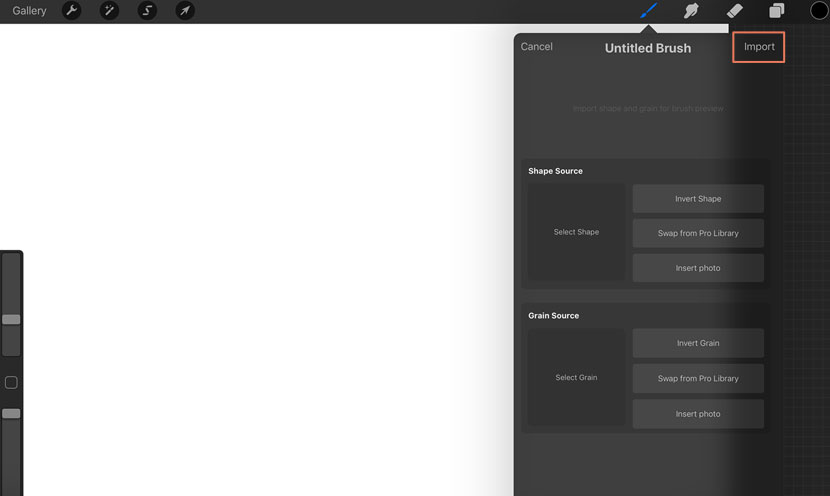
Step 5 – Navigate to the location you saved your .brush files and choose the first brush. Repeat Step 4 & 5 to import each brush. If there are multiple brushes, see the next steps for a Protip on how to import them all in one go!
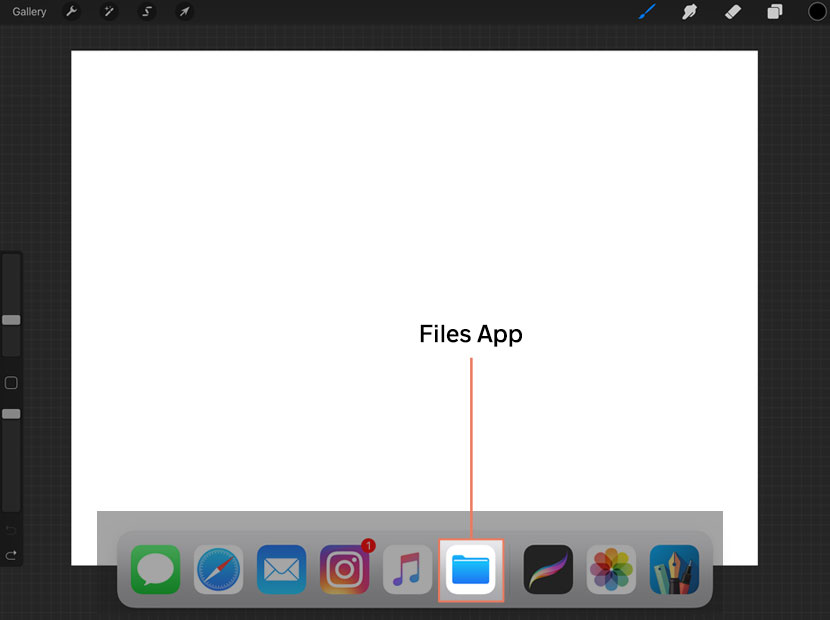
Step 1 – With Procreate open, access the ‘Files’ app by simply swiping up from the bottom of your screen and you’ll see the app icon.
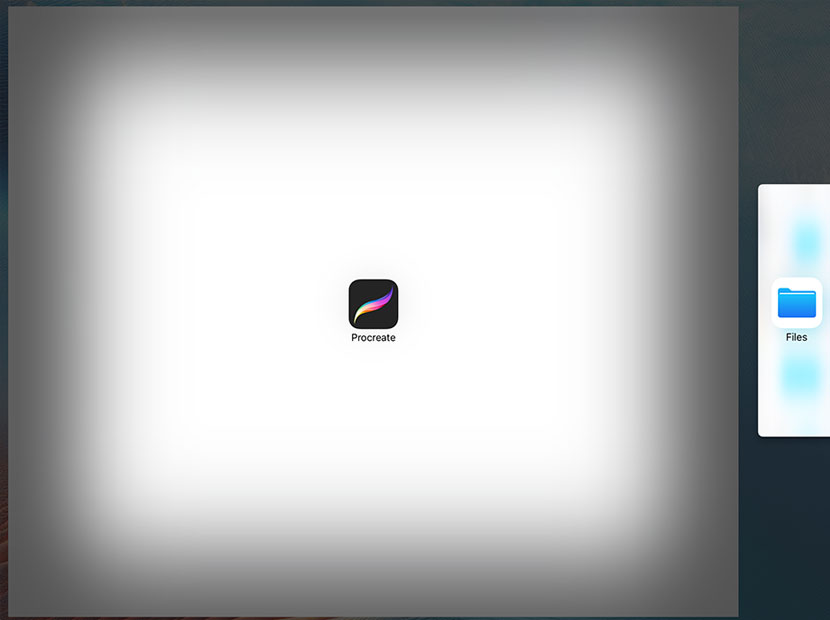
Step 2 – Hold down the Files App icon and drag it to the right side of your screen to dock, then let go of the icon. Your File browsing app is now side-by-side with Procreate.
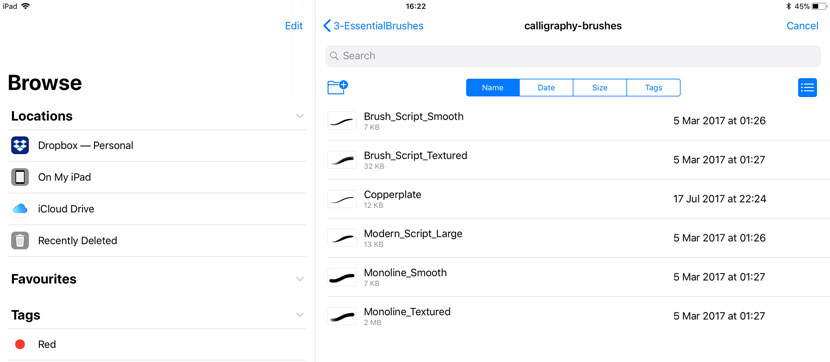
Step 3 – Navigate to the location you saved your brushes folder (iCloud or Dropbox), and find your .brush files. You’ll notice the ‘Select’ option in the top right of the Navigation bar.
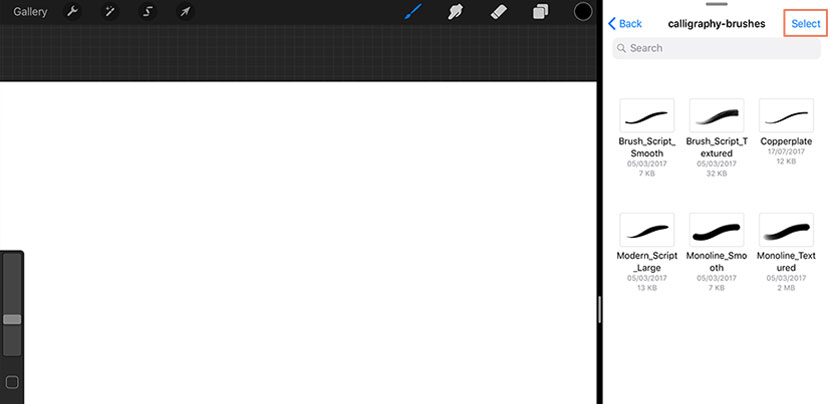
Step 4 – Tap ‘Select’ in the top menu bar, and you’ll see you can choose multiple files at once (they will get a blue circled tick to indicate they are selected). Tap on each of the brush files.
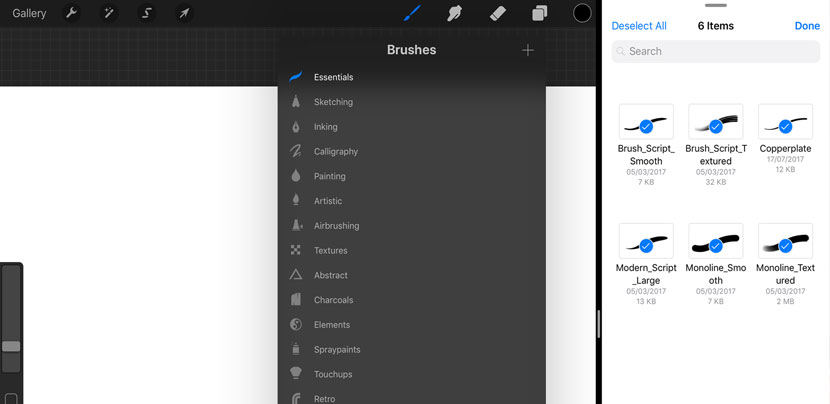
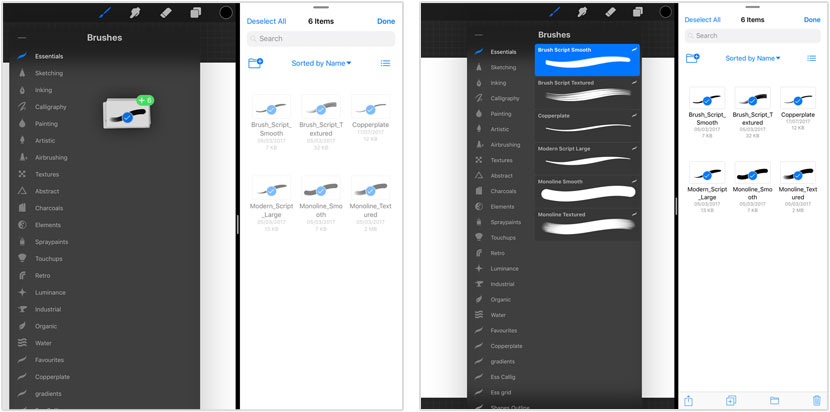
Step 5 – Tap and hold one of the selected brushes and you’ll see you can now move them all at once. Drag them into your brushes panel to import.
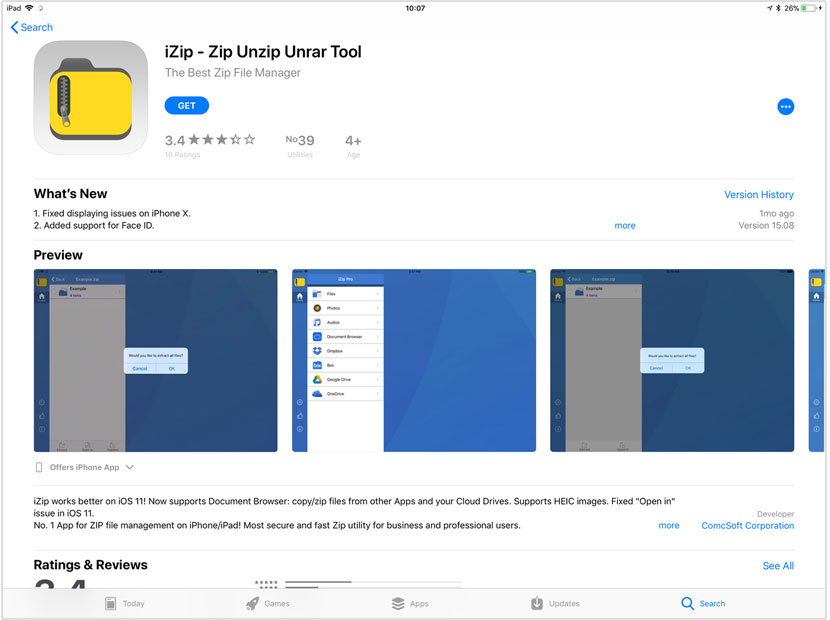
Step 1 – Open the App Store on your iPad and search for the free App ‘iZip’. Tap on ‘Get’ and install the app.
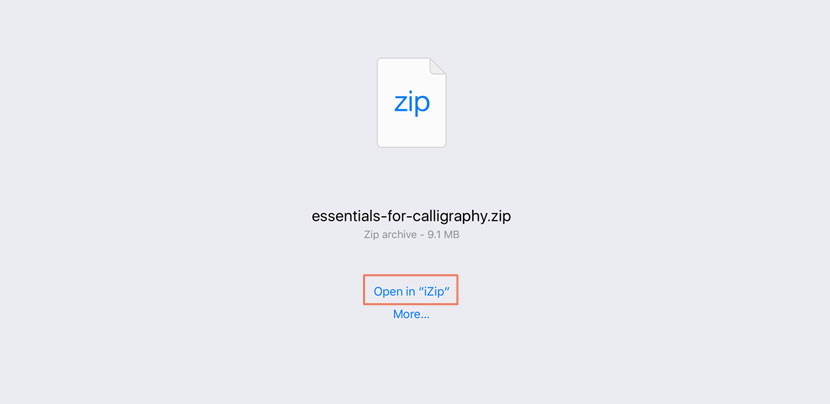
Step 2 – Tap on the link to download your zip file. You’ll see a zip icon and the name of the file. Tap on ‘Open in iZip’.
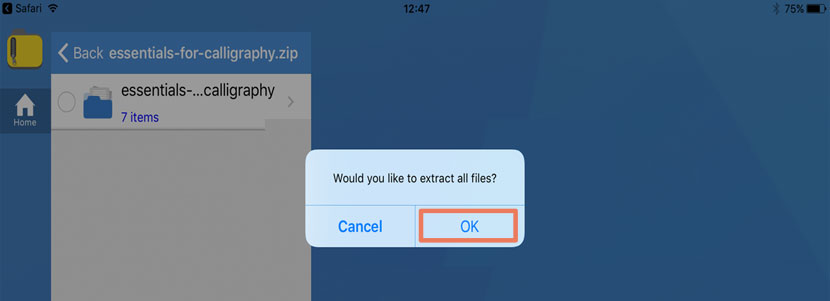
Step 3 – The iZip App will open and you will see a prompt asking you to extract all the files. Choose ‘OK’.
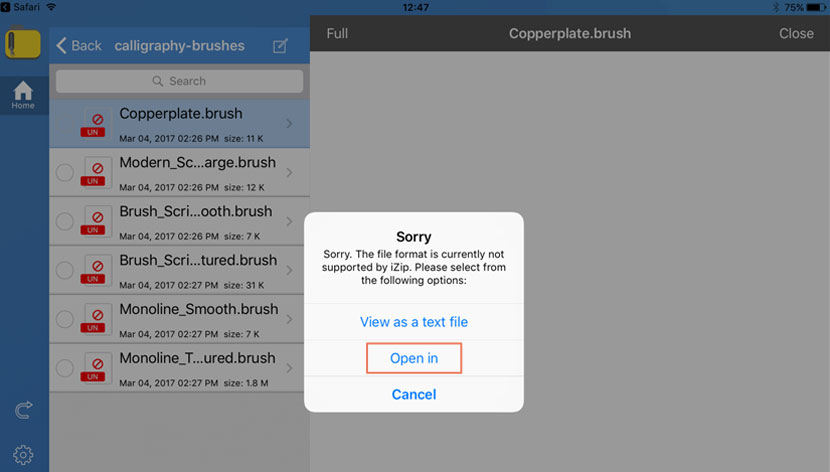
Step 4 – Once the zip file is extracted, you’ll be able to view the contents. Locate the .brush files and tap on one of them. You’ll get a dialogue box saying the file can’t be opened. This is fine, just choose the ‘Open in’ option.
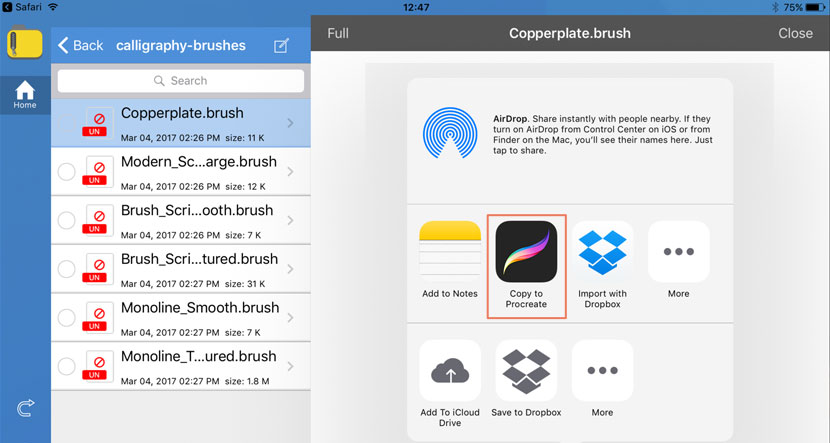
Step 5 – Choose the ‘Copy to Procreate’ option and Procreate will open showing your new brush file! Repeat these steps to install each brush.
You’ll notice Procreate will collect these brushes in a generic set called ‘Imported’. You can easily move them into a new set by swiping right on each brush icon to select, then hold down on one of them and drag into a new set.
That’s it! You’re ready to create beautiful things. Hopefully that helped if you’ve ever had trouble with the new brush panel before. If you have any questions or comments, please leave a message in the comment section below.
Get the Free Email Course
Sign up to the free email series for a step-by-step guide to the basics of Copperplate Calligraphy on the iPad Pro with Procreate.
You'll get immediate access to the first module covering the Basic Strokes, and further emails containing 5 new lowercase letters at a time for a-t of the alphabet.
Detailed instructions, Quick Tips, and Procreate Practice Drills included!

Mat
Oh man, the bulk trick is a lifesaver. Thank you!
Nicole Mauloni
You are welcome Mat, so glad it helped! 🙂