There’s so many advantages to digital lettering. Once you buy your brushes or textures, you can use them over and over again, and they never run out. You don’t have constant costs like pens and paper. It’s completely mess free. Your Apple Pencil can create an endless amount of styles & effects in the one tool without needing physical space to store a library of supplies. It’s completely portable and you can take your work anywhere, it’s such an easy set up. The list goes on…
But there are those occasions where rather than printing something, you really want a handmade look and feel.

Learn Calligraphy
on the iPad
from Scratch!
Create stunning calligraphy in Procreate with no experience or special tech skills (even if you have messy handwriting and don’t think you’re creative enough)
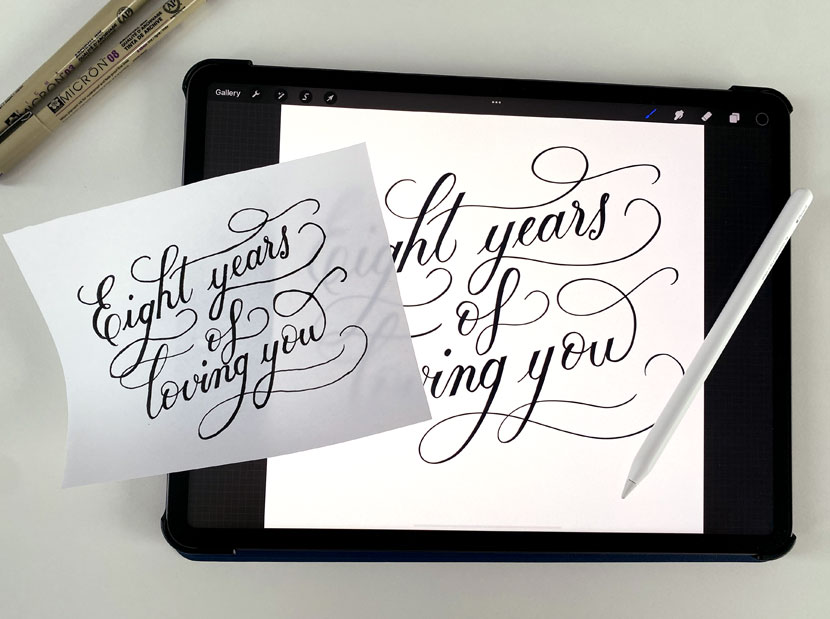
WATCH THE FREE WORKSHOPToday I’m going to show you how you can turn your iPad into a lightbox to transfer your digital lettering onto paper. With this approach you can have all the advantages of being able to use layers and refine your work in Procreate. Once you’re happy with the result, we’ll disable the iPad screen and use it as a lightbox to transfer the design onto paper.
This is a really convenient way to make sure you get everything refined and polished digitally first. You’ve then just have that one transfer onto paper by tracing the design, and you have your physical artwork on paper.
Note: There are a few important things to consider, which I discuss in the video.
Let’s take a look at how to do it!
How to turn on Guided Access
Before you start tracing your design, you need to disable your iPad so the movement doesn’t affect the screen. This can be done using a setting called ‘Guided Access’.
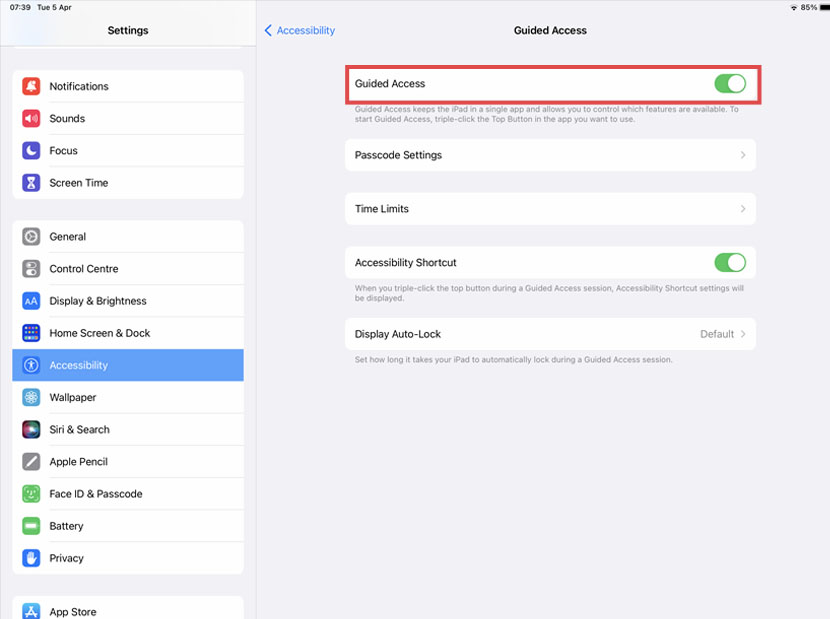
To turn on Guided Access, go into your ‘Settings’ and tap the ‘Accessibility’ tab in the left menu. Scroll to the bottom and you’ll see ‘Guided Access’.
Toggle the switch at the top to on.
The way it works is you triple click the top button and it will initiate Guided Access and lock the iPad Screen. You then triple click the top button to go back to normal.
**** IMPORTANT ****
A really important part of the Guided Access setup is to tap on ‘Passcode Settings’ button and then tap ‘Set Guided Access Passcode’. Enter your normal iPad passcode.
The reason for this step is, when I tried Guided Access for the first time and tried to get out of it by triple clicking the top button, it brought up the passcode screen as expected, but all the buttons were enlarged and I couldn’t enter my passcode! And because the purpose of guided access is to lock the screen, I wasn’t able to do anything to get out.
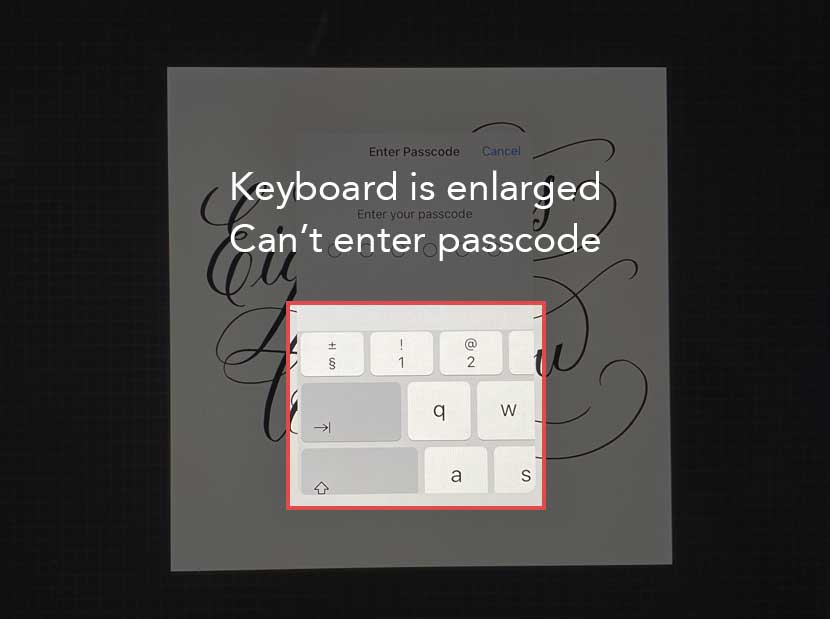
After a long call troubleshooting with Apple, the solution was to force restart. So if this happens to you, know that you can get out of Guided Access by clicking the volume up button once and the volume down button straight after, then hold down the power button for a few seconds and your iPad should turn off.
This is why that ‘Set Guided Access Passcode’ step is important. For some reason, doing this on setup will format the screen correctly and you should see all the keys fine. Apple did say this was a very rare problem, so it’s unlikely to happen to you at all, I just want to make sure you know what to do if it does!
Besides that little hiccup with the setup, once in place, Guided Access can be really useful to allow you to transfer your digital lettering onto paper.
What tools to use
Another important thing to keep in mind when doing this, you don’t want to press too firm or use a really sharp, hard lead pencil when tracing the design. Reason being we want to be very careful not to pierce the paper and scratch the iPad screen!
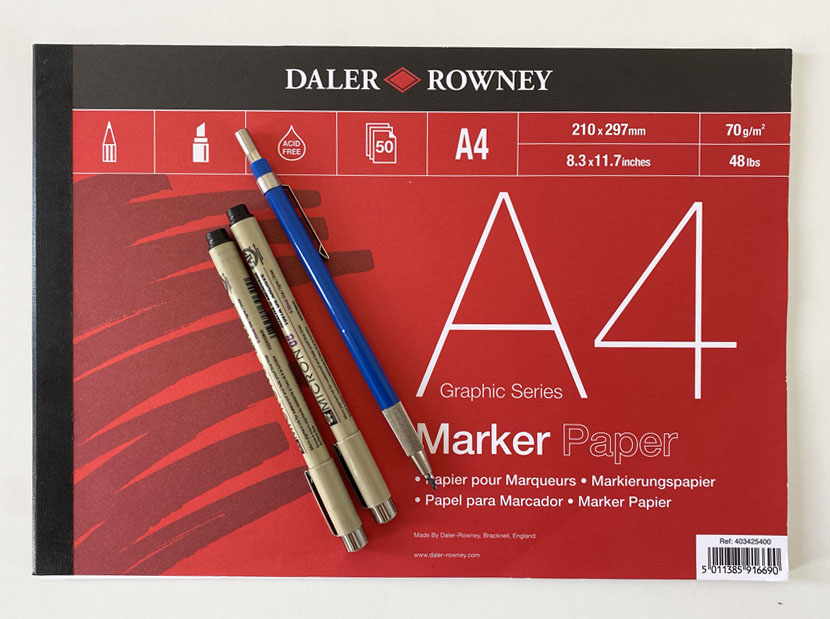
So use a very gentle pressure and soft lead pencil. I used a Staedtler Lead Holder pencil to trace the design. The paper you use should be thin enough to see through it clearly. You can always transfer onto heavier stock after the initial transfer has been made. I found a 70 GSM (or lighter) paper from Daler Rowney worked really well.
And once you have your phyisical copy of the design on paper, you can retrace to refine it further or just go over the pencil with pen. My go-to pens for this sort of job are Microns. They come in different sizes which is helpful for using a thin one for the outline, and going for something thicker when you want to fill the lettering. For this project, I used a .3 for the outline and .8 for the fill.
* Note, these are affiliate links. I earn a small commission from purchases made with these, which doesn’t cost you anything extra but helps me create more videos like this. If you purchase through these links, thanks for supporting the blog!
Being able to transfer your digital lettering to paper is awesome, but it’s worth saying this is obviously at your own risk. Like I said, this method comes with a warning that you definitely need to be careful doing the tracing! But with a soft touch, you can safely end up with a finished design on paper that looks like the whole process was analogue, which is really cool!
I’d love to hear your thoughts on this, please let me know in the comments section below!

Mary Ann Ganoung-Williams
Hi there. I followed all the steps several times but even though my iPad went into guided access mode the screen does not lock. Is there another step I am missing?
Nicole Mauloni
Hi Mary! Thanks for your question. It’s hard for me to tell without seeing what’s happening. Can you film it and send to me over email? Or otherwise, Apple support is super helpful for troubleshooting. If you’ve followed the video steps, there might be something different with the model you’re using. They would be able to better help you in that case.
Rose
What is the top button?
Nicole Mauloni
Hi Rose, thanks for your question. The button I’m referring to is the physical button located on the side of the iPad. Depending on your iPad model, it’s usually the Power button (also called the Sleep/Wake button). It’s the one you press to turn the screen on or off or to power the device down.
If you’re holding the iPad in portrait orientation (with the Home button or screen at the bottom), this button will be on the top-right edge of the device. On newer iPads without a Home button, it’s still in a similar spot on the edge, but slightly higher.
Does this help clarify? Let me know!