The word ‘calligraphy’ means ‘beautiful writing’… Learning the letterforms is the first part. After this, the next step is to learn how the letters connect to each other. It may seem pretty straightforward (and for some letters it is) but there are some exceptions that are a little unexpected that you need to know about.
Thankfully, there aren’t separate rules for each letter, and they fall into 3 main groups. We’re going to take a look at these groups today!
See the video below, or the written out version underneath it.


Learn Calligraphy
on the iPad
from Scratch!
Create stunning calligraphy in Procreate with no experience or special tech skills (even if you have messy handwriting and don’t think you’re creative enough)
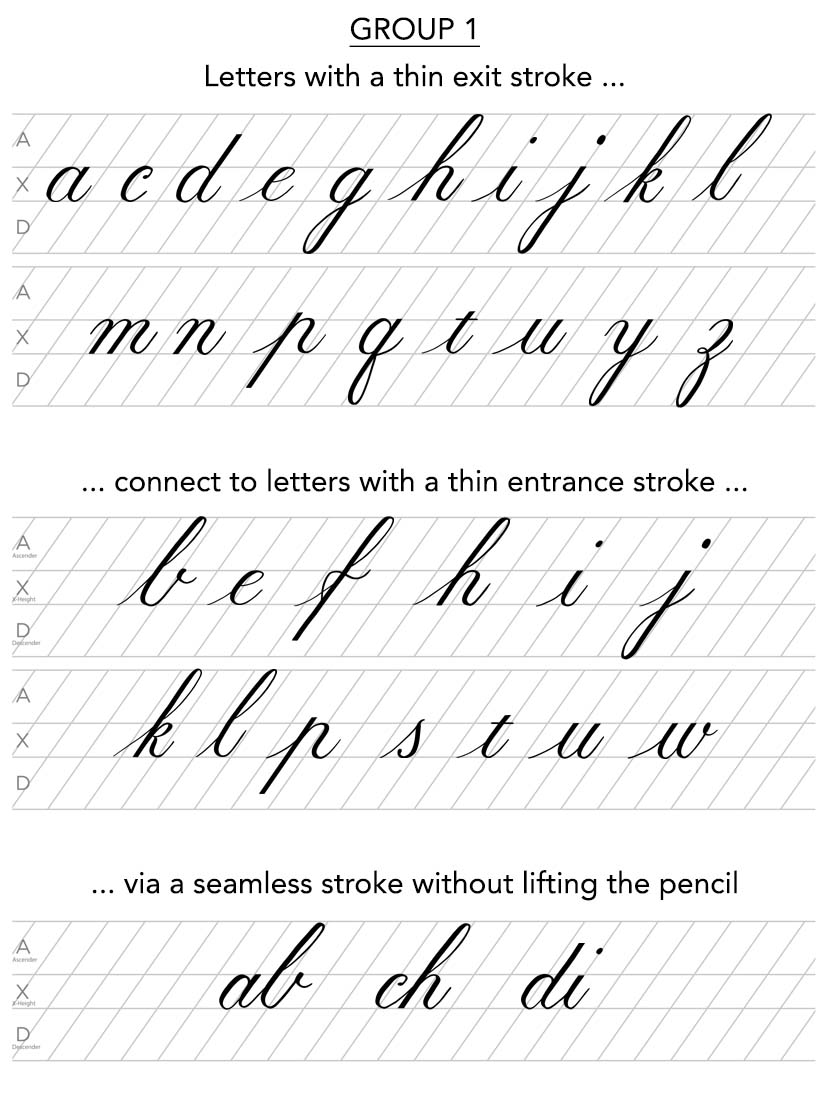
WATCH THE FREE WORKSHOPGroup 1 : exit strokes connect to entrance strokes
The first group of letters is the easiest to remember and most straightforward to write. It contains letters that have an exit stroke and letters that have an entrance (or ‘lead in’) stroke. These connect to each other seamlessly without lifting your pencil.
Letters with exit strokes:
a, c, d, e, g, h, i, j, k, l, m, n, p, q, t, u, x, y, z
Letters with entrance strokes:
b, e, f, h, i, j, k, l, p, s, t, u, w,
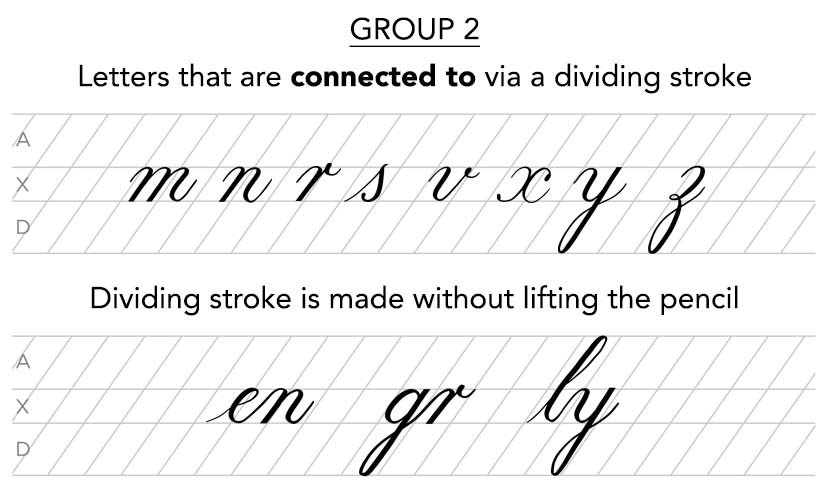
Group 2 : letters divided by a hairline stroke
This second group contains letters that are divided by a hairline stroke. So the letters in this category are letters other letters are connecting to.
These letters are:
m, n, r, s, v, x, y, z
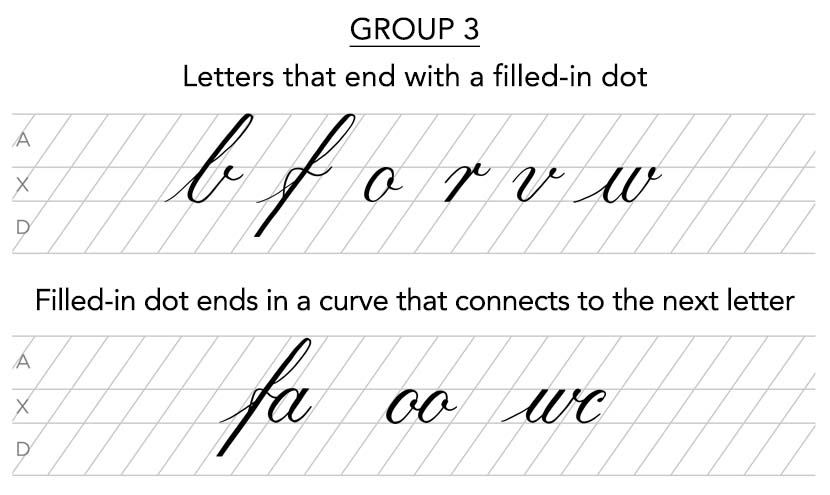
Group 3 : letters that end with a filled-in dot
The last group of letters contains any letters that end with a filled in dot.
These letters are:
b, f, o, r, v, w
These letters connect to the following letter via a small curve.
While the letter ‘f’ doesn’t technically end with a filled-in dot, it is treated the same as the letters in this group too.
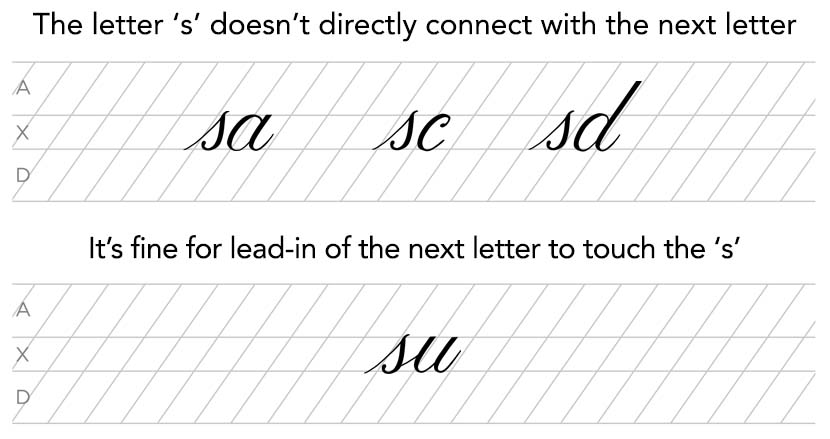
The letter ‘s’ is a bit of an outlier. It fits in a couple of these different categories, but has it’s own rules for connection.
When connecting to the s, it is placed in Group 2, with the thin stroke dividing it’s download and that of the letter before. When it is the preceding letter, it doesn’t necessarily connect with the next letter, though you could have the lead-in stroke of the next letter touching the s.
Connections and spacing are intertwined
The way letters connect to each other determine the amount of space between them in order to write visually balanced calligraphy. If you are leaving too much space, or too little, your calligraphy won’t look right no matter how well formed your letters are. It is an important component to writing well.
You can dive deeper and learn the spacing for these groups of letters as well as practice yourself with over 70 pages of practice sheets.
If you’re starting from scratch, sign up to the free Starter Kit below to get your pressure sensitive brush, guidelines and the basic stroke practice drills!

Elyfercompany
Your articles are very instructive, I look forward to the next one.