Have you discovered Procreate’s Reference Window yet? It’s not a new feature but how you think to use it might be!
Incase you haven’t tried it before, it allows you to load an image in a separate window right within the canvas. You can move the window anywhere on the screen, you can even scale and pan the reference image within the window itself! What you do on the canvas will not affect the reference window, meaning you can zoom and pan, write and paint and the window remains visible, just like a sticky note on your document.
There’s something you need to do to load the images in the right way, but we’ll get to how it works in a moment.
Watch the video below to see it in action.
Why the Reference Feature is Perfect for Calligraphy!
I want to share a way I’ve been using this for my calligraphy students. If you’ve tried your hand at calligraphy before, you would already know it can often be tricky to tell where a stroke starts and ends. It’s not always where you expect. Some strokes start mid-way through a flourish and are completed after drawing the rest of the letter. Other strokes overlap and create the illusion they were drawn with a single continuous motion.
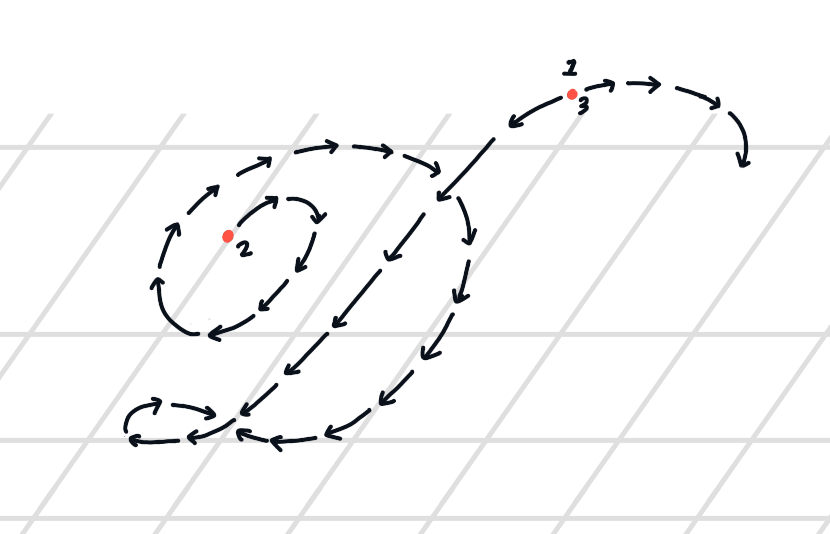
This flourished uppercase ‘D’ above is a perfect example of how letters can look like they are made with one stroke but are actually several strokes overlapping. We start at number one and follow the stroke down and stop when we finish the loop. We pick up again and go to stroke 2. Follow the arrows around and it meets at the end of our 1st stroke. Then we find stroke number 3. And as you can see it actually starts mid-way through that top flourish! So we pick up where we left off to finish the letter.
This can be confusing to try and remember the path as well as getting your head around applying pressure for the thick and thin strokes!
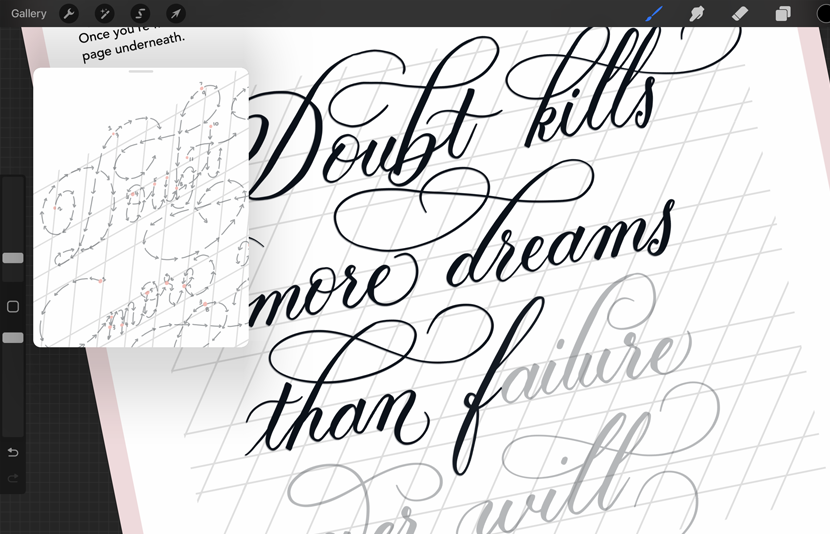
That’s where the Reference Feature comes in! You can load a stroke guide in your reference window and refer to it like your own personal calligraphy GPS while you practice 🗺️
No need to fiddle with turning layers on & off, and no print outs or extra devices required!
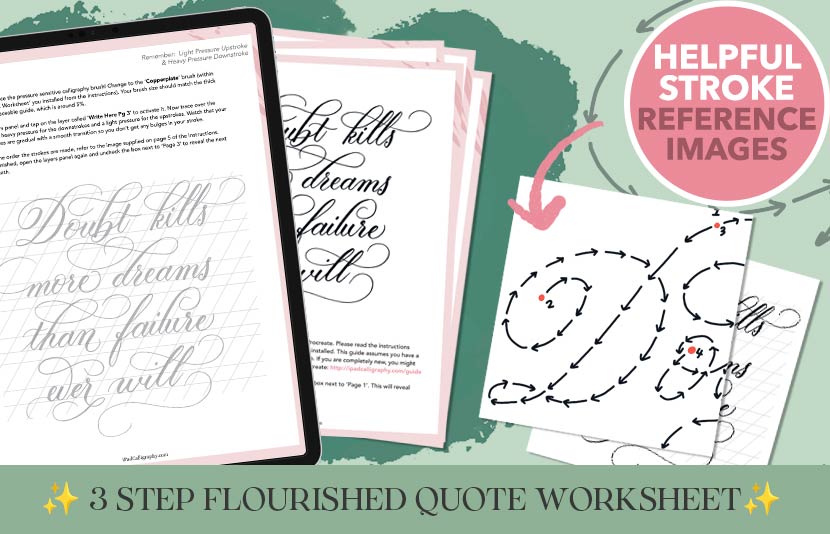
This flourished quote worksheet for my iPad Calligraphy students was designed to use this feature. It has 3 pages of traceable versions, each building on the last and comes with the extra images to load in your reference window to guide your strokes.
How to use the Reference Feature
So let’s look at how to actually open and use the Reference window.
You can’t just save the image you want to use anywhere (like iCloud or Dropbox). So first, you need to make sure it is on your local iPad in the photos app.
Once you have the image in the right place, go to the wrench icon (first icon in the top left menu) and go to the ‘Canvas’ menu. You’ll see the ‘Reference’ toggle. Switch this on and the window will open.
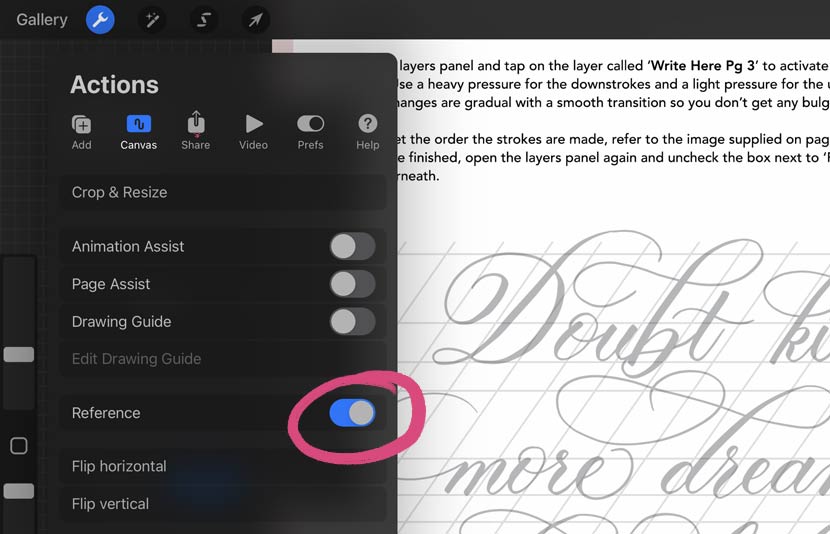
It will load a copy of the canvas by default. Just tap the ‘image’ button at the bottom of the panel. Then choose ‘Import Image’ and you will see it takes you to your photos app. Find the image you want to use and tap to import it.
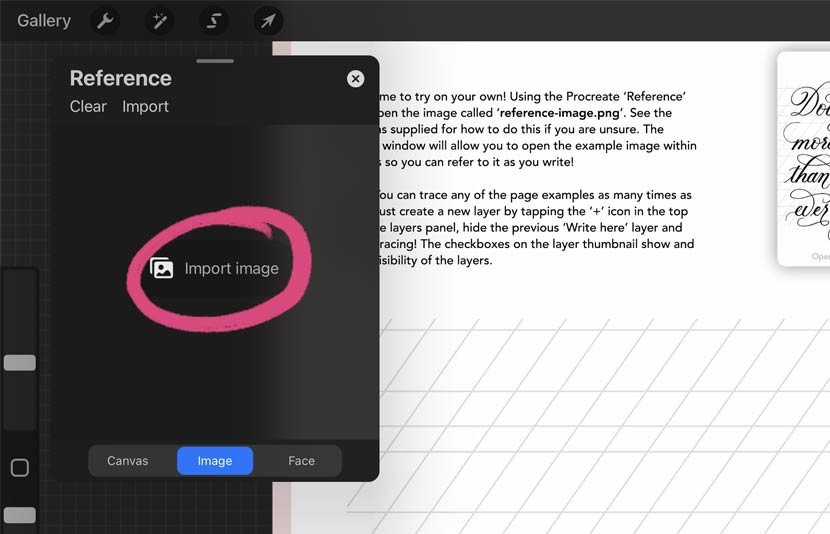
You can now use the top of the panel to move the window anywhere on screen and whatever you do on the canvas won’t interfere with visibility of the panel. You can also rotate and zoom on the reference image inside the window too.
When you’re finished, just use the ‘x’ icon in the top right corner to close the window.
And that’s it!
Click here to check out the flourished quote worksheet used in tutorial.
I would love to hear if you find this learning method useful. Leave a comment below.

