If you’ve created something you love in Procreate – whether it’s hand lettering, a sketch, or an illustration – you might be wondering: How can I do more with it?
Maybe you want to scale it up for a print, use it in a repeating pattern, cut it with your Cricut, or recolor it for a new design. The best way to do all of that without losing quality? Convert your Procreate art into a vector.
But here’s the good news: you don’t need expensive software like Adobe Illustrator to make it happen. In this tutorial, I’ll walk you through a completely free method to convert your Procreate artwork into a scalable SVG file, perfect for use in Affinity Designer, Linearity Curve, or even directly with your cutting machine.
You can read the step-by-step instructions, download the free guide below to keep on hand, or watch the full video tutorial to follow along in real time.
Why Convert to Vector?
Vector files are:
-
Crisp and clean no matter the size (perfect for both stickers and posters)
-
Fully editable so you can tweak lines or recolor at any time
-
Resolution-independent, meaning you won’t lose any quality
-
Compatible with cutting machines like Cricut and apps like Affinity or Illustrator
Step-by-Step: From Procreate to Vector
1. Export Your Artwork from Procreate
Open your artwork in Procreate and export it:
-
Finalize your cleaned-up artwork (ideally using black & white linework).
-
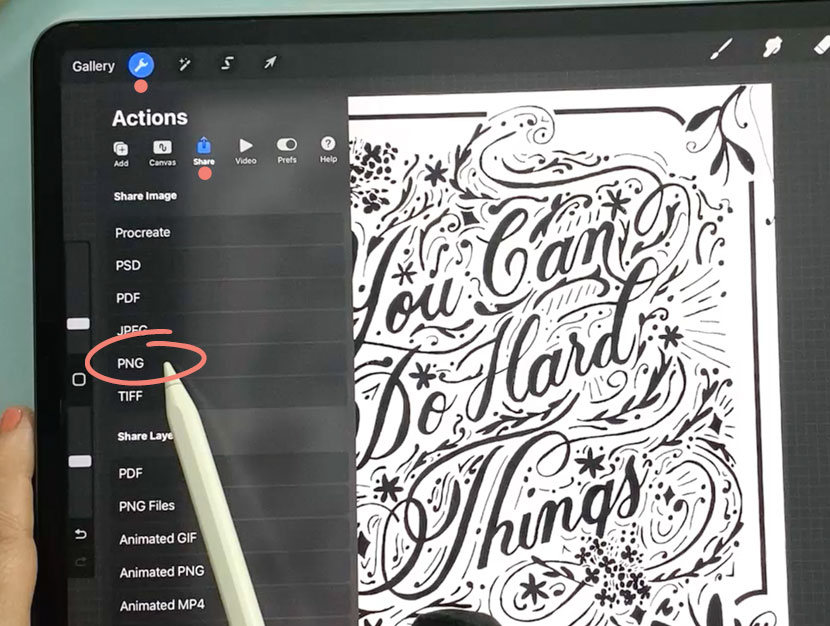
Tap the wrench icon → Share → PNG → Save to your Camera Roll.

2. Install Adobe Capture
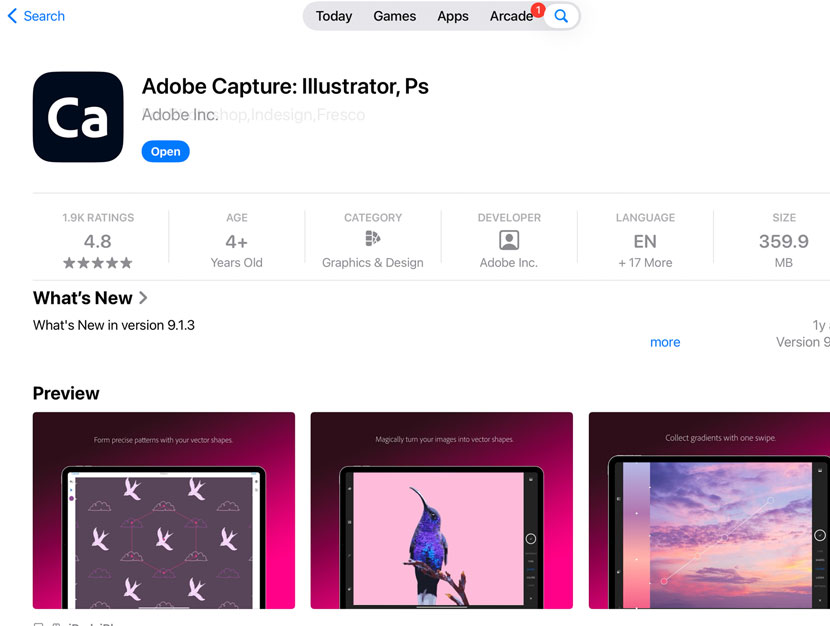
To convert your artwork into a vector, we’ll be using an app called Adobe Capture. The good news? It’s completely free to use – no paid Adobe subscription required. You’ll just need to create a free Adobe account if you don’t already have one.
To set up your free Adobe account:
-
Go to www.adobe.com
-
Tap ‘Sign in’ in the top right corner
-
Then tap ‘Create an account’ and follow the prompts to enter your details
Once your account is ready, download the Adobe Capture app from the App Store. When you’re signed in and the app is installed, go ahead and open Adobe Capture to get started.

3. Vectorize Using Adobe Capture
-
Open Adobe Capture & from the bottom left menu, tap Import > Camera Roll.
-
Choose your saved PNG artwork.
-
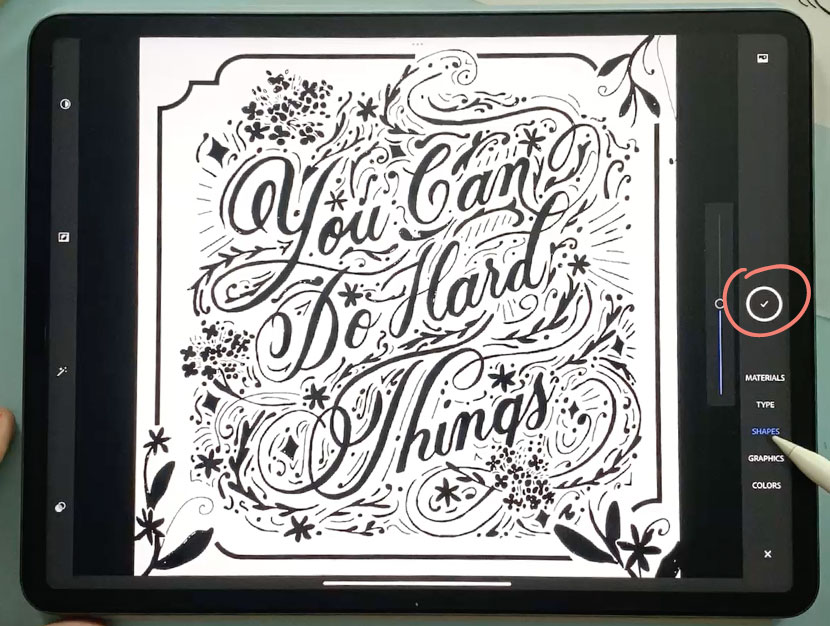
Switch to the Shapes module via the menu on the right side.
-
Adjust the threshold dial if needed.
-
Tap the Circle Tick Box when you’re done.
-
Optional: Toggle Smooth on/off.
-
Tap Save in the top right corner and name your shape.

4. Export the Vector File (SVG = ‘Scalable Vector Graphic’)
Now that you have your vector artwork, you can export it as an SVG file – perfect for use in vector apps like Affinity Designer, Linearity Curve, or even Cricut Design Space.
-
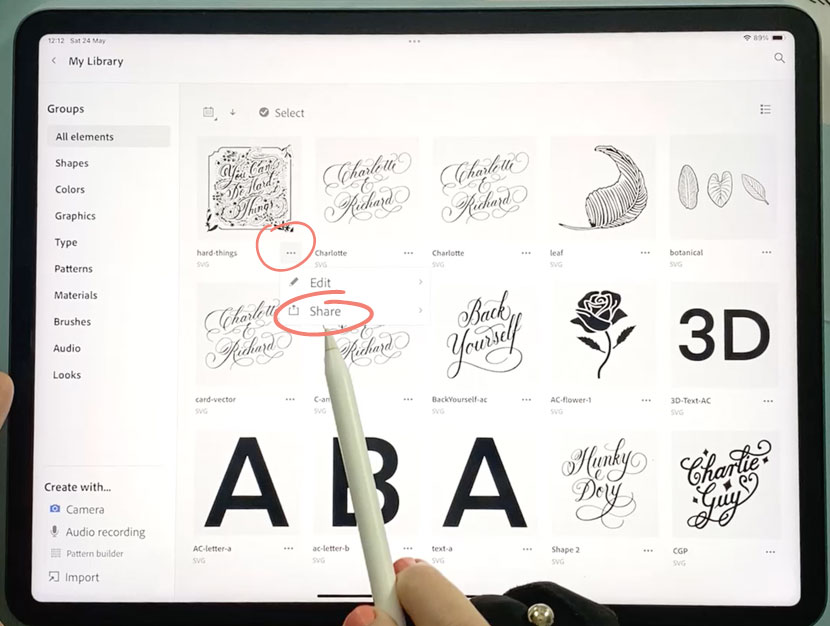
From your library, tap the 3 dots to the right of your saved shape’s Filename and choose – Share > Export As > SVG.
-
Save it to Files in a project folder of your choice..

What If My Artwork Is in Color?
Adobe Capture is best for black-and-white images – but here are some workarounds:
Option 1: Adjust the Threshold in Adobe Capture
If your artwork uses just 2–3 colors, you might still get a good result in Capture by increasing the detail threshold (the slider on the right).
Option 2: Convert to Black and White First
In Procreate:
-
Go to Adjustments → Hue/Saturation, set Saturation to 0.
-
Then use Curves to boost the contrast and clarify the lines.
-
Export as PNG and follow the Adobe Capture steps.
Once it’s vectorized, you can recolor in Affinity Designer.
Option 3: Use Linearity Curve for Full-Color Artwork
If you regularly work with detailed color art, Linearity Curve is a fantastic tool. Its Auto Trace feature handles full-color vectorization beautifully. Watch a full tutorial here.
I hope you enjoyed this tutorial. Don’t forget to download your free guide above so you can refer to it later!
