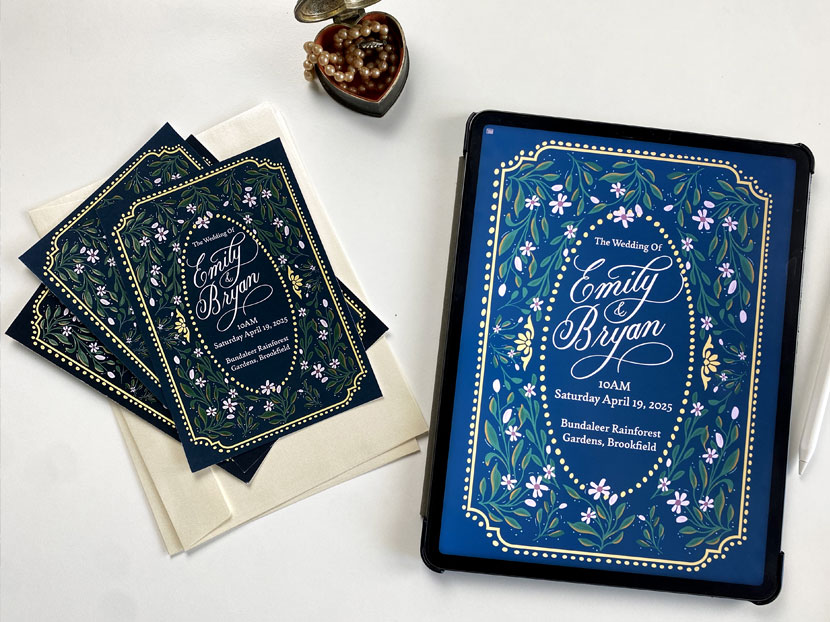
Did you know you can create professional custom invitations right from your iPad using Procreate? Rather than spending hundreds on a designer, you can craft beautiful, high-quality invitations for weddings, birthdays, baby showers, and more!
In this tutorial, I’ll walk you through the entire process, including essential pro tips to ensure a flawless final print and a crucial tip when trimming your invitations.
If you’d like to follow along, download the free project resources below, containing the print-ready 5×7” template as a Procreate file, special frame stamp brush and color palette included!
Step 1: Set Up Your Invitation Template
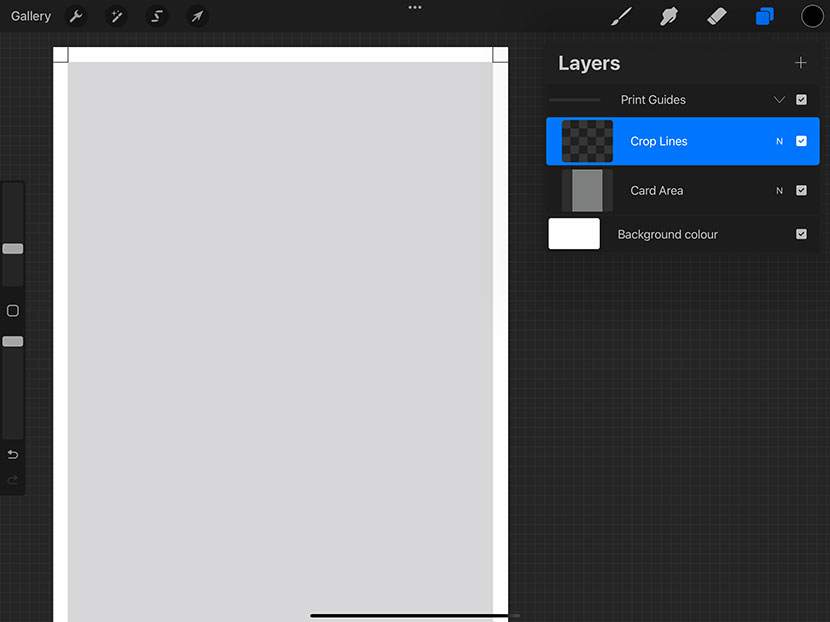
Start by opening a 5×7 inch card template in Procreate (included in the download linked above). If you don’t have one, create a new canvas as 5 x 7” at 300 DPI.
Your template should include crop lines giving sufficient bleed area so we get a nice professional finish when we trim it.
Before printing, make sure you turn off the visibility of the layer called ‘Card Area’ to ensure it doesn’t show on the final design. (You can leave the Crop Lines layer on).
Step 2: Change the Background Color
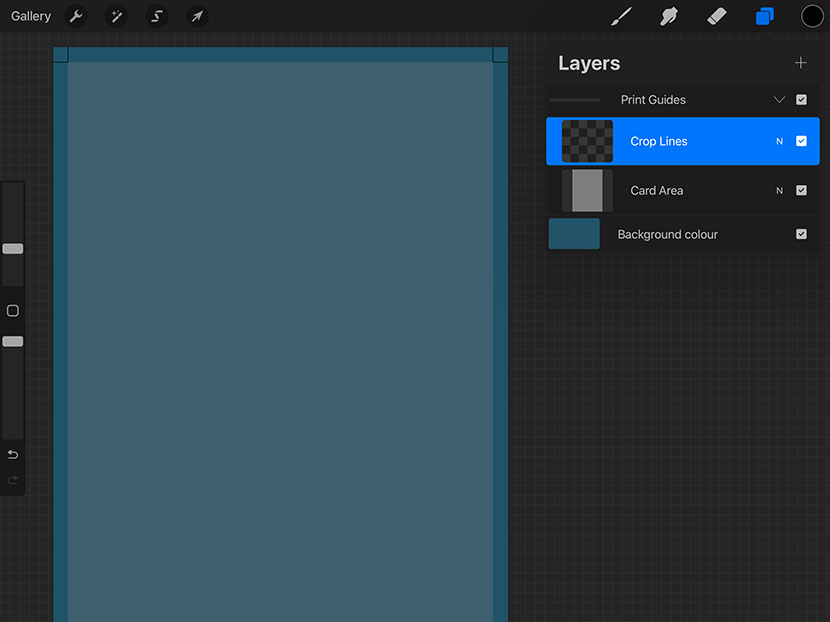
Tap on the Background layer and select a dark blue from the free color palette included with the project download (or any color of your choice).
Step 3: Add a Decorative Frame
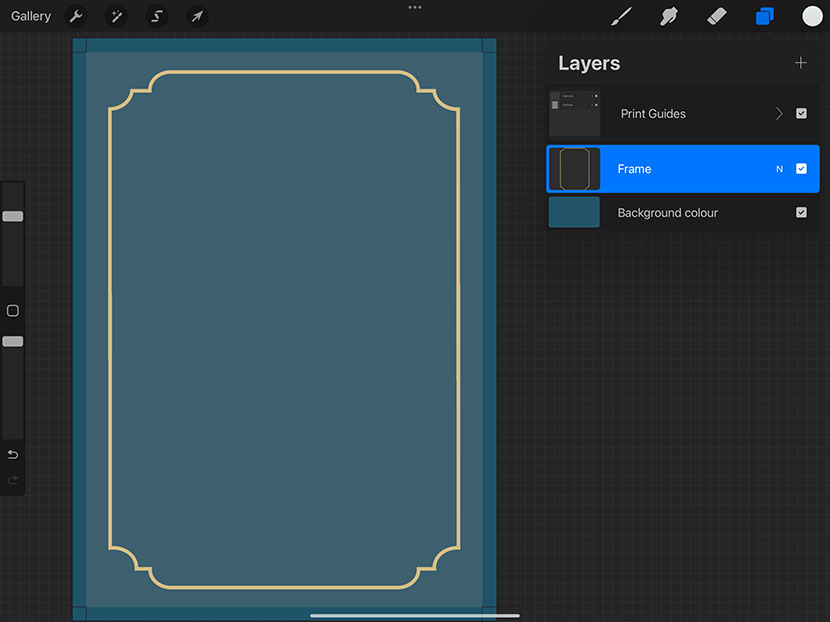
Use the frame stamp brush (included in the provided downloads) and tap the canvas to place the frame, ensuring it sit within the card area, nice and large inside the canvas.
Center the frame using guidelines:
-
- Go to Canvas Panel → Edit Drawing Guide → Increase the Grid Size to maximum which will give both the vertical & horizontal guidelines.
- Optional : Adjust grid color using the slider at the top for better visibility.
Adjust the Frame for a Balanced Design
- Use the Selection Tool (S icon in the top left menu) → Choose Rectangle Mode from the bottom context menu and select the bottom part of the frame.
- Swipe with three fingers to cut and paste it to a new layer.
- Move this bottom part of the frame to the bottom of the card area while keeping it aligned (turn on ‘snapping’ in the bottom menu to help keep it aligned when moving).
- Duplicate the top frame layer and move it so you fill the remaining gap in the border.
- Erase excess scalloped borders to leave only straight lines on the sides.
- Merge layers and rename the new layer as Frame.
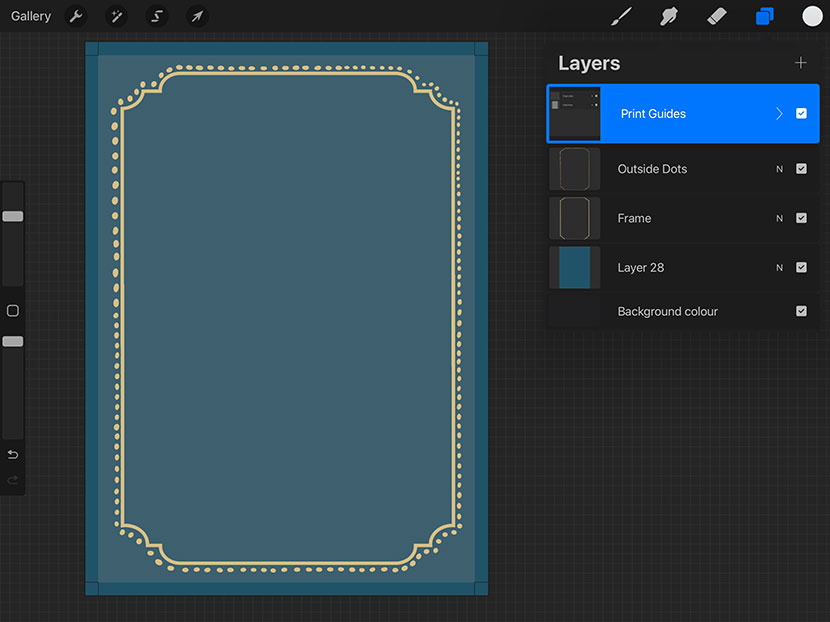
Step 4: Add Dotted Borders
Create a new layer.
Select a non-textured brush (eg. Syrup brush from Procreate’s inking set).
Draw smallish dots around the frame’s edges in the light yellow color. The dots don’t have to be perfect – just keep them evenly spaced and within the safe area.
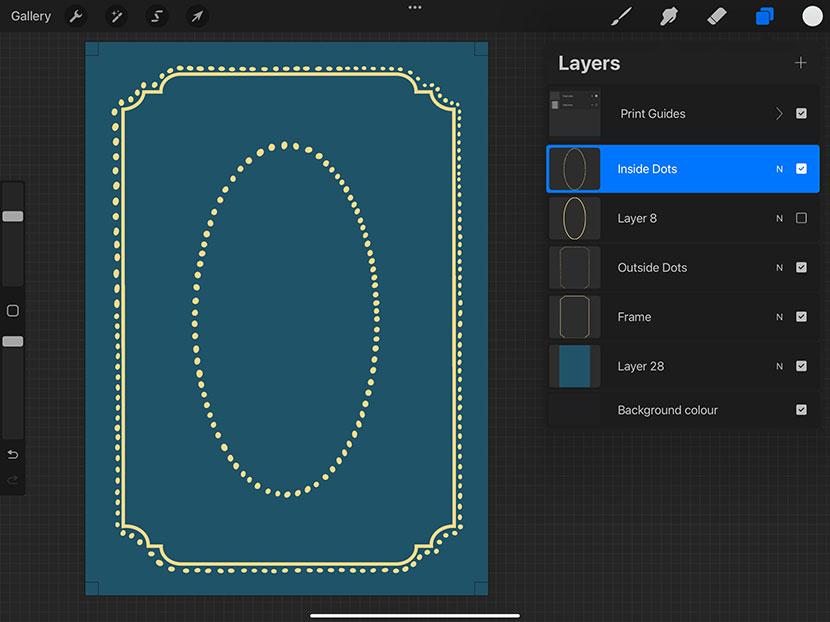
Step 5: Create an Inner Oval Frame for Text
Add a new layer above the dots layer.
Use the oval stamp brush (or draw an oval freehand).
Lower the opacity and create another layer to draw small dots using the oval as a guide.
Step 6: Add Decorative Elements
Decorative Motifs:
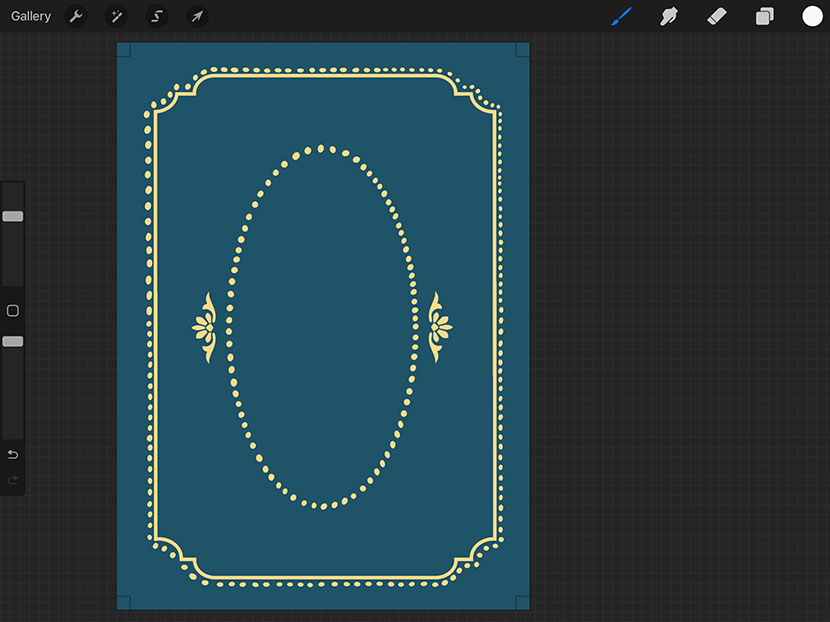
- Create a new layer and use the ‘Motif 11’ stamp (or draw a similar design freehand).
- Duplicate the motif layer, flip it horizontally, and align it.
- Group the motif layer, along with all other elements of the frame, and rename the group Frame (tap on the group thumbnail and choose ‘Rename’ from the flyout menu).
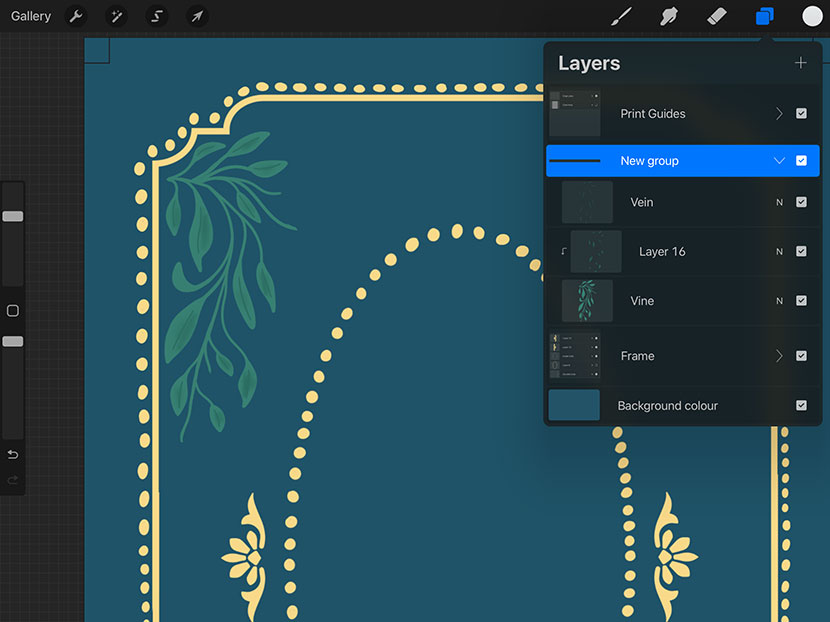
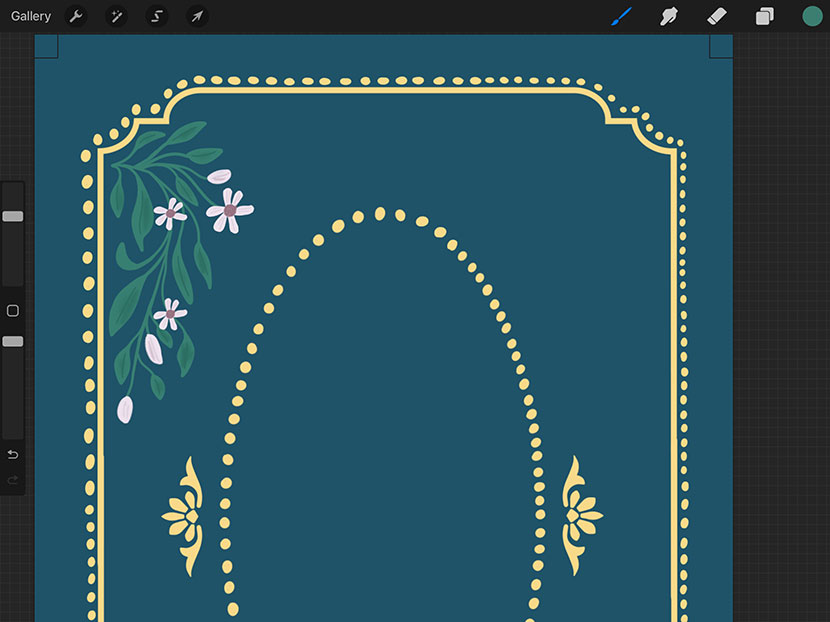
Drawing Vines and Leaves:
- Create a new layer.
- Using the teal green, draw a vine outline.
- Add a new layer for leaves and smaller vines coming off the main branch.
- Add darker green veins to the leaves to add more detail.
- Use a soft shading brush and a clipping mask to add subtle shading to the leaves.
Adding Flowers and Buds:
- Create a new layer and use light lilac to draw the main flower shape
- Add a darker purple center to the flower.
- Duplicate the flower layer (keeping the original as the master copy), resize, and rotate for variation. Place around the vine.
- Draw small buds on a new layer around the vines using the light lilac.
Adding Light Effects:
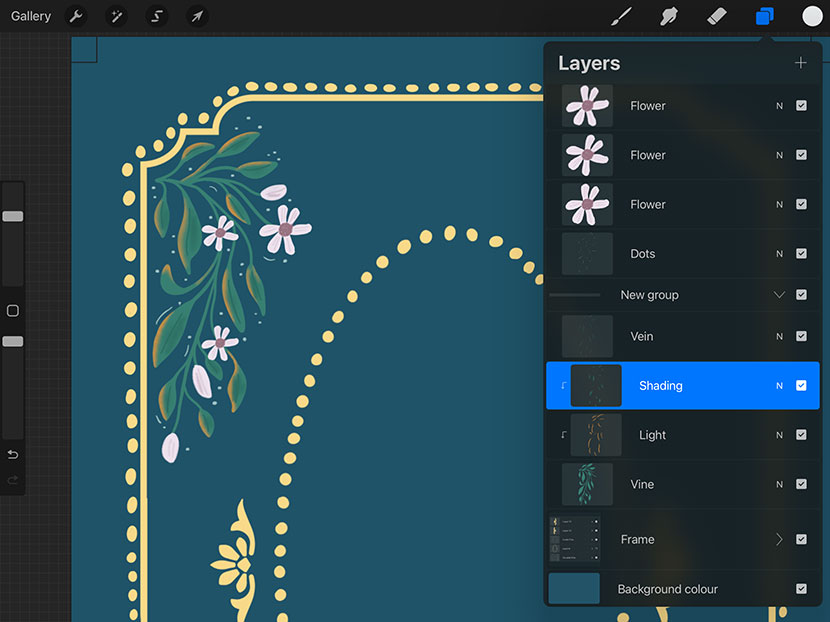
- Create a new layer above the leaves.
- Use light orange to add highlights to the leaves. Apply a clipping mask to this layer by tapping the layer and choose ‘Clipping mask’. This will keep everything inside the leaves layer.
- Blend the edges with a shading brush to create a soft lighting effect.
- Add small blue dots around the area for a finishing touch.
Duplicating and Mirroring for Symmetry
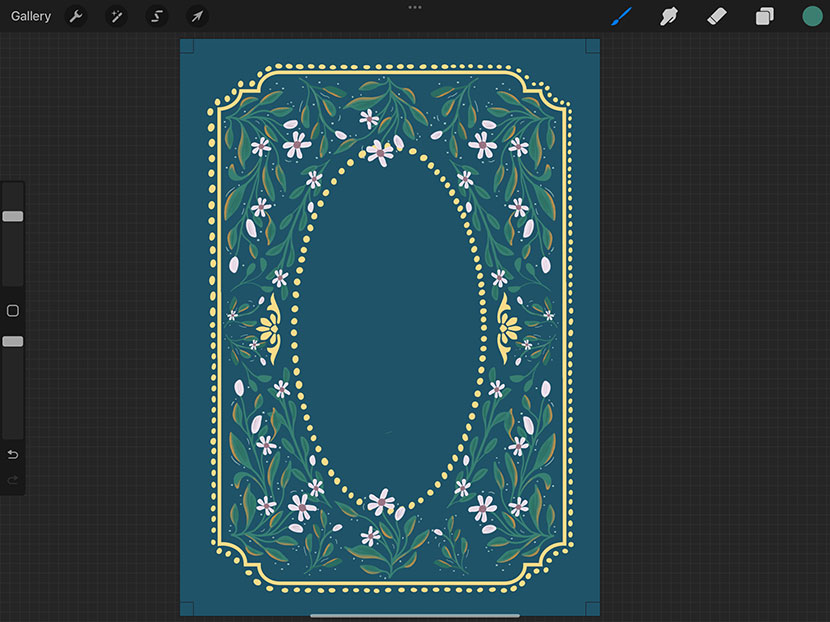
- Group the layers that make up the vine and flowers and duplicate the group. You can tap the layer group and merge it to preserve layer availability.
- Flip the duplicate version horizontally and reposition on the other side for balance.
- Repeat for all corners and repurpose them slightly so they also fill the middle top, bottom and sides.
Step 7: Add Hand-Lettered Text
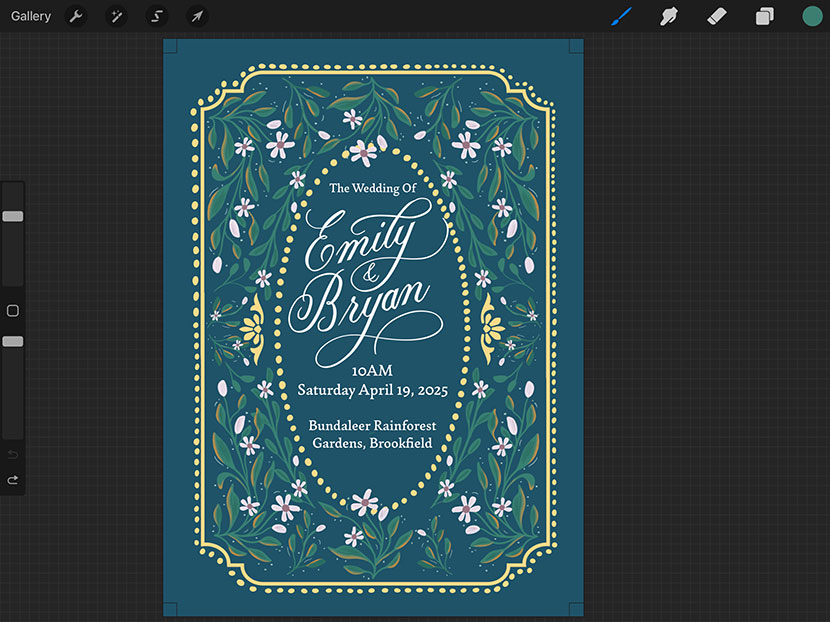
Optional: Create your lettering in a separate document.
Copy and paste it into the design.
Change the color to white: Swipe two fingers on the lettering layer to lock transparency. Then tap the layer → Choose Fill Layer.
Add event details using a serif font like Garibaldi.
Adjust font size and spacing under Wrench Tool → Add Text.
Step 8: Test Print First!
Before printing, always do a test print to check:
- Color accuracy: The background may appear darker than expected.
- Text readability: Ensure high contrast for better legibility.
- Visibility of trim marks: Make sure crop marks are clearly distinguishable.
When I printed my invitation, I realized the background color was much darker than anticipated, making the text difficult to read. Additionally, the trim marks were barely visible, which made precise cutting challenging. To fix this, I adjusted the background to a lighter blue and changed all the text to white for better contrast. I also made the crop lines white to ensure they stood out against the darker background. The final result was much more polished and professional. (Note: The lighter blue is included in your color palette.)
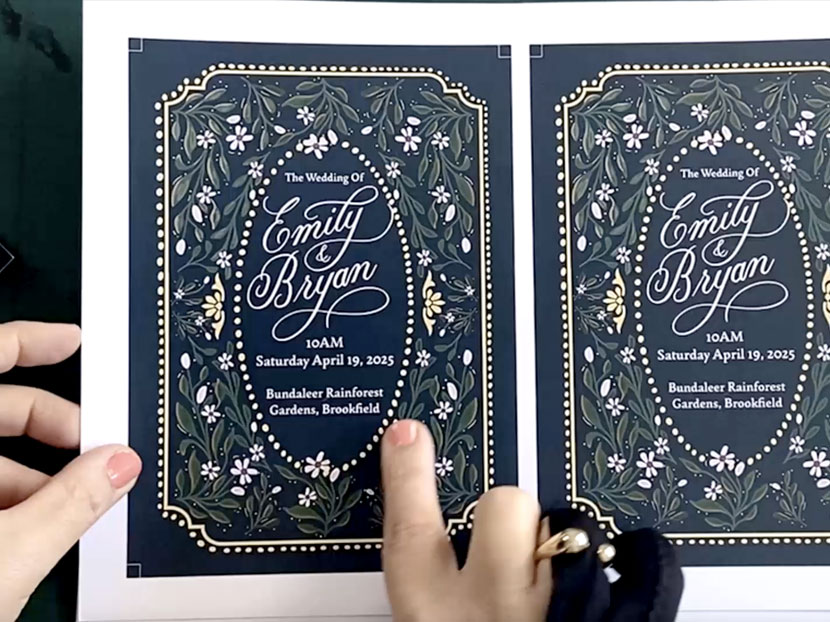
Step 9: Print & Trim!
- Print at Officeworks (Australia). Or if in the USA, FedEx Office, Staples, or a local print shop.
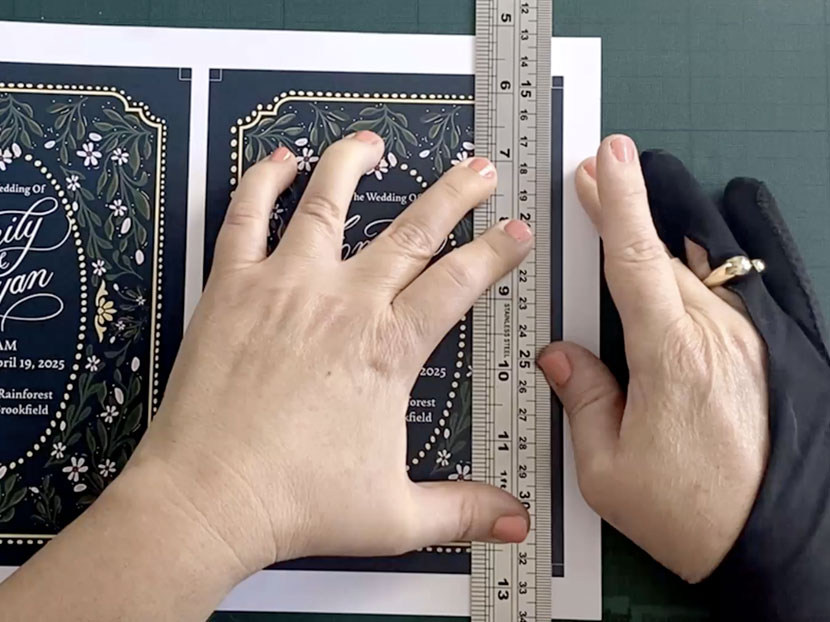
- Trim with a metal ruler cutting mat and blade (Stanley knife):
- Align the ruler with trim marks.
- IMPORTANT! Don’t cut all the way through; start about an inch into the page area and don’t complete remove the edge – this will mean your crop marks remain attached for the next cuts.
- Rotate your cutting mat if needed for better control.
Your Beautiful Wedding Invitation is Ready!
And that’s it! Your beautifully designed, professional-quality invitation is ready to send to the guests!
With these techniques and templates, you can easily adapt this design for different events and experiment with your own artistic touches.
