Last week we saw that using blending modes can do wonders to enhance your lettering projects, creating some really amazing results.
There’s something else that make blending modes incredibly useful and can really get you out of a pickle! There’s been more than one occasion when I’ve realised I’ve lettered straight on-top of a white background layer. Meaning the lettering and background are both on the one layer. I can’t then use the lettering with another background because the white background is covering anything underneath!


Learn Calligraphy
on the iPad
from Scratch!
Create stunning calligraphy in Procreate with no experience or special tech skills (even if you have messy handwriting and don’t think you’re creative enough)
WATCH THE FREE WORKSHOPRemove a White Background with Blending Modes
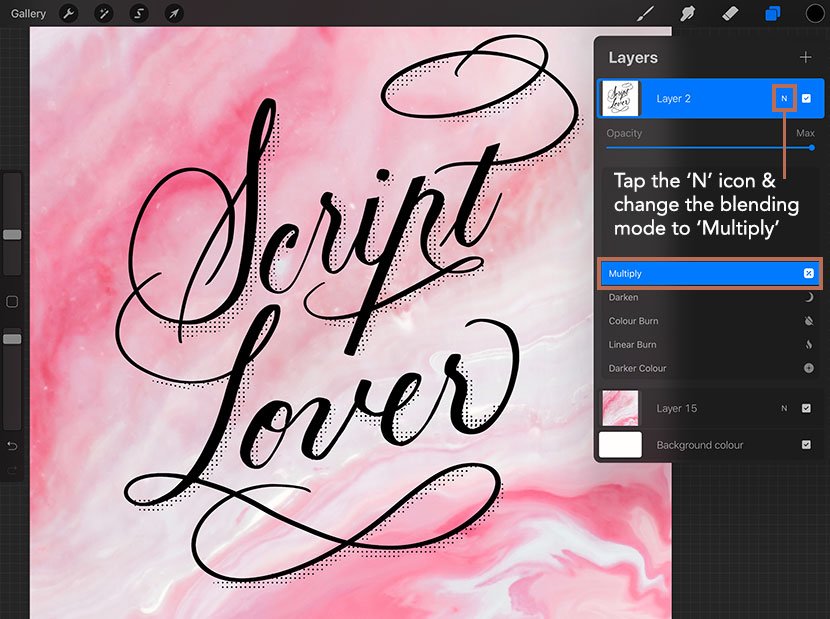
The example project consists of a layer with black text on a white background and a marbled texture layer underneath. We are unable to see the marble pattern below the lettering layer because the white background is part of the layer and covering anything sitting under it.

But it is possible fix this easily without recreating the lettering or using layer masks, with the use of blending modes! You can access blending modes by tapping the little ‘N’ icon on the layer thumbnail. It will expand a scrollable panel of options to choose from.
Change the blending mode of the lettering layer to ‘Multiply’ and you’ll see it completely knocks out the white background, leaving you with lettering on the marbled background.
A very quick and easy fix!
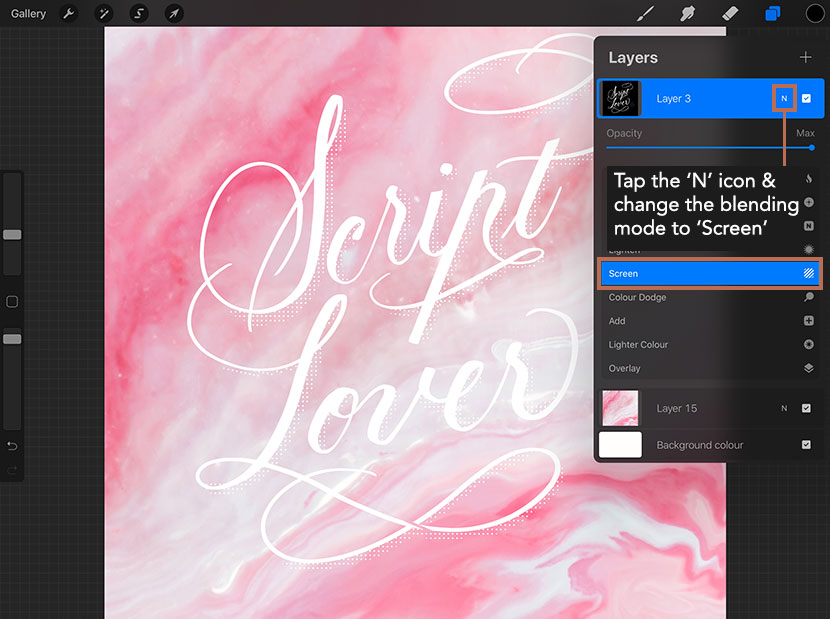
Remove a Black Background with Blending Modes
So we can do it with white backgrounds, what about black? It works just the same, only we use a different blending mode. Set the blend mode of the layer to ‘Screen’ and it will remove the black background!

And that’s it! Such a simple but useful trick to know about for those times you need to remove the background from a layer!

Bożena
…thank you very much…
Nicole Mauloni
You’re so welcome, thanks for reading!