A trick to bring very interesting effects to your projects is the use of blending modes. Blending modes are a group of options that affect the way two layers blend together. You can change the mode on one layer, or both.
There are a variety of options to choose from that vary in intensity. Some just bring a slight change to the tone or edges of the image, whereas others will dramatically change the look, appearing as if you put it through a filter.
There are descriptions of the different blend modes and what they do in Procreate Handbook. While it’s useful to skim through these, don’t worry too much about memorising them. You can easily cycle through the different modes to see which suits your project best. It doesn’t make any permanent change to the image either, so you can always set it back to ‘Normal’ mode. One setting might work well for one project, but not so well for another. So in most cases, it’s a matter of trial and error.


Learn Calligraphy
on the iPad
from Scratch!
Create stunning calligraphy in Procreate with no experience or special tech skills (even if you have messy handwriting and don’t think you’re creative enough)
WATCH THE FREE WORKSHOPHow to change the blending mode on a layer
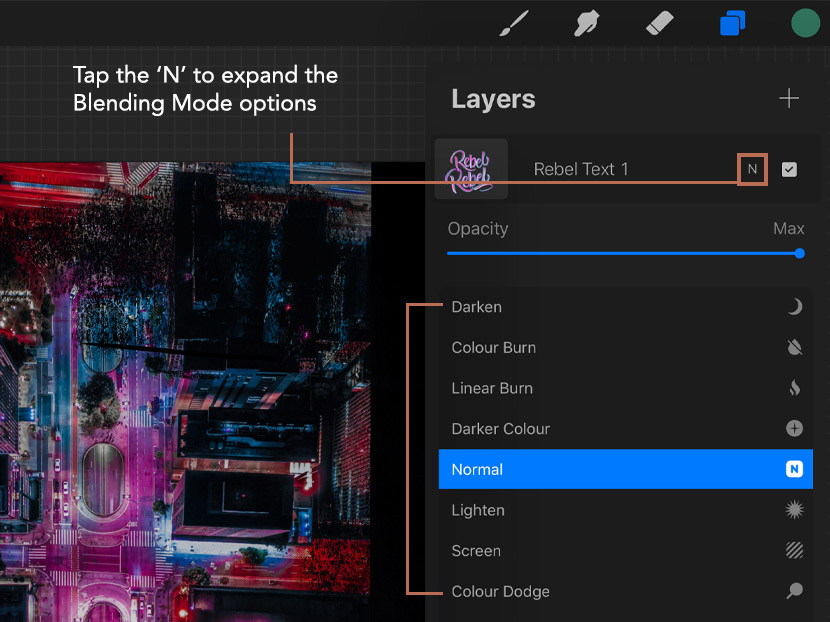
Have you have wondered what that little ‘N’ on your layer thumbnail means? You’ll be glad to hear we’re about to find out! The ‘N’ stands for ‘Normal’ mode. If you tap the ‘N’, a panel expands revealing the settings for that layer. Along with the opacity, you’ll see this is where you can change the blend mode.

While you’ll still see some modes alter the image on it’s own, to get the most impact it helps to have another layer below to interact with. This can even be a duplication of the same image. You’ll get some interesting effects if you change the blending modes on both layers.
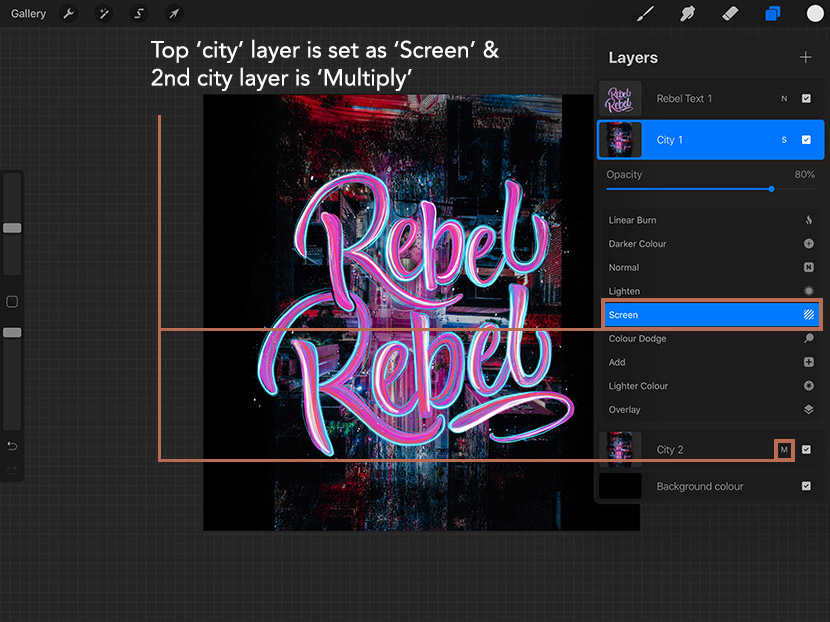
If you see the example below, I have the the city image set on ‘screen’ mode (with the opacity turned down to 80%). This makes some nice adjustments to the image in terms of brightness. I then change the blending mode on a duplication of the city layer to ‘Multiply’. These layers interact creating some lovely darkened areas, making it a perfect background for my lettering!

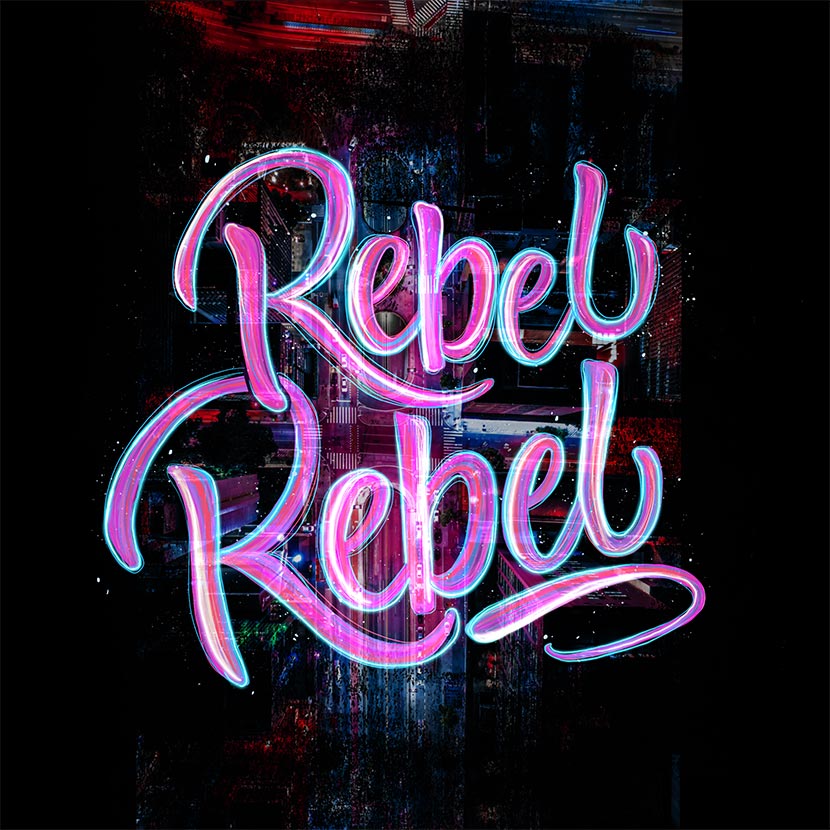
I then created a duplicate of the lettering layer so I have two copies. I set the top version to ‘Add’, which cranks up the brightness and brings the city image shining through. I set that layer’s opacity at 80% to tone it down slightly.
I then set the bottom version to ‘Color burn’ so the areas below the lettering will deepen and show through.

And that’s it! Just by changing the way the layers blend together, you can really enhance an effect and get a great result!
And here is a link to the city image I used in this project.
I hope you enjoyed today’s tutorial. Let me know in the comments if you plan to use blend modes for your projects!

Toni
Great tutorial and thanks for the link to the procreate handbook for future reference! Definitely would use this in future projects.
Nicole Mauloni
Thanks Toni, glad you liked it!
Bob Cobb
Thank you, these tips and tutorials are inspirational. I’m listening, (with my eyes of course 🙂 )
Nicole Mauloni
Excellent to hear Bob, thanks so much 🙂