Last week was the release of a new Shapes and Ornaments Brush Pack for Procreate. If you missed it, you can see a summary of over 100 brushes included here. A massive thank you to all of you who have purchased so far! I was blown away by the response and really appreciate your support.
If you haven’t got your copy yet, you’ll be pleased to hear I’ve extended the Early Bird discount by another 48 hours, so there’s still time to save 20%! (Offer expires 24th June)
What We’ll Be Making
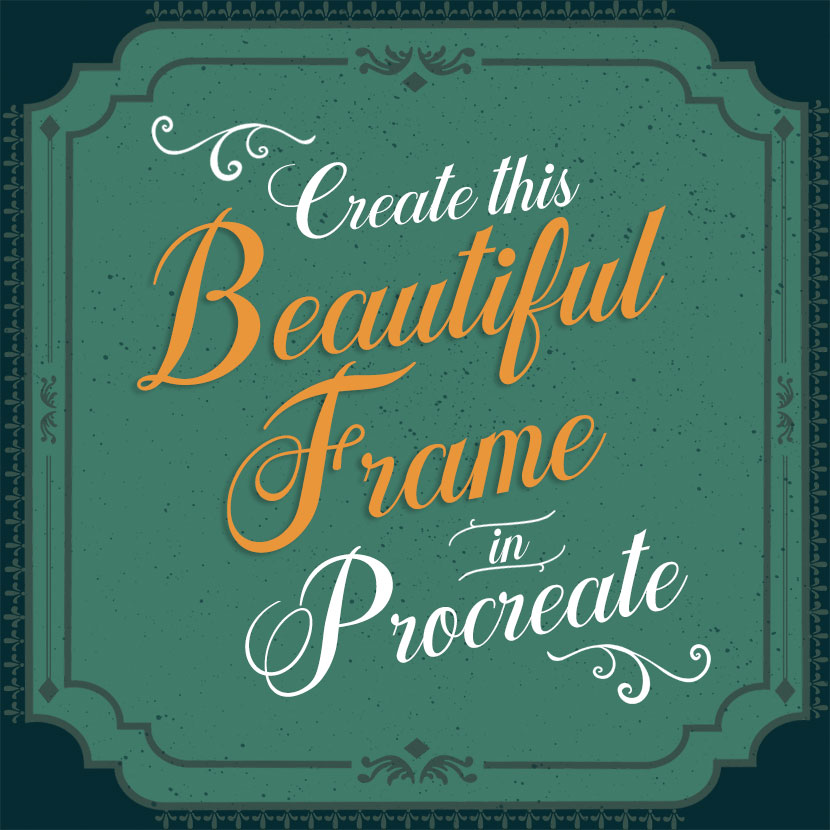
In this tutorial, I’m going to show you how easy it is to combine a few of these brushes to create a beautiful vintage style frame.
If you don’t own the brushes, this will still be a useful tutorial for you. It will just require extra time drawing the individual elements.
Below you’ll find a video, written version of the instructions as well as a PDF to download to save for later.
1. Set Your Background Colour
Step 1
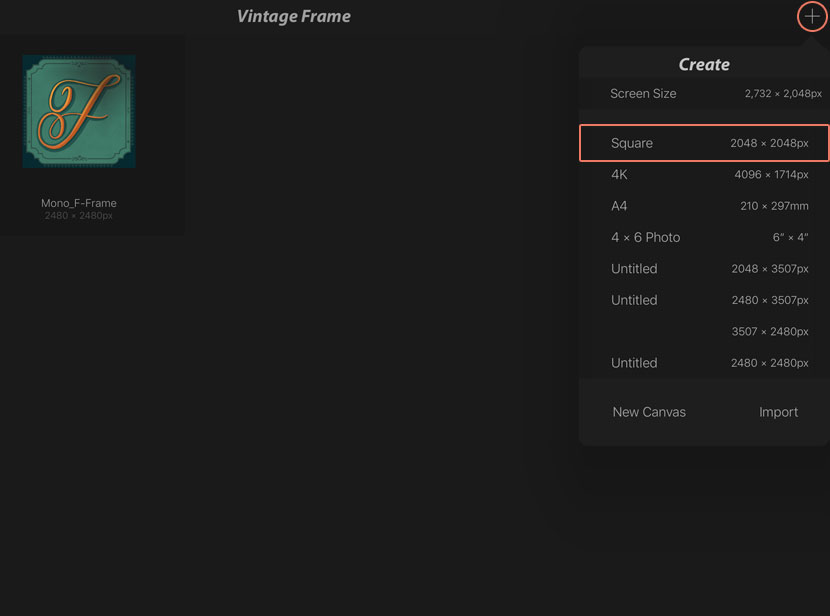
Start by creating a new document in Procreate. Tap the + icon in the top right of your screen and choose ‘Square 2048 x 2048’ from the Create Panel.
Step 2
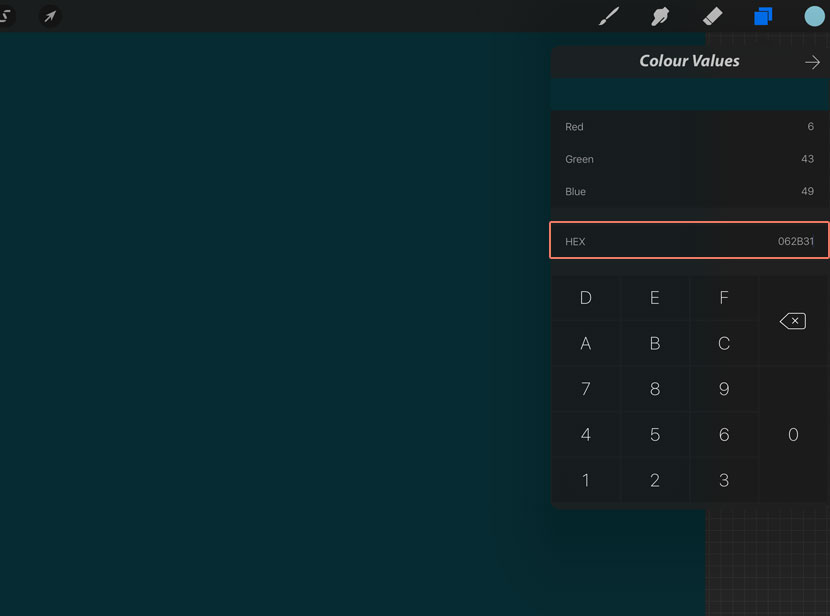
Now change your background colour to a bottle green. Do this by opening your Layers Panel and tap the ‘Background Colour’ layer. You’ll see the colour wheel. Tap on the three lines icon on the left side and enter the following code in the ‘HEX’ field – “062B31”.
2. Create the Base Shape
Step 1
Change your colour setting to a lighter green – HEX ‘407B69’. (Tap the colour circle in the right corner of your toolbar and navigate to the ‘Colour Values’ screen).
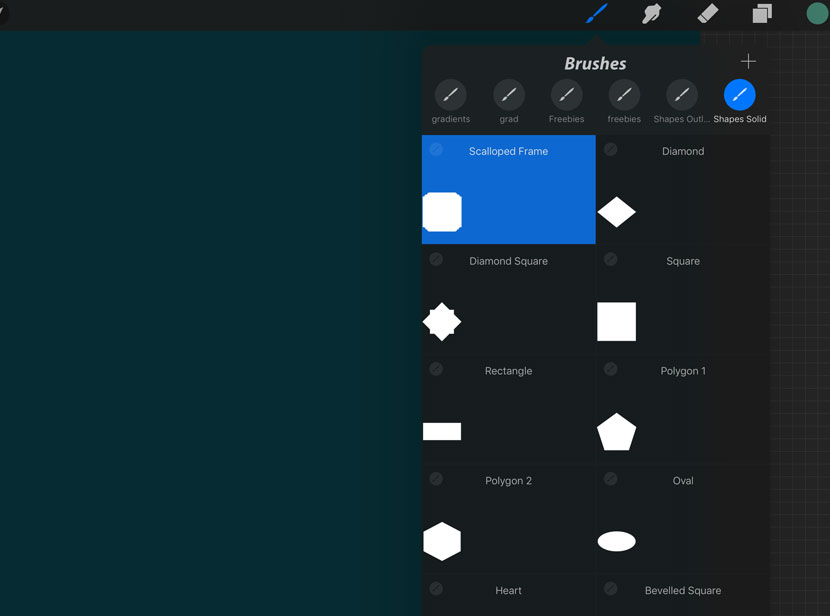
Now we’ll ‘stamp’ the base shape of our frame with one of the solid shape brushes included in the Ornaments pack. Select the ‘Scalloped Frame’ brush from your brush panel.
Step 2
Check the size of your brush by doing a quick tap on your screen. You may need to increase or decrease the setting to give a fairly snug fit inside the canvas. You can do this by adjusting the top slider on the left side of your screen.
Leave an even amount of buffer space on all sides (we’ll be adding a border design to this area in the next step).
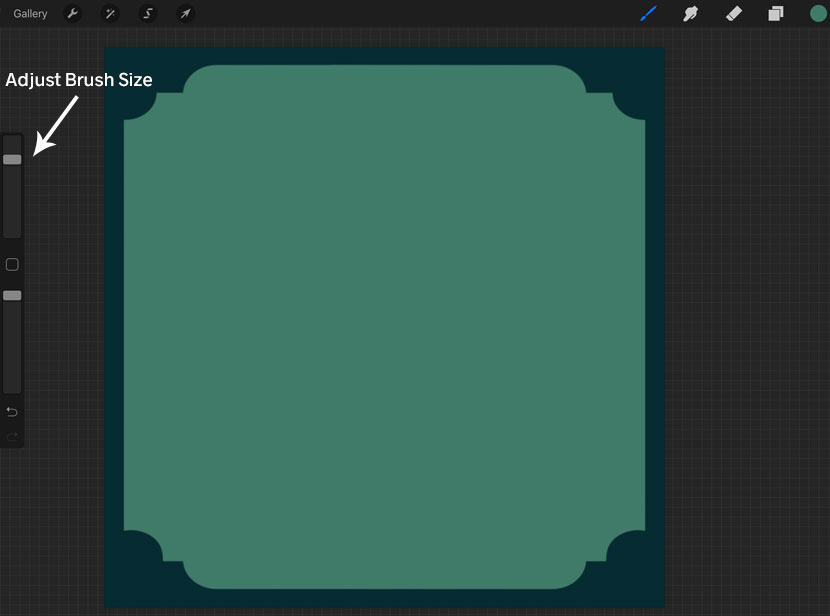
If you need to resize your shape layer with more precision, you can choose your Arrow tool (in the top toolbar) and ‘pinch’ the layer in or out to adjust. Only do this when scaling in fairly small amounts, otherwise you will lose the sharpness of the shape.
Move the shape to centre it on the canvas as best you can.
Quick Tip: It can be tricky to get an accurate control when moving a shape with your fingers. To move the position by small amounts, simply select the Arrow tool and ‘tap’ on the canvas (outside of the layer’s bounding box) in the direction you want to go. This will nudge your layer in very small increments giving you a much finer control.
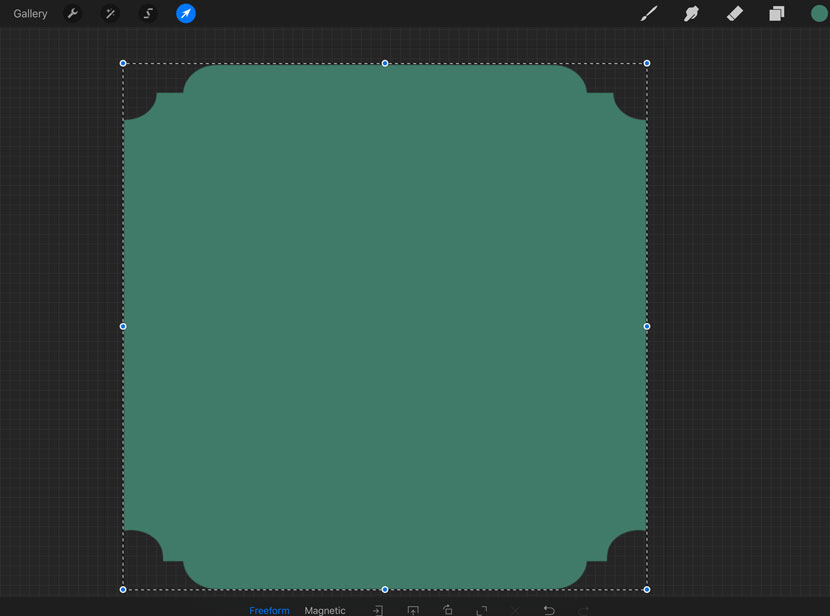
Quick Tip: If you turn off the visibility of your background layer, you’ll see the canvas grid which will help guide you when aligning the shape horizontally and vertically.
Step 3
Next we’ll add a darker stroke outline to the base shape. Change your colour value to HEX ‘37514A’.
Add a new layer by opening your layer panel and tapping on the ‘+’ icon.
Now select the brush called ‘Scalloped Frame Outline’ from your Shape Outline Brushes.
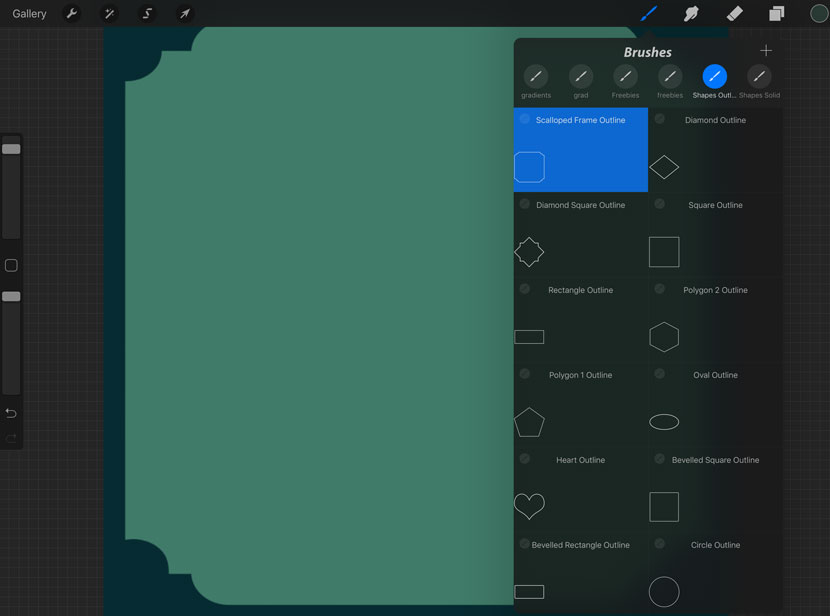
Step 4
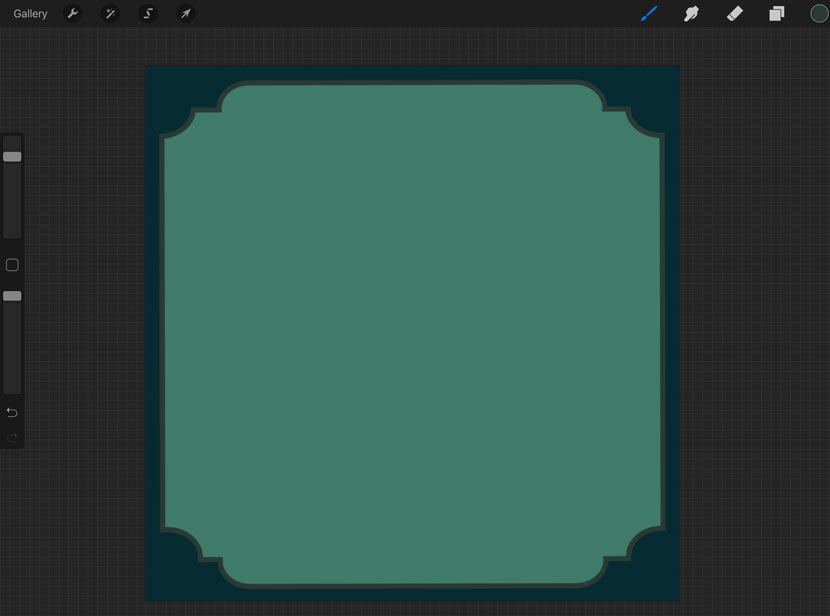
Stamp your outline as close to the size of the solid shape as you can. Then scale slightly and move it into position if needed (refer to the previous steps for adjusting the size and position tips).
Step 5
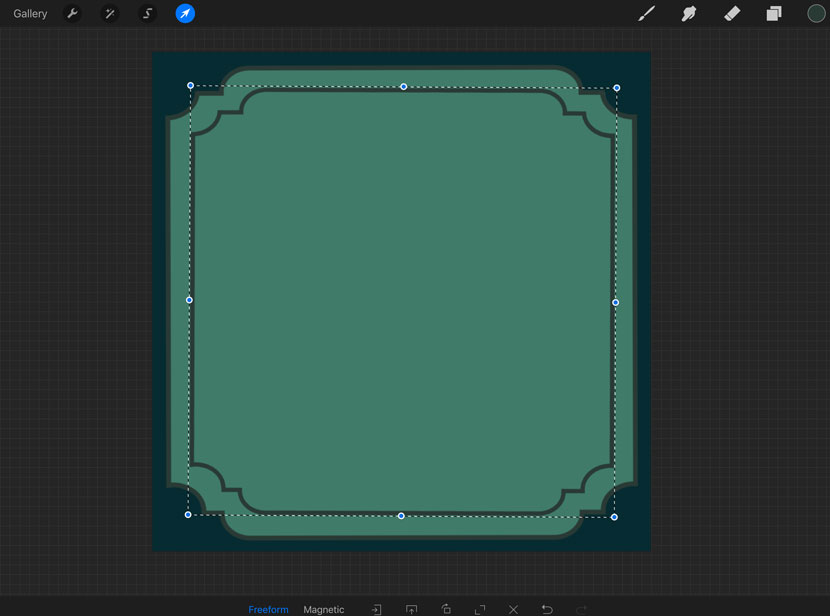
Duplicate your stroke layer by opening the layer panel and swiping right on the layer thumbnail with your finger. Tap on ‘Duplicate’.
Scale this second stroke layer down slightly to fit centered inside the frame with a little space between the two outlines. (Arrow tool, use a pinch gesture inwards.)
3. Create the Border Edges
Step 1
Now we’re ready to add a border design to the outer edge of the frame.
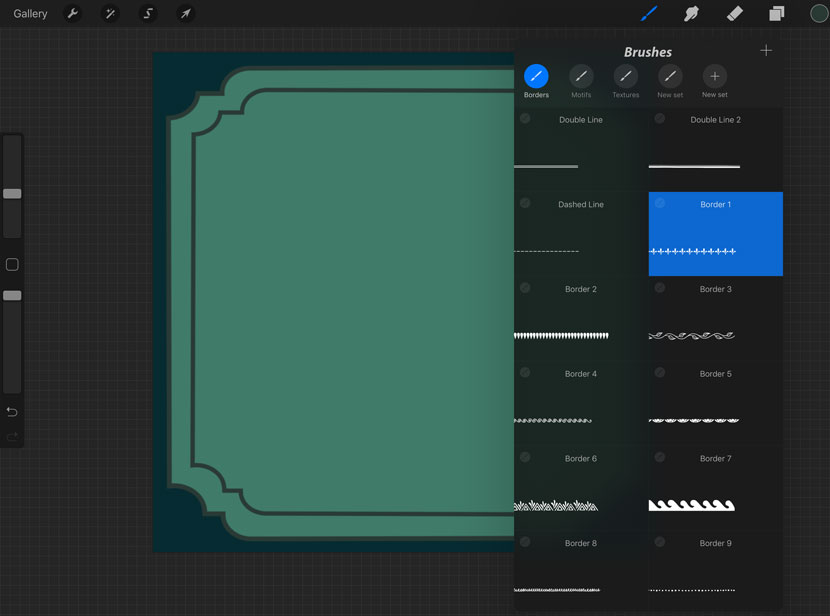
Create a new layer, then select the brush called ‘Border 1’ from the Ornaments Pack.
Step 2
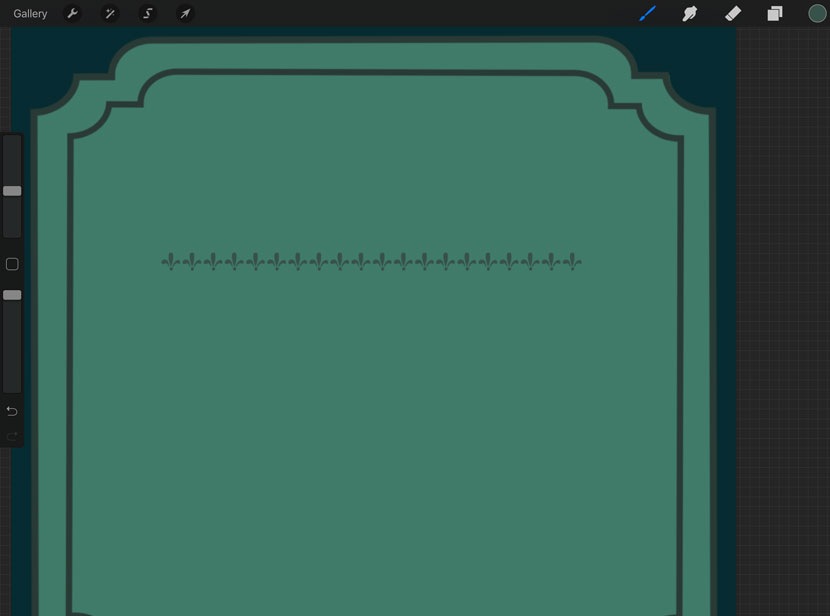
Stamp the border design on your canvas. Don’t worry about the positioning or length of this for now, just play around with the brush size until you are happy with the height of the design.
It should be a small enough to fit the space between your frame shape and the canvas edge.
Step 3
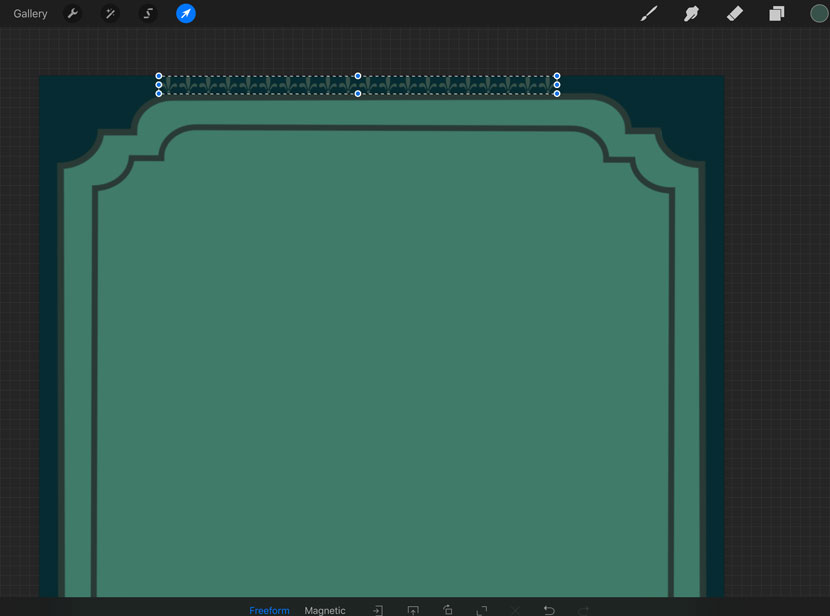
Choose your Arrow tool and move the border to the top left outside of your frame (where the bevelled edge straightens out). The dots at the bottom of the border can touch the edge of the frame.
Step 4
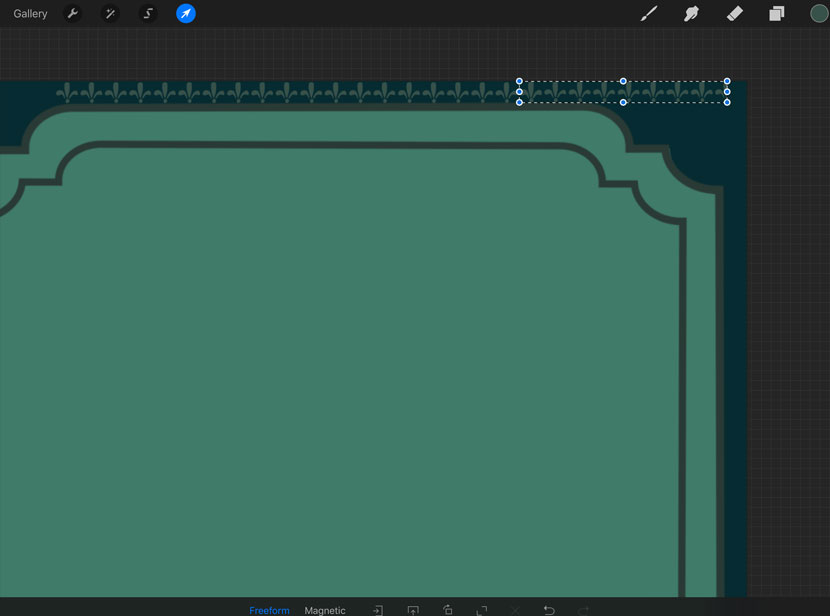
The easiest way to extend the length of the border is to duplicate the layer and position this at the end of the first.
To make sure it’s all lined up nicely, overlap the first design motif with the last motif of your original layer.
Step 5
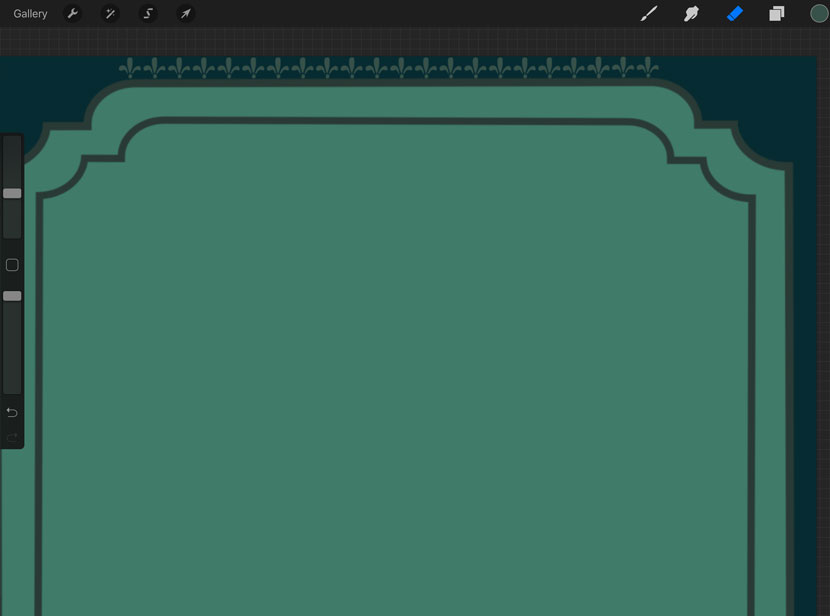
Now choose your eraser and rub out any overflow of the second border layer. You now have a lovely border edge!
Merge these layers by ‘pinching’ their thumbnails together in the layers panel.
Step 6
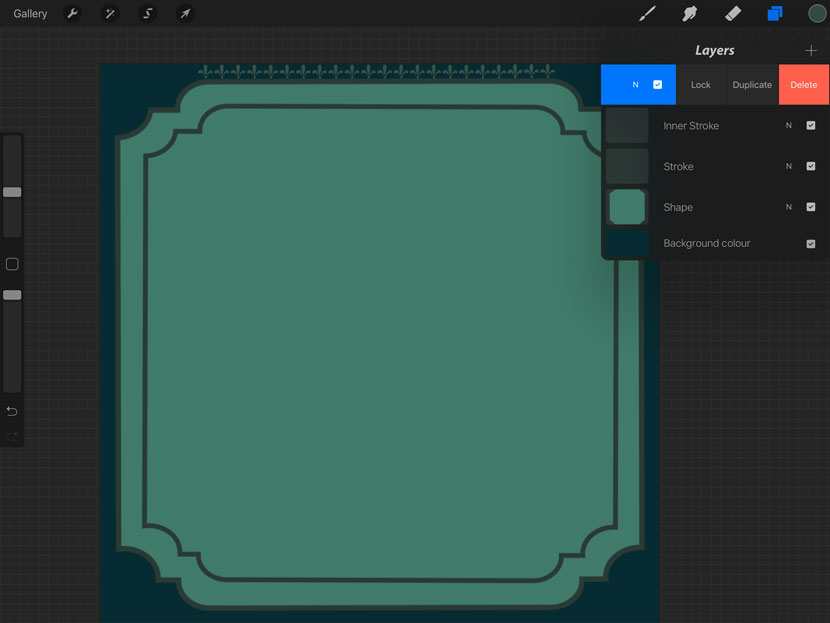
We now want this same border around the other sides of the frame. To ensure it is a consistent size, rather than stamping with the brush again we can just duplicate this master layer and rotate.
Swipe left on the border layer thumbnail in the layers panel and choose ‘Duplicate’.
Step 7
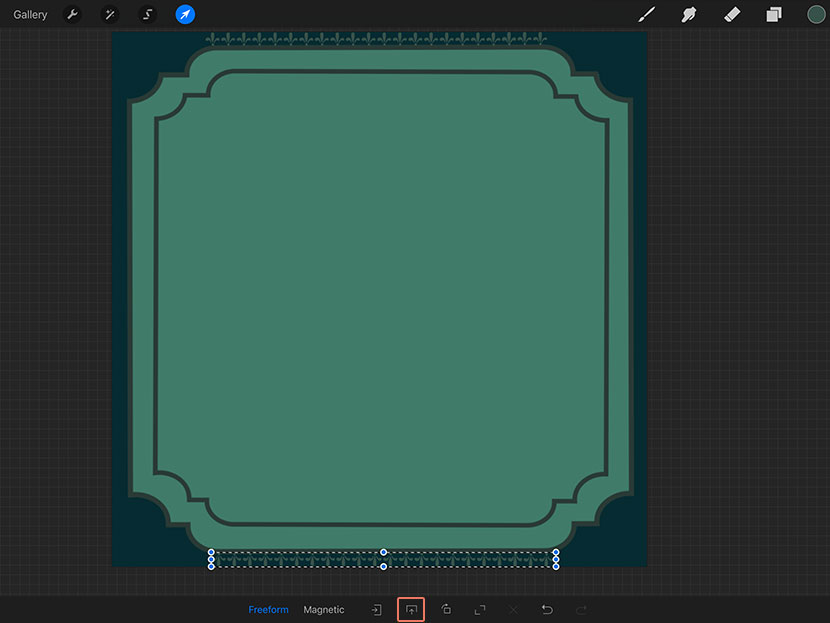
Make sure your new border layer is selected and choose your Arrow tool. You’ll see some options at the bottom of your screen. Tap the second icon from the left to flip the border.
Position it at the bottom of the frame. You can turn off your background layer to see the canvas grid if you need a guide to align it with the top version.
Step 8
To get our vertical border edges, we’ll repeat this duplicating and flipping method.
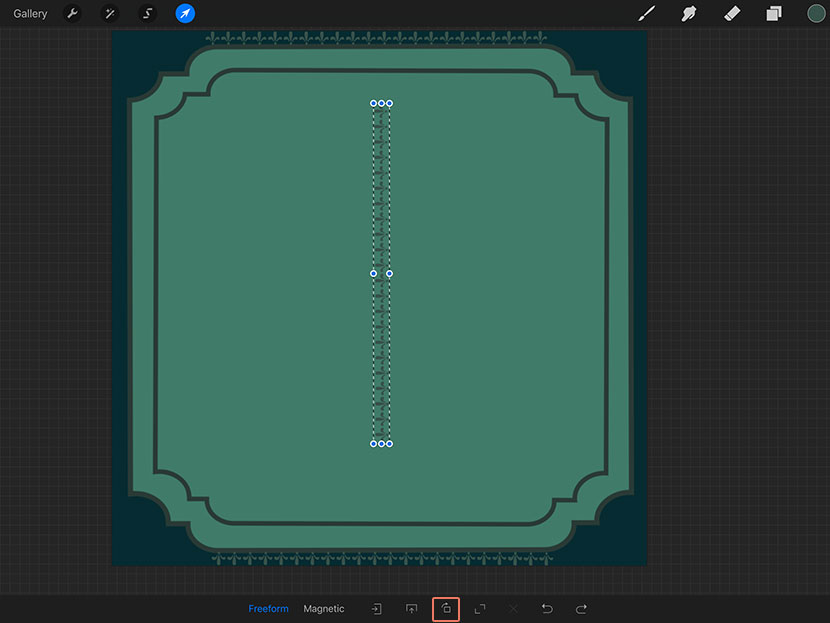
So go ahead and duplicate your border layer but before you rotate it, move it to the middle of your canvas. The reason for this is, once you rotate it and deselect the shape, any parts that extend outside the canvas area will be deleted. So this just gives you more space to flip the angle without it going off the edge.
With your border in the center of the screen, and your move tool selected, hit the rotate button twice (3rd icon from the left in the bottom toolbar).
Step 9
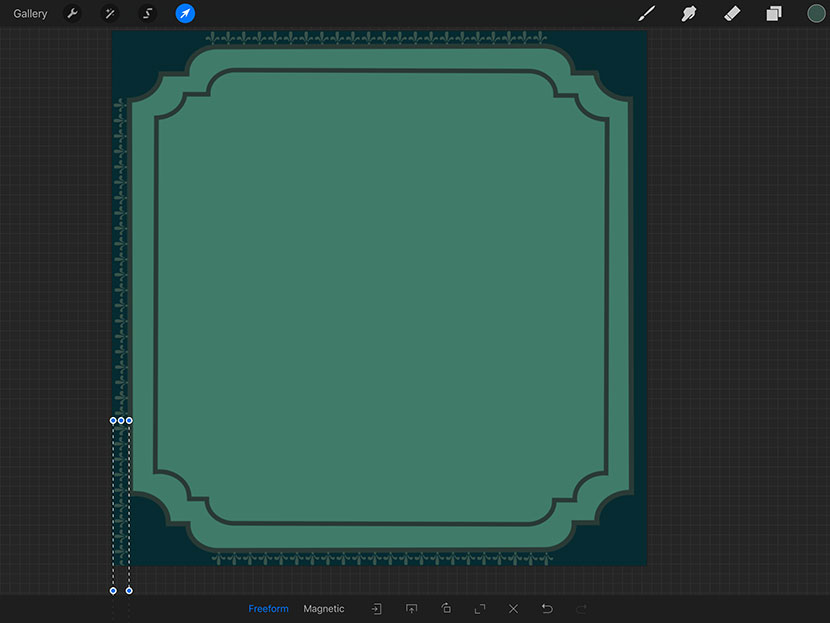
Move your vertical border layer into position starting it from the top left of the straight edge of the frame.
Use the same method as the top border (step #4 & 5), duplicate it and position to fill the space. Erase any overflow and merge the layers.
Step 10
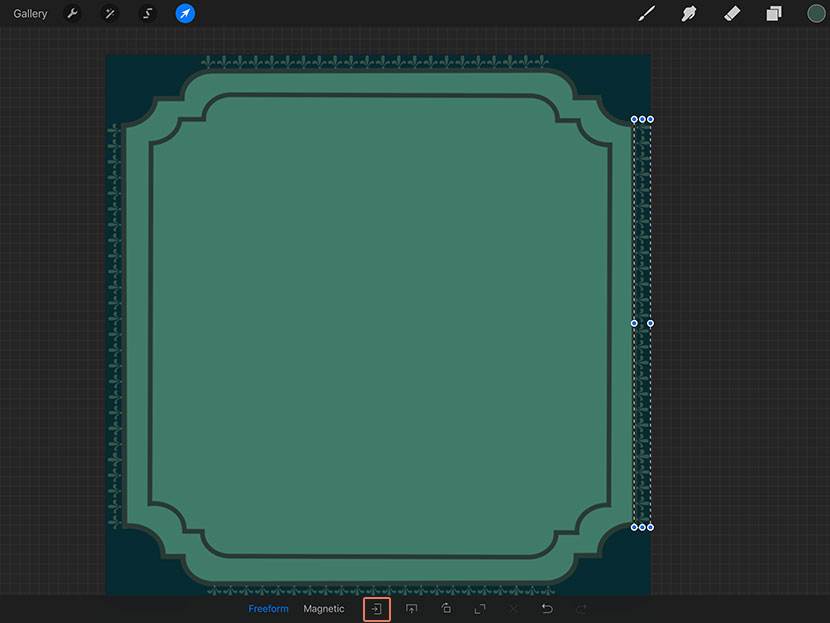
Duplicate your left border and with the Move tool selected, hit the flip button to rotate. Place this on the right edge of your frame.
The body of your frame is complete – well done!
4. Create the Inner Border
Step 1
We’re almost finished. Just a couple of decorative touches left to add!
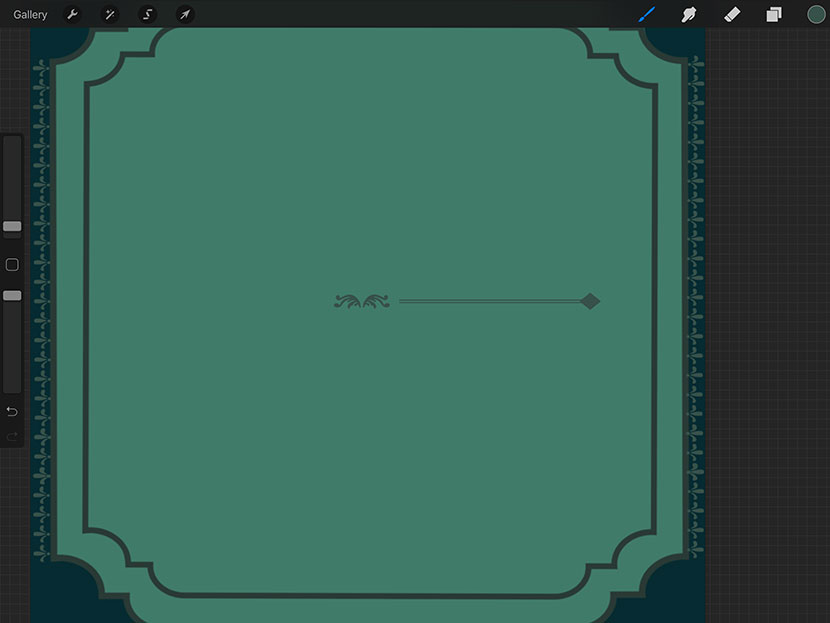
We’ll now add a border to the inner frame on the left and right sides by combining a motif brush and the Diamond shape brush. We’ll assemble this horizontally and rotate it into a vertical position when it’s ready.
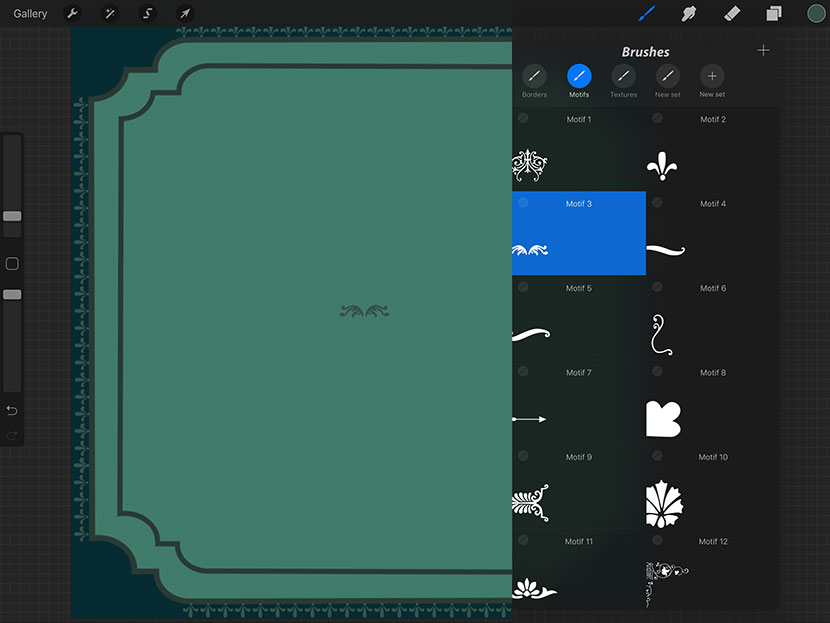
Create a new layer and make sure your colour is still HEX 37514A. Select the ‘Motif 3’ Brush.
Stamp your motif at a fairly small size toward the center of your canvas.
Step 2
Now create another layer and choose the ‘Double Line’ Brush (from your Border Brush Set). Stamp on the right of your motif at a fairly thin size. Nudge into place so it’s centered vertically with your motif design.

Step 3
Create a new layer and choose the ‘Diamond’ Brush from your Solid Shapes Set. Decrease the size of the brush to just above the minimum size and stamp the shape. Stamp it anywhere on your canvas, and then use the Arrow tool to move the diamond to the end of the double line.
Step 4
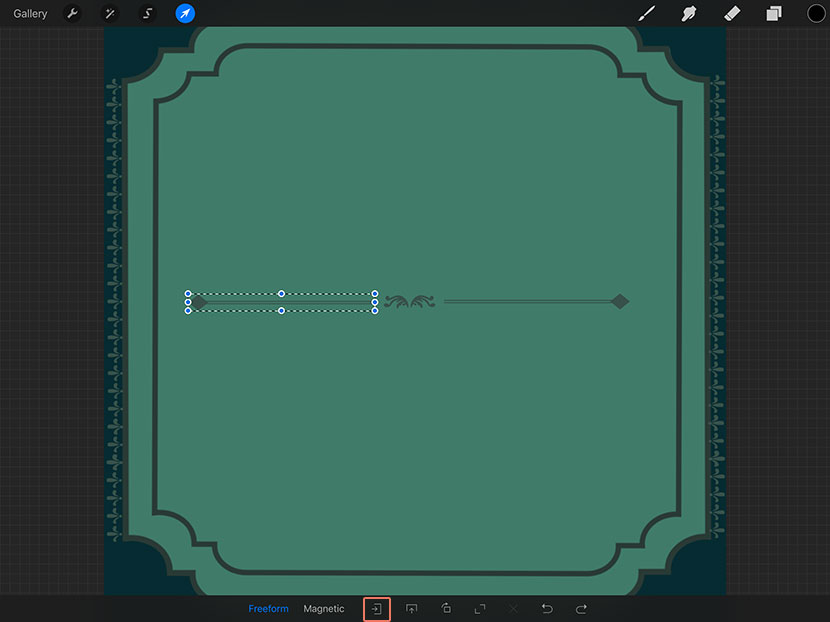
Next, merge your Double Line and Diamond layers (by ‘pinching’ the thumbnails together from your layers panel).
Then duplicate this merged layer.

Step 5
Choose your Arrow Tool and tap on the Flip button (first icon in the bottom toolbar). Move the reflected layer into position on the left side of the motif.
Step 6
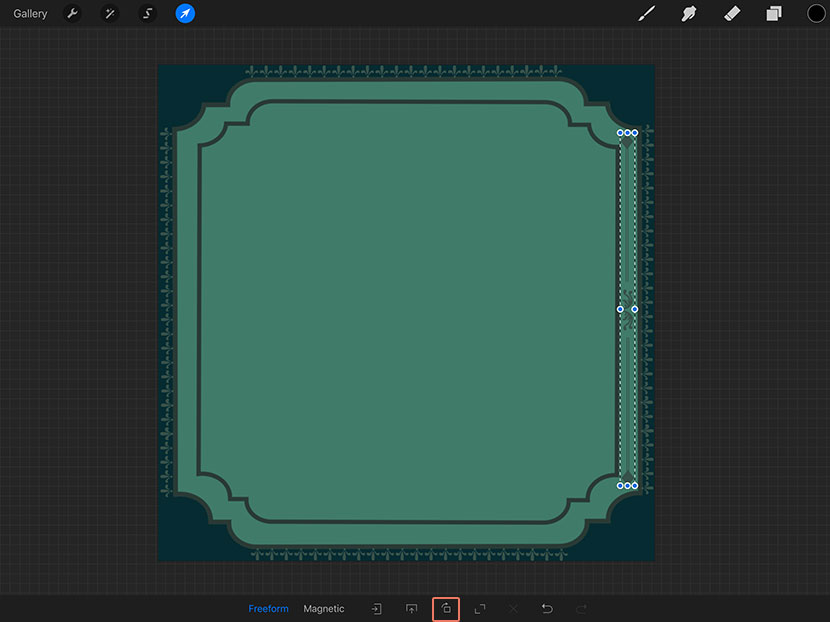
Now merge all components of this side border, by pinching them together from the layers panel.
Select your Arrow tool, and rotate the layer vertically, by tapping the 3rd icon from the left (in your bottom toolbar), twice.
Move it into place on the right side of your frame between the inner and outer strokes.
Step 7
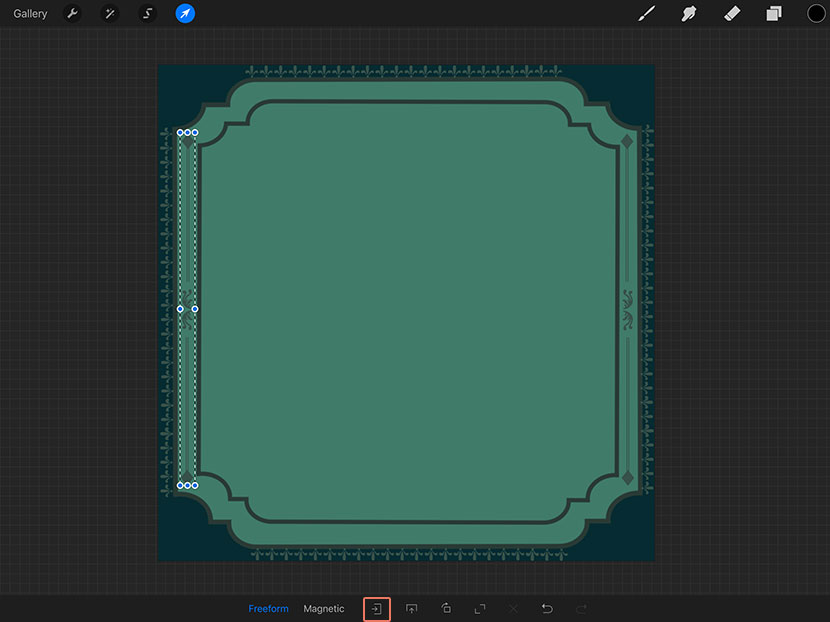
Duplicate this layer, and flip it by tapping the first icon in the bottom toolbar. Move it into place on the left side of your frame. Lovely!
5. Add the Motifs
Step 1
And finally, we’ll add a couple of design motifs to the top and bottom of the inner frame to balance things out.
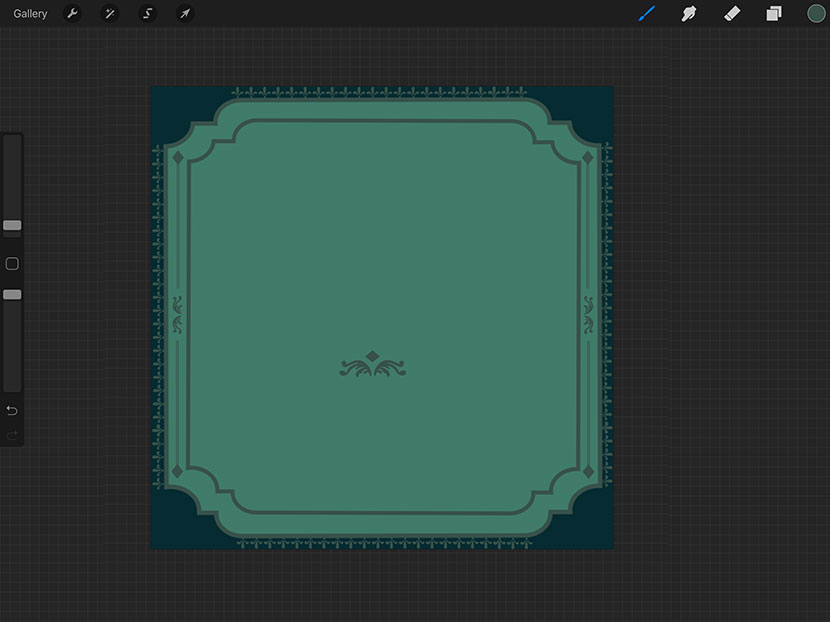
Select your ‘Motif 3’ Brush again and slightly increase the brush size. Stamp this on the canvas.
Then create another layer and choose your ‘Diamond’ Brush from the Solid Shapes Brush Set. Stamp this at a small size, fairly close to the motif in the center of the arches. Because this is on a separate layer, you can easily adjust the position by selecting your arrow tool.
Merge these two layers.
Step 2
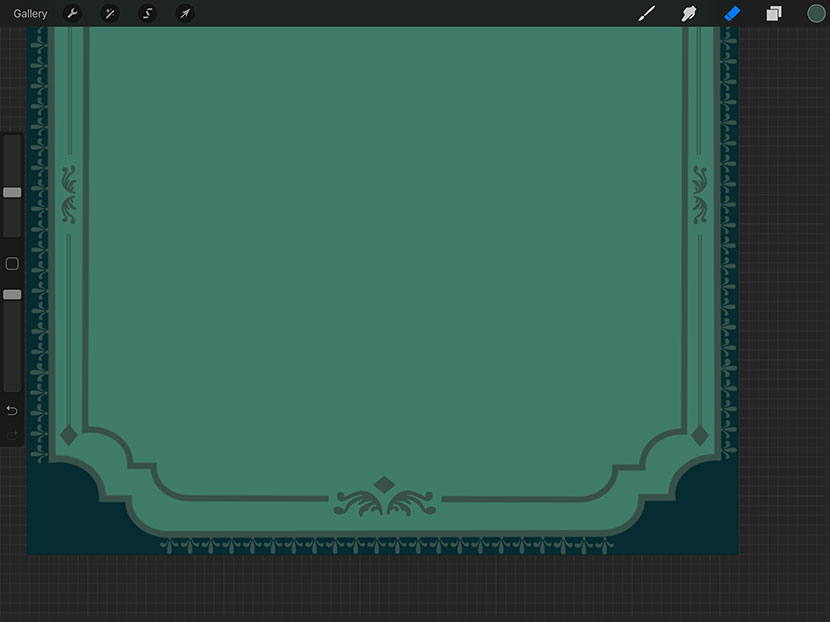
Move the motif design to the middle of the bottom line of your inner frame.
Select the eraser tool, and with your inner stroke layer active, erase the stroke from under the motif design and a little bit of extra space around the edges.
Step 3
Now it’s just a matter of duplicating this layer, flipping it vertically and positioning in the middle of the top line of your inner frame.
Repeat the previous step and erase the inner stroke from the motif area.
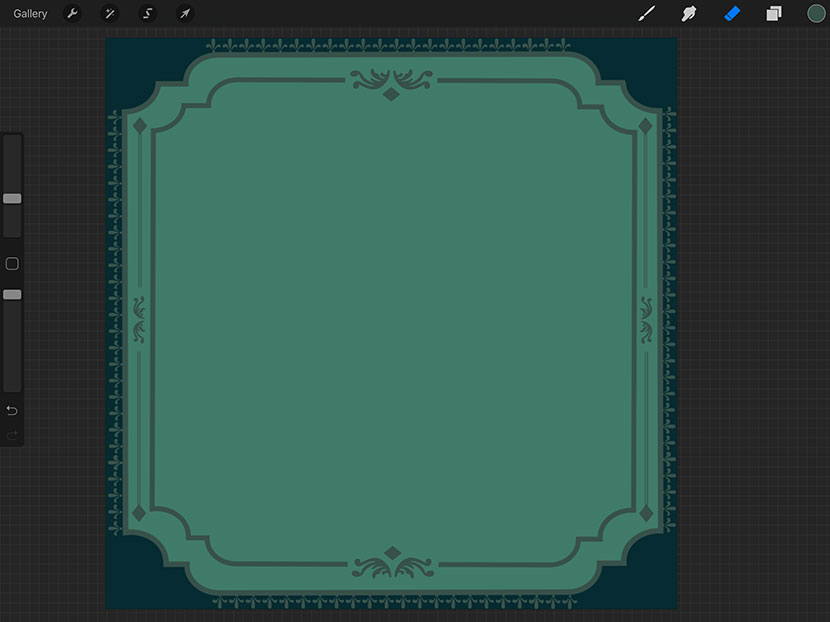
And that’s it!
You now have a beautiful design to frame your lettering. So much easier than drawing these elements individually or importing graphics.
The next step is optional, but I’ll just show you how you can add a bit of texture in Procreate as well.
6. Add Texture (optional)
Under the ‘Textures’ Brush Set, choose a texture brush. I’m using ‘Texture 5’.
Set your colour to the darker green – HEX ‘062B31’.
Stamp the texture on a new layer. I like my texture to be small and sporadic to give the most realistic results. Play around with what works best for you. If you like to keep it small just stamp the canvas a few times to cover the layer. You can also easily erase any larger dots if you want less of those.
Once you’re happy, just reduce the texture layer’s opacity to around 50%. And voila! Easy huh?!
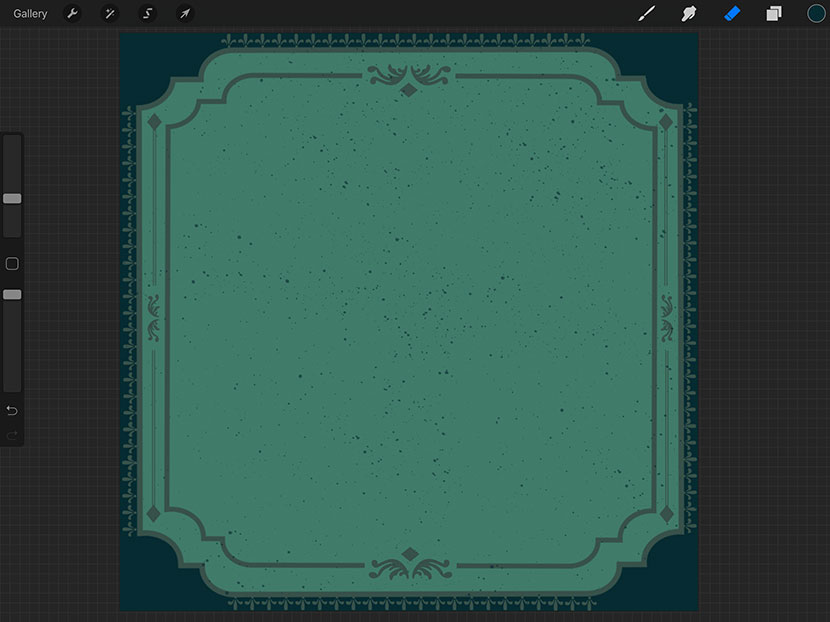
You’re now ready to add some beautiful lettering. I chose a bright orange colour to contrast nicely with the background.
I hope you enjoyed this tutorial and your new brushes! I would love to see what you’re making with them, please feel free to leave a comment below.


Barbara Shakespeare
Really nice tutorial! A great inspiration to my imagination. 👍🏻
Nicole Mauloni
So glad you like it Barbara! Can’t wait to see what you create 🙂