If you follow Procreate on social media, you will have no doubt seen some recent teasers about the upcoming release of 4.1. Savage (the makers of Procreate) were very tight lipped about the launch date, saying only a couple of days ago that they weren’t sure of when it would be released.
They just announced it was available yesterday. Tricksters.
This update is very exciting and delivers some of the most requested features from the Procreate community.
What’s Included
Liquify Filter
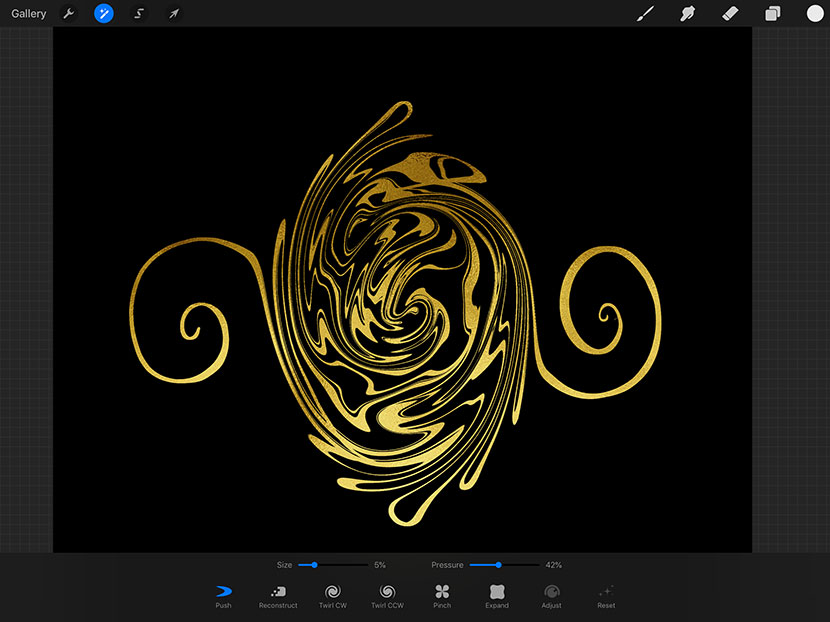
Powered by Metal 2, the Liquify filter is incredibly fast (at 120fps) allowing a flawlessly fluid and intuitive experience. Push, pull, pinch and twirl your artwork!
How to access:
To access the Liquify settings, tap on the magic wand icon to access your ‘Adjustments’ toolbar. Choose ‘Liquify’ from the menu.
You’ll see a panel appear at the bottom of your screen with five different types of liquify options : Push, Twirl Clockwise, Twirl Counterclockwise, Pinch and Expand. Push and Twirl are definitely the stronger of the options.
You can also scale the ‘Pressure’ (ie. how strong of an effect you want) and the Size (ie. size of the area you want to liquify). There is also a ‘Reconstruct’ button, which allows you to go back over the area and ‘repair’ by lessening the effect a bit at a time. Or you can also choose to ‘reset’ and completely undo the effects.
Note: these reset options only work while you are still within the filter settings. If you do something else, such as delete a layer or paint on something, then return, the reset options are no longer available.
Warp Transform
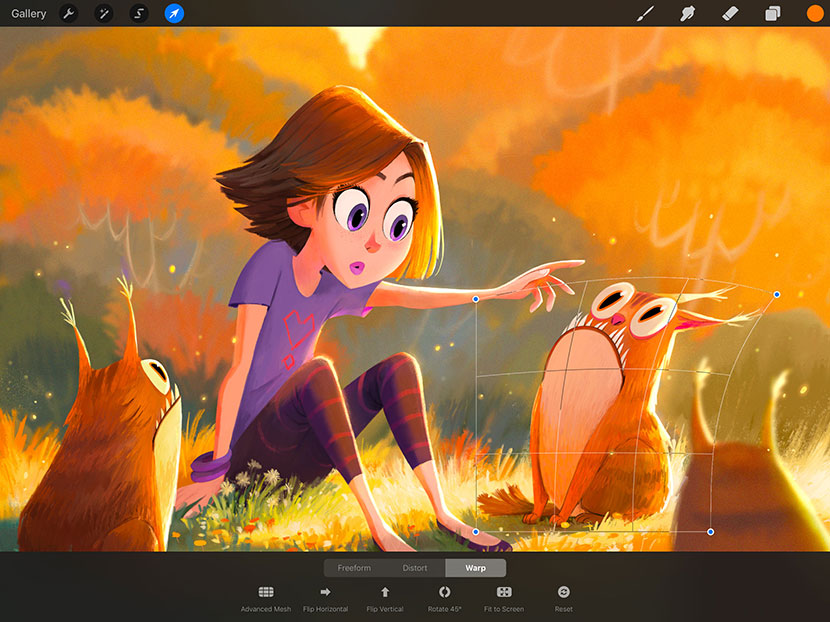
The Warp Transform settings wrap, fold and curves layers into position like never before. This is very powerful with lots of options for lettering!
How to access:
When you select the arrow icon in the top menu bar, the transform options appear at the bottom of your screen. You’ll see three tab settings : Freeform, Distort and Warp. You’ll be familiar with Freeform, though the button actions have been redesigned to be a lot clearer (flip horizontal, flip vertical etc) and you can now ‘fit to screen’.
The warp effect itself can be used in Freeform and Distort transform modes, giving you adjustable nodes that controlling different areas of the object. You are able to fold and curve shapes or layers around on themselves. It really is a lot of fun to play with.
Within the Warp settings, tap the ‘Advanced Mesh’ to bring up 16 individual nodes, giving you a much finer control.
All transform actions can be undone by choosing the ‘Reset’ option. Like in Liquify, this will only reset while you are still within the filter itself. Go out and make another action, and you won’t be able to use that button (though you can still undo).
PS. Stay tuned, I’m working a new kit to make special use of this awesome new feature.
Live Symmetry
This is such a great addition! Like you have probably seen all over instagram with apps like iOrnament or Amaziograph, Procreate now offers symmetrical tools! Perfect for intricate mandalas or even refining parts of an illustration. Even more fun to see lettering in double!
How to access:
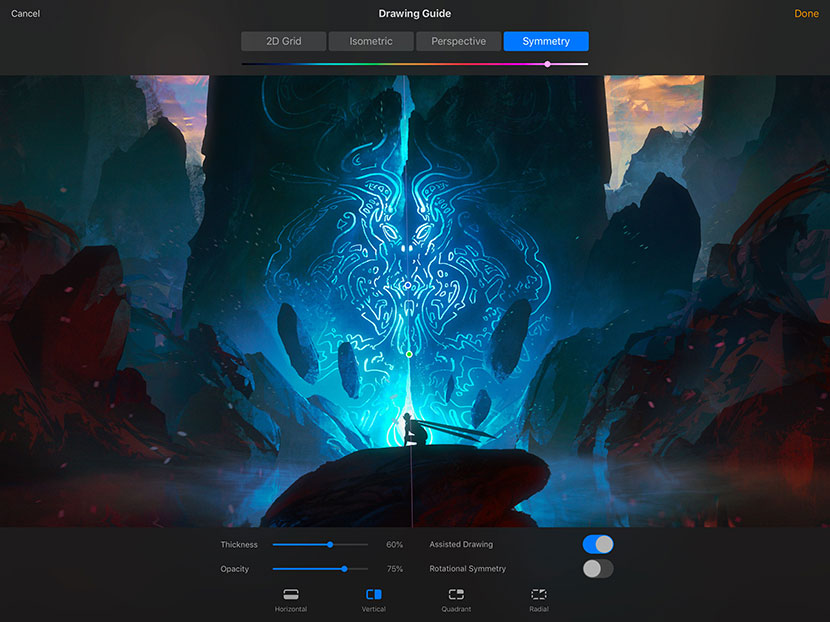
To access the symmetry options, tap on the spanner icon in your top toolbar to access your Actions Panel and select the ‘Canvas’ tab. Turn the ‘Drawing Guide’ toggle on. Then tap on ‘Edit Drawing Guide’ just below it. You will then enter the editing guide screen. There are several assisted guide tabs here and you’ll see Symmetry at the far right.
Something to understand before going further – this screen mode is to edit your guidelines set up only. You don’t actually draw on the canvas in this mode. It’s only for adjusting the settings. When complete, you return to the canvas to draw using your guidelines or symmetry set up.
So, now that’s understood, back to the Symmetry tab! You’ll see you can change the guideline colour (using the slider at the top), and adjust the ‘Thickness’ and ‘Opacity’ using the sliders at the bottom. At first, I thought these were to adjust your stroke attributes, but like I said, this screen is just for your guidelines (I found that out the hard way after spending 5 minutes trying to write on screen. Just trying to save you time).
If you want to get some intricate type mandalas, try out the ‘Radial’ setting. It will repeat in each quadrant of your canvas creating some really interesting designs!
The Drawing Assist toggle should be switched on. You’ll see if you tap on the layer thumbnail from the layers panel when back in the regular canvas, you can turn it off again, and your strokes won’t be mirrored. This allows you to switch in and out of the symmetry mode with ease.
Once you are finished in the setup window, you choose ‘Done’ in the top right to exit the set up and return to the canvas to create beautiful symmetrical designs.
Other Advanced Drawing Guides
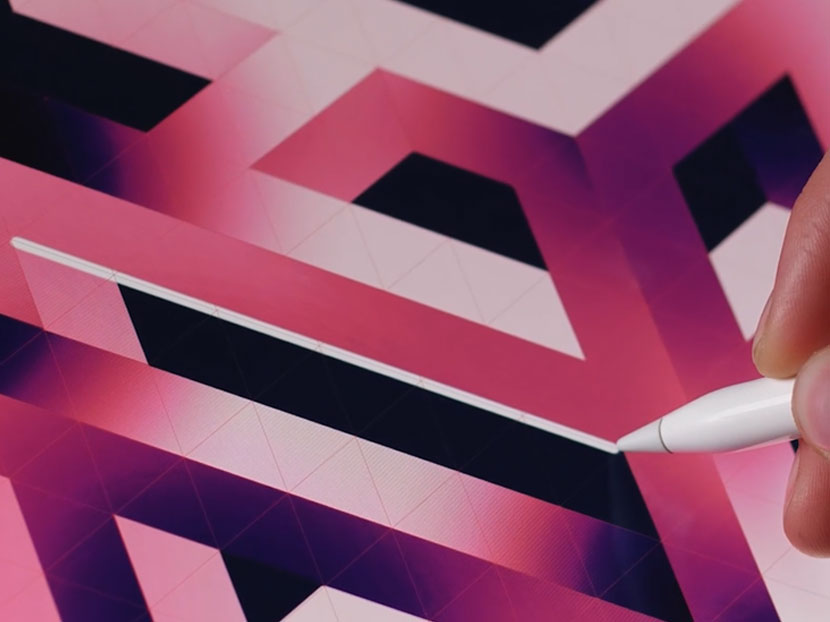
As well as the symmetry tools, there is also an additional set of 2D and Isometric guides added to Procreates perspective tools. You can even input your own measurements so the 2D Grid can be used like a ruler.
How to access:
As per the symmetry tools, tap on the spanner icon in your top toolbar to access your Actions Panel / Canvas tab. Turn the ‘Drawing Guide’ toggle on. Then tap on ‘Edit Drawing Guide’ just below it. You will then enter the drawing guide screen.
The 2D grid is a great help and so useful for lettering. We no longer need to paint a square grid on a separate layer. You can also edit the grid size to enter your own custom amount.
Isometric guides are within this set too. They are super handy for representing 3D space. And of course there’s your perspective grid too – just tap on the canvas where you want your vanishing point to go.
Note, these guidelines are not saved out when you export as a png or other file format. They are only visible from within Procreate.
Advanced Gestures
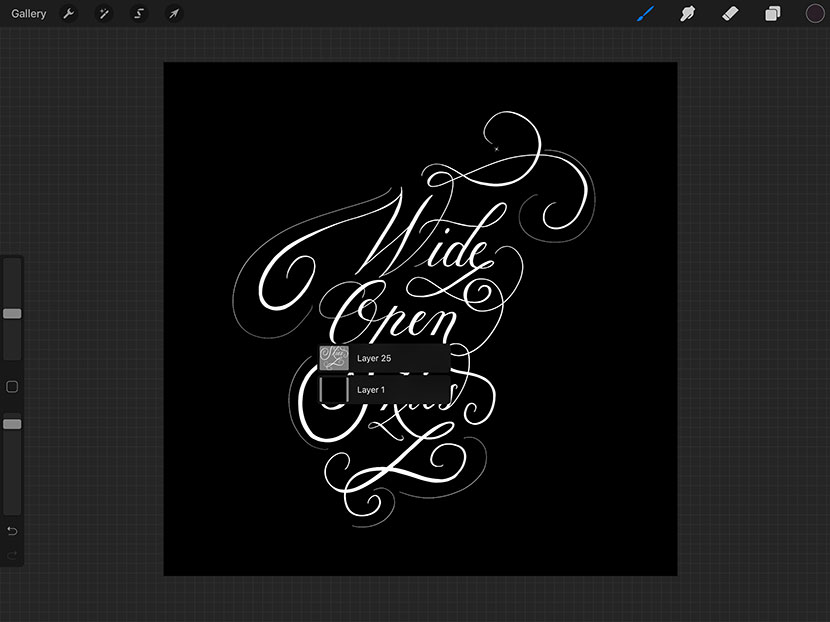
There’s also loads of additional gesture control improvements too. You can set up the ability to select layers by tapping the contents without leaving the canvas – a brilliant workflow enhancement.
Another thing I know you guys are going to love – you can now export and import an entire brush set at once making it a lot easier to install brush kits!
All these great features came directly from the ideas and suggestions board on the offical Procreate forum. It’s a great place to check out and log any ideas you may like to see, as well as vote for your favourites. Procreate take the most voted ideas seriously when working on the feature releases.
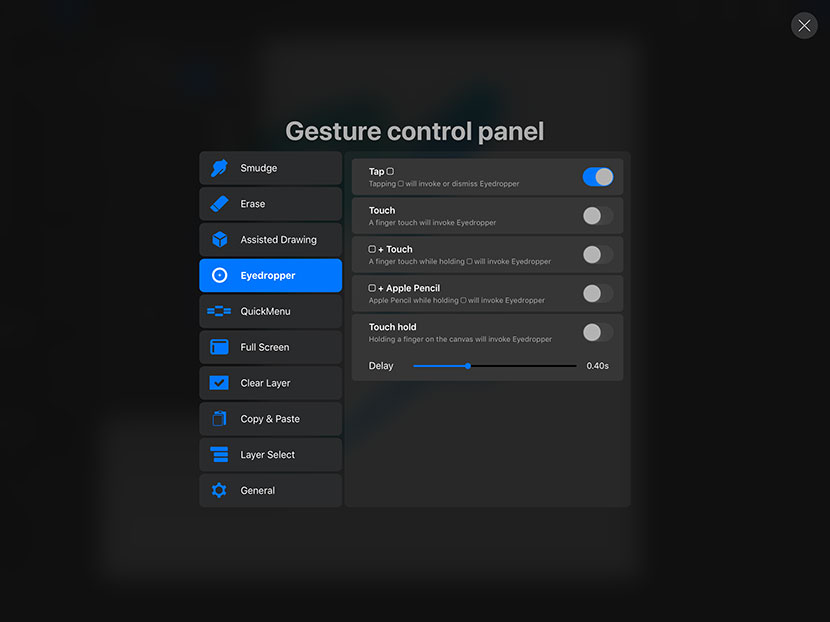
Note: If like me, you went to ☐ + pencil tap on the canvas to pick a colour and it didn’t work, check your Gesture Control Panel settings. Since the update, the default gesture to activate the colour picker changed to just tapping the ☐ (the eyedropper will appear). You can change this if you like under the Actions Panel / Preferences / Gesture Controls / Eyedropper.
Should I Backup Before Installing?
This release is fairly straightforward. I had no trouble installing the update and have not heard of anyone else having issues (from limited searching online and community forums). Having said that it is always a good idea to keep backups of your work, especially if you are part way through a particular workflow you need to keep consistent.
There are no brush engine changes this time though (remember the V4 update – eek!), so your library should stay in tact.
This app just keeps getting better and better. I’m off to explore these new features in more detail and will report back with more soon!
I’d love to hear your thoughts on the new features. Leave a comment below.

Dorothy
I’m glad to have got the email with this post or I wouldn’t have been aware of the upgrade. It’s a pretty exciting one! Having fun playing with the new features. BTW, am also enjoying the tutorial for Copperplate Calligraphy and will be sending a positive testimonial soon!
Nicole Mauloni
Hi Dorothy, that’s great to hear. Thanks for reading and I’m glad to share the exciting news with you 🙂 And thank you so much for the upcoming testimonial – it’s always a big help when people give their feedback so I really appreciate it!
M.H.
I just upgraded to version 4.1.1 and ever since I did that, I can’t get to the preferences. It just crashes every time I tap the monkey wrench icon (I think that’s what’s called the spanner icon).
I’ve updated to the latest iOS, restarted, etc…
Nicole Mauloni
Hi M.H. Sorry to hear the update is causing issues for you. Sounds like you have tried the right steps with restarting etc. Maybe check the discussions on the Procreate forum [https://procreate.art/discussions/4] to see if anyone else is having this issue. You can also email Savage directly and get some troubleshooting help. Matt is very helpful – support@savage.si