Are you ready to unlock the full potential of Affinity Designer 2.5 on your iPad? This guide walks you through the essential tools and features you need to know to use the app with confidence. After reading / watching the article below, you’ll understand the main functionality to take you from beginner to confident designer. Let’s dive in!
Why Choose Affinity Designer?
One of the standout features of Affinity Designer is its seamless switching between Vector Persona and Pixel Persona. This allows you to create sharp, scalable vector graphics and add pixel-based textures or shading, all within the same project – no app hopping required!
Add to that the Command Controller, an on-screen tool that enhances functionality without a keyboard, and you have a creative powerhouse tailored for the iPad.
Best of all, Affinity Designer is a one-time purchase of $19.99, a far cry from Adobe’s $600+ yearly subscription.
You can either watch the Video below, or scroll down to read the full walk-through.
Getting Started: The Gallery Screen
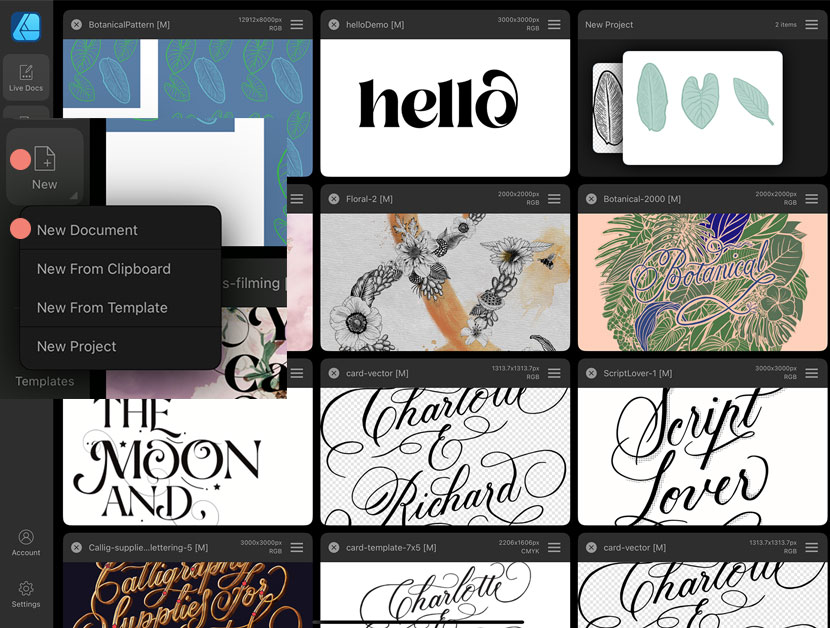
When you open Affinity Designer, you’ll land on the gallery screen. Here, you can:
- Create new documents.
- Import existing projects.
- Access tutorials through the Lessons tab or the Learning Portal under the Help menu.
Pro Tip: Save Your Work
Affinity doesn’t auto-save projects elsewhere. To prevent data loss:
- Tap the hamburger menu and select “Save As.”
- Save to iCloud or Dropbox for easy access and reduced iPad clutter.
- Name files with the project title to keep things organized.
Setting Up Your First Document
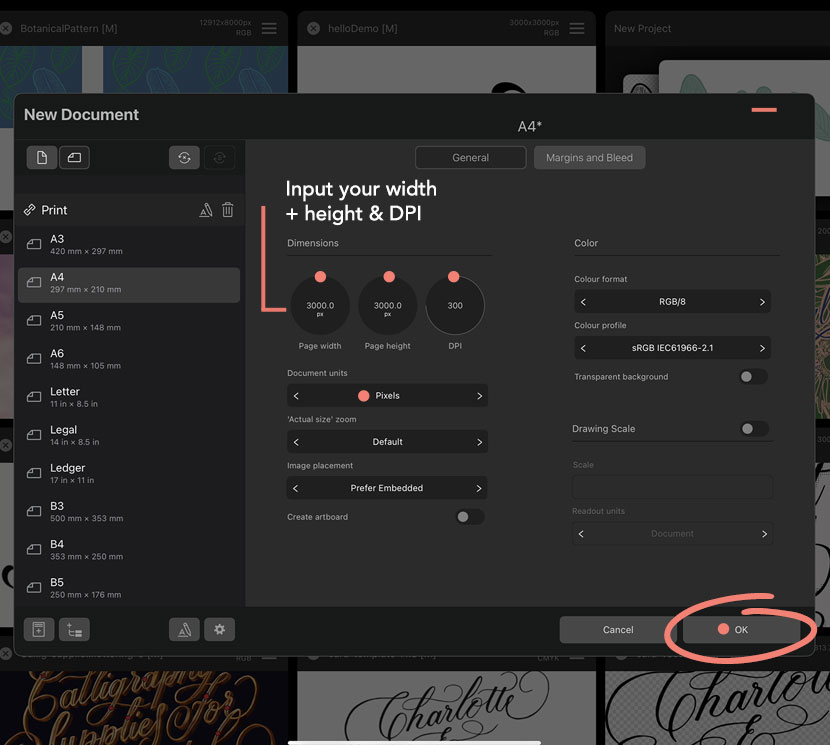
To start a new project:
From the Gallery Screen (shown previous), tap the “New” icon on the left menu and choose ‘New Document’.
Choose a preset from the left column or define custom dimensions (e.g., 3000×3000 pixels, RGB format).
Hit “OK” to begin designing.
Navigating the Interface
Personas
Switch between Vector Persona (sharp lines) and Pixel Persona (shading and texture) by tapping the top-left corner icon and choosing from the drop-down menu.
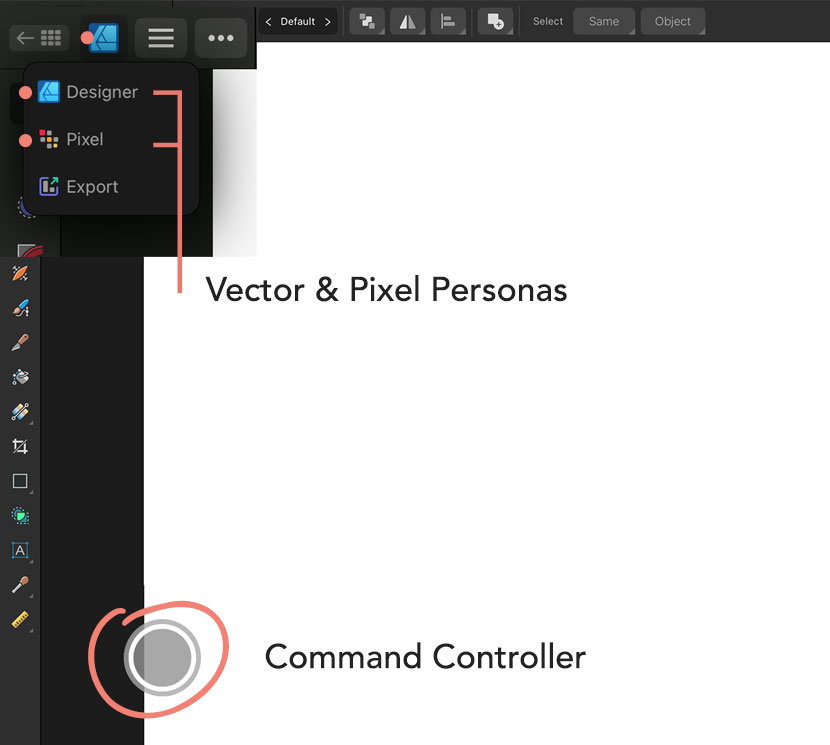
The Command Controller
The Command Controller is a handy on-screen tool that gives you extra functionality without needing a keyboard. Tap the circle and tap on the ‘up’ arrow to activate.
- Use it with the Move Tool to constrain movements to straight lines or rotations to precise 15-degree increments. This ensures pixel-perfect precision, which is especially useful for logo design and layouts.
- Experiment with other tools like the Pen Tool or Shape Tool to discover additional context-specific enhancements.
Tool Discovery
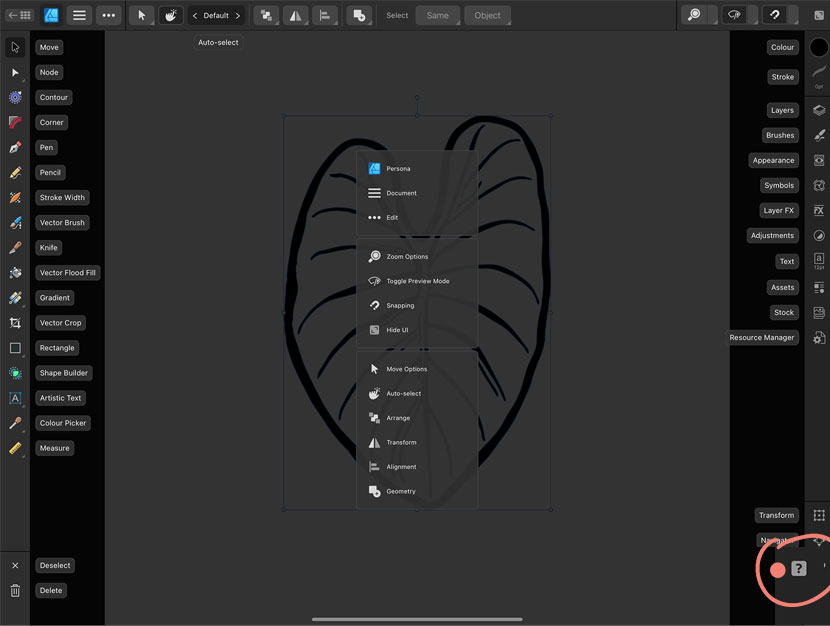
With just a tap, you can identify unfamiliar icons and quickly familiarize yourself with their functions. This is particularly helpful when transitioning from other apps like Procreate, where tool layouts may be different.
Make it a habit to explore the tools regularly, as many have hidden capabilities that can benifit your design process. Whether you’re searching for the Pen Tool, Vector Brush, or Text Tool, the “?” icon ensures you’ll never feel lost while navigating the interface.
Canvas Rotation (Hot tip🔥)
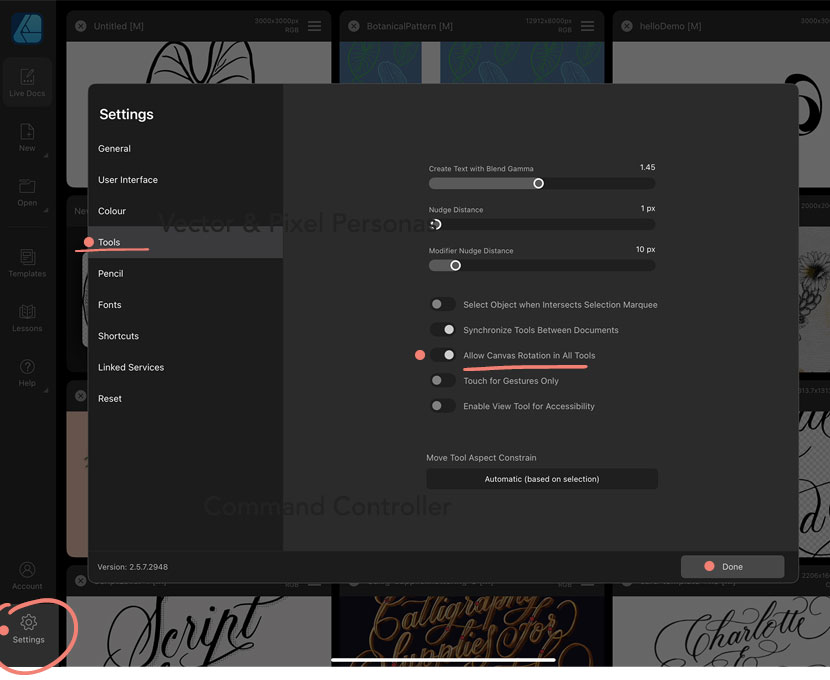
Most gestures are the same as Procreate. However, one key gesture not available by default is Canvas Rotation (usually a two-finger turn in a circular motion). To enable it:
- From the Gallery screen, navigate to Settings > Tools.
- Turn the toggle for “Allow Canvas Rotation in All Tools” to on.
Key Tools for Designers
Pen and Node Tools
These are vital for vector art:
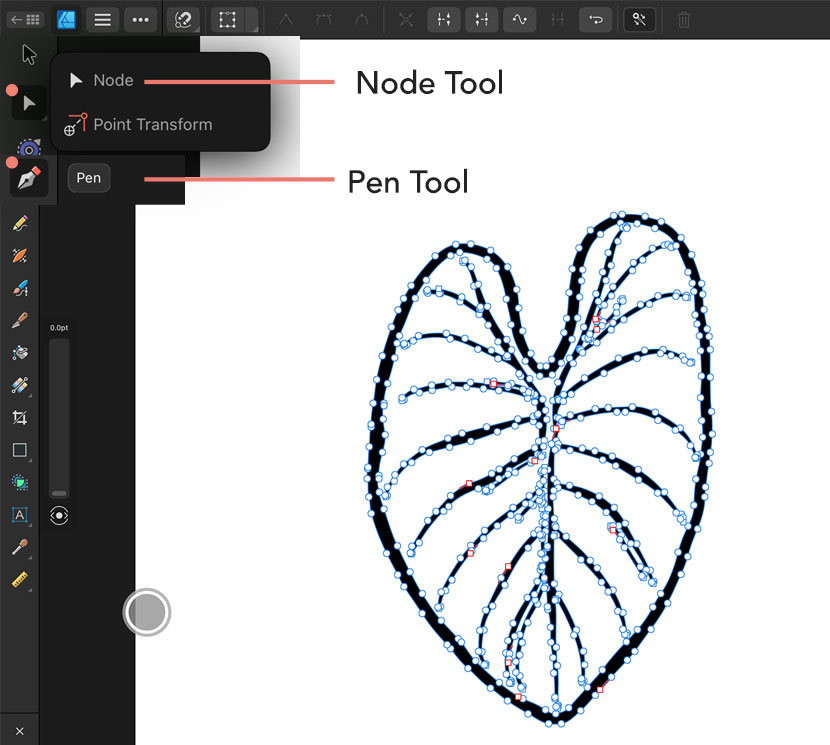
- Pen Tool: Perfect for creating custom vector shapes with precision. You can plot points and connect them with straight or curved paths, giving you complete control over the object. It’s ideal for drawing logos, intricate illustrations, or tracing over existing artwork to create editable vector shapes.
- Node Tool: Once you’ve drawn a shape, use the Node Tool to refine it. This tool allows you to select and manipulate individual nodes (points) along a path, adjusting their position, curve, and angle to achieve exactly the look you want. It’s especially useful for tweaking curves or smoothing out sharp angles.
Vector Brush Tool
Unlike raster brushes in Procreate, Affinity’s vector brushes create scalable, editable paths. This makes them ideal for projects that need to remain sharp at any size, like logos, typography, or illustrations.
- Customization: You can choose from a variety of built-in brush types or import custom brushes for unique effects. For instance, a smooth brush might be perfect for sleek lettering, while a textured brush could add depth to illustrations.
- Editable Strokes: After applying a vector brush stroke, use the Node Tool to adjust the shape and flow of the path, allowing for fine-tuning without starting over.
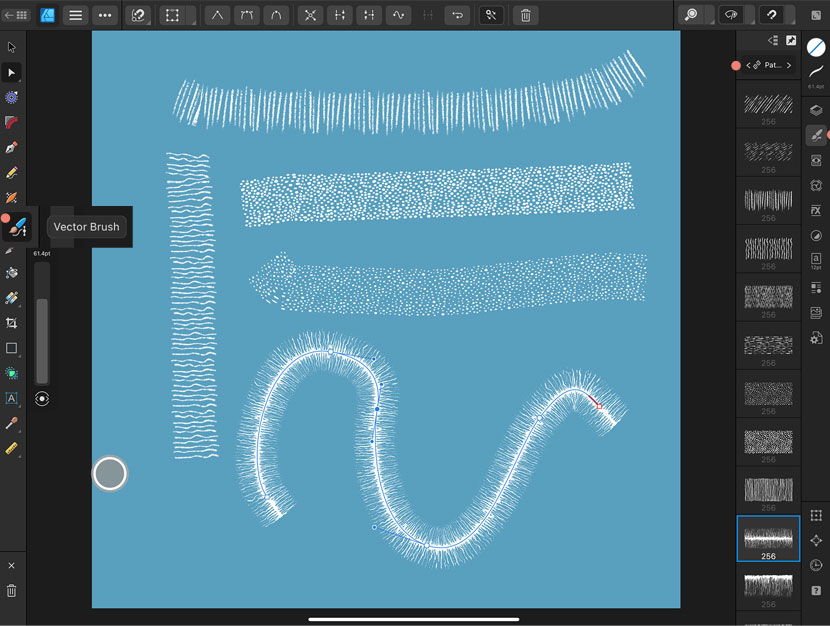
Experiment with different brushes to find ones that suit your style and project needs. The flexibility of vector brushes ensures that your work stays crisp and professional, no matter how much you scale or adjust it.
Text Features
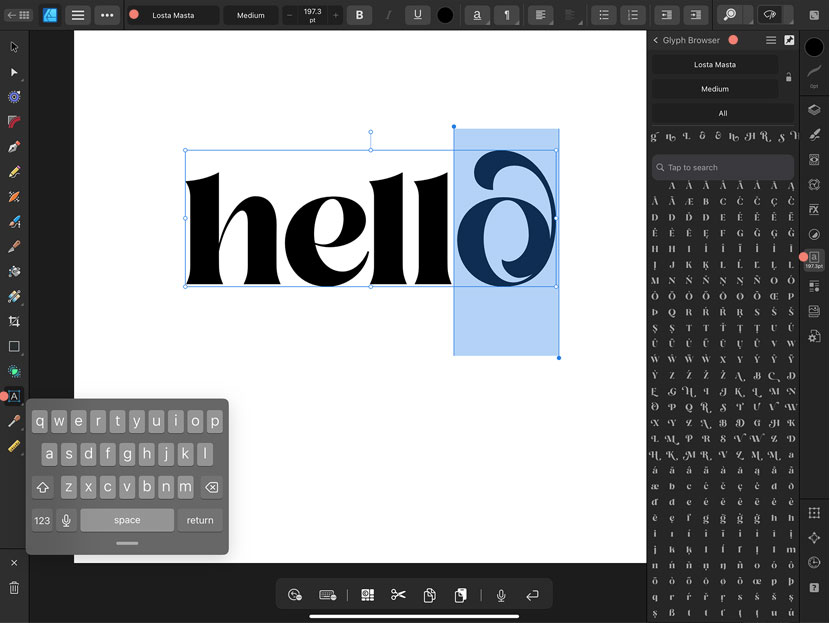
Affinity Designer excels at handling text, making it a favorite for projects like logos, invitations, and digital typography. One standout tool is its Glyph Browser, which gives you full access to alternate characters and special font features often found in ‘OpenType’ fonts.
- Easily change the font or style by tapping the font name in the top menu to see available options. Note: Not all fonts include alternate characters, you’ll need to choose a font with OpenType features to access alternate glyphs, ligatures, and swashes.
- Use the Glyph Browser to explore decorative alternates, ligatures, and swashes in OpenType fonts. You can find this by opening the Text properties menu from the right tool bar.
Filling the Gaps: Workarounds for Missing Features
Live Trace – Convert Pixel Art to Vector
Affinity Designer lacks Adobe Illustrator’s Live Trace feature, but here’s an easy and effective workaround:
- Use the free ‘Adobe Capture‘ app to import a .png file of your pixel art and convert it to a vector ‘Shape’.
- Save the file and then Export it as an .svg.
- Import it into Affinity Designer for further refinement.
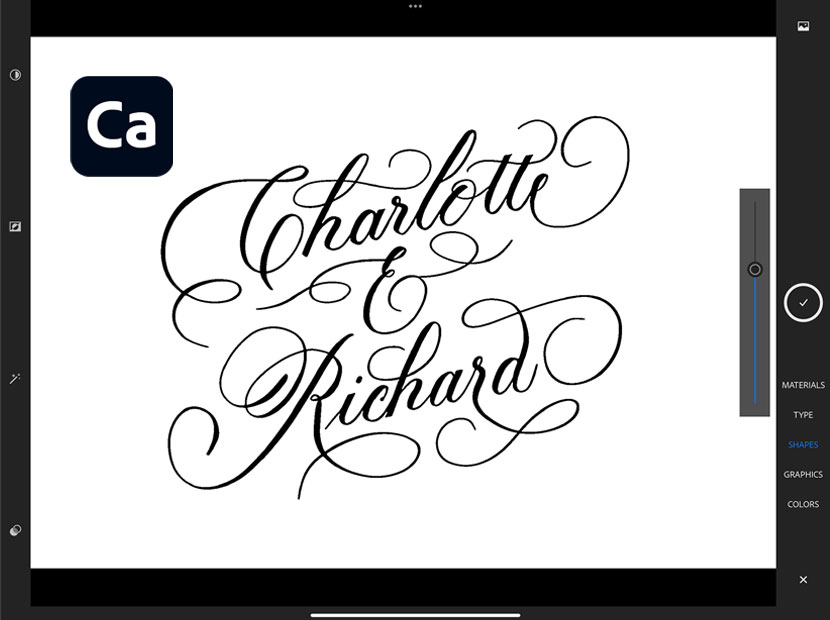
Adobe Capture is a free app. You don’t need a subcription to use it, but you will need a free Adobe account. Just sign up via the Adobe website, and then once you install the Capture app on your iPad, you’ll have the option to sign in.
Bonus Tip: Sculpt Mode
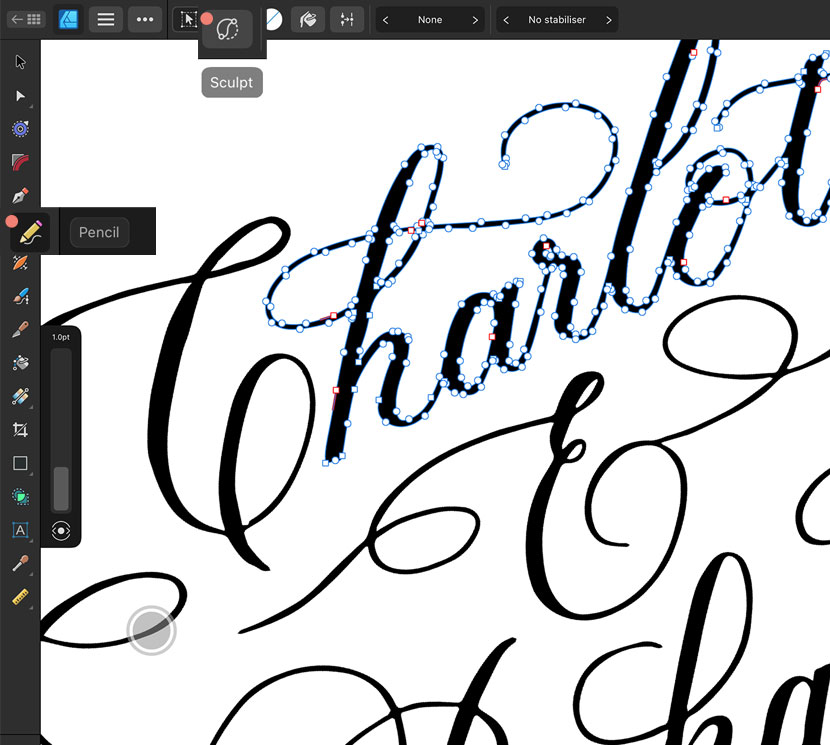
Something Affinity does exceptionally well is refining vectors. If you want to edit your vector lettering, select the Pencil Tool first (from the left menu), and then ensure the ‘Sculpt’ setting is enabled (top menu).
Now you can redraw over the stroke to refine the shape and remove any unwanted points or kinks. This allows you to intuitively adjust and reshape your design using the Apple Pencil, making edits feel as natural as drawing on paper. It’s a feature that truly takes advantage of the iPad’s touch interface and gives you incredible creative control!
Want to Dive Deeper into Converting Vectors?
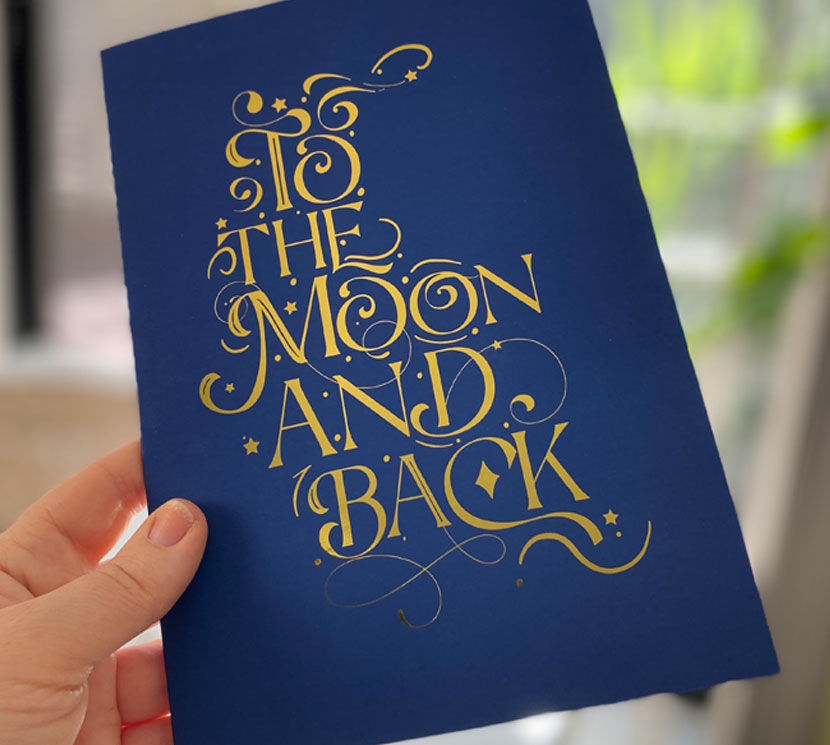
I teach the full process of taking your Procreate lettering into Affinity Designer in my Gold Foil Card course. You’ll learn how to use Procreate, Adobe Capture, and Affinity Designer together to create stunning designs. The final project is a beautiful gold foil greeting card! Click here to check it out.
Ready to Create?
Now that you know the basics, dive into Affinity Designer and experiment with its features. Remember to just experiment and try out the tools. You won’t break anything 😉
Don’t Forget Your Free Cheat Sheet!
Download the condensed guide linked above to keep all these tips handy while you create.
Found this guide helpful? Share it with fellow creatives, and stay tuned next time for 6 things Affinity Designer does better than Procreate. Happy designing!
